 Dialog at which Master Shipper Quantity Export Option is Selected
Structural Material Manager
Version 20.0
Copyright 1985 - 2024
E.J.E. Industries LLC
User’s Guide
11007 South Ocean Drive #6214
Jensen Beach, FL 34957
Phone: 724-228-8841
Toll-free: 1-800-321-3955
E-Mail: Sales@ejeindustries.com or Support@ejeindustries.com
Web Site: http://www.ejeindustries.com
TABLE OF CONTENTS
Chapter 1: General Information
Section 1-2: About this Manual
Section 1-6: Software Replacement Policy
Section 1-8: Program Upgrade Policy
Section 1-9: Hardware Requirements
Chapter 2: Overview of System Operation
Section 2-2: Summary of Menu Functions
Section 2-3: Entry of Structural Material Items
Section 2-7: Material Printouts and Adhesive Labels
Section 2-9: External Data Interface
Chapter 3: System Installation
Section 3-2: Instructional Notation
Section 3-3: Installing the System
Section 3-4: Running the System
Section 3-5: Installing the Security Key
Section 3-6: Installing the Key Drivers
Section 3-9: Downloading Patches from the Internet
Section 3-10: Removing the System from your Hard Drive
Section 3-11: 64-Bit Architecture
Chapter 4: Material Entry Basics
Section 4-2: The Sample Material List
Section 4-3: Opening and Closing Jobs
Section 4-4: The Material Entry Screen
Section 4-5: Field Structure of Item Entries
Section 4-6: Selecting a Material Type
Section 4-7: Entry of Steel Beams and Channels
Section 4-8: Steel Bar-Size Channels
Section 4-9: Stainless and Aluminum Beams and Channels
Section 4-10: Canadian WWF and WRF Sections
Section 4-11: Error Checking of Entries
Section 4-12: Instant Erasing of Item Fields (demonstrates Angle entry)
Section 4-13: Aborting an Item Entry
Section 4-15: Entry of Bar Grating
Section 4-16: Gauge Thicknesses (demonstrates Bar entry)
Section 4-17: Entry of Square and Rectangular Tubes
Section 4-18: Entry of Square and Rectangular HSS
Section 4-19: Entry of Round Tubes
Section 4-25: Entry of Miscellaneous Items
Section 4-26: Entry of Main Members
Section 4-27: Exiting from the Material Entry Screen
Section 4-28: Exiting from the System
Chapter 5: Material Entry Fine-points
Section 5-2: Inserting Items in the List
Section 5-5: Repeatedly Entering Items of the Same Type
Section 5-6: Cut, Copy and Paste Operations with the Clipboard
Section 5-7: Using the Copy to Clipboard Feature for Repetitive Lists
Section 5-8: Copying Items by Piece Mark to Clipboard
Section 5-9: Quickly Selecting Items in a Drop-Down List
Section 5-10: Quicker Methods of Entering Lengths
Section 5-11: Saving One Keystroke on Each Item
Section 5-12: Changing Default Material Grades
Section 5-13: Repeating the Previous Entry
Section 5-14: Generating Instant Fractions
Section 5-15: User-Defined Function Keys
Section 5-16: Decimal Lengths and Widths
Section 5-17: Support for Digital Plan Measures
Section 5-18: Conversion from Plates to Bars.
Section 5-19: Conversion from Bars to Plates.
Section 5-20: Standardizing Plate Descriptions.
Section 5-21: Standardizing Bar Descriptions.
Section 5-22: Changing the Material List’s Colors.
Section 5-23: Changing the Application’s Display Style.
Chapter 6: Material Printouts and Labels
Section 6-3: Availability of Printouts
Section 6-4: Printout Title-Blocks
Section 6-5: Unsorted Printout Format
Section 6-6: Printing the Unsorted List
Section 7-2: Sorting by Type and Size
Section 7-3: Sorting by Piece Mark
Section 7-4: Criteria for Combining Items
Section 7-6: Automatic Re-Sorting of Jobs
Section 7-7: Sorted Report Format
Section 7-8: Sorted Label Format
Section 7-9: Printing the Sorted Report or Labels
Section 7-10: Summarizing Each Sequence on the Sorted List
Section 8-2: Shipping List Format
Section 8-3: Detail Item Quantities
Section 8-5: Master Shipper Report Format
Section 8-6: Printing the Shipping List or Master Shipper
Section 8-7: Shipping Ticket Format
Section 8-9: Printing the Shipping Ticket
Section 8-10: Re-printing a Shipping Ticket
Section 8-11: Shipping the Balance of a Job
Section 8-14: Editing Jobs with Shipment Histories
Section 8-15: Copying Jobs with Shipment Histories
Section 8-16: Merging Jobs with Shipment Histories
Section 8-17: Alternate Shipping Mark Scheme
Section 8-18: Identical Piece Marks on Main Member Headings and Actual Items
Section 8-19: Minor Mark on the Main Assembly Item.
Chapter 9: The Estimating Module
Section 9-3: The Material Price Field
Section 9-4: The Shop and Field Hours Fields
Section 9-5: Changing the Estimating Feature Defaults
Section 9-6: Estimating Calculations
Section 9-8: Building a Master Price List
Section 9-9: Applying Prices from a Master Price List
Section 9-10: Applying Prices Manually
Section 9-11: Printing the Unsorted-Estimating or Sorted-Estimating List
Section 9-12: The Unit Pricing Feature
Section 9-13: Printing the Shipping-Estimating List
Section 9-14: Building a Buy List
Section 10-2: Summary of Length-Nesting Values
Section 10-3: Summary of Plate-Nesting Values
Section 10-4: Stock Size Values
Section 10-5: Preferred Stock Length
Section 10-6: Cutting Clearance Value
Section 10-7: Milling Clearance Value
Section 10-8: Squaring Clearance Value
Section 10-9: Safety Buffer Value
Section 10-10: Camber / Mid-Ordinate Rise
Section 10-11: Flipping Indicator
Section 10-12: Maximum Shop Capacity
Section 10-13: Preferred Shop Capacity
Section 10-14: Overview of Nesting Speed and Accuracy
Section 10-15: Running Other Programs While Nesting
Section 10-16: Reducing Nesting Time
Section 10-17: Levels of Nesting Intensity
Section 10-18: Quantity Restrictions within One Stock
Section 10-19: Non-Nestable Items
Section 10-20: Automatic Erasure of Nested Files
Section 10-21: Activating the Nesting Module
Section 10-22: Changing the Length-Nesting Values
Section 10-23: Changing the Length-Nesting Shop Limits
Section 10-24: Changing the Plate-Nesting Values
Section 10-25: Changing the Plate-Nesting Shop Limits
Section 10-26: Free-Form vs. Shear-Cut Patterns
Section 10-27: Saving the Nesting Value Changes
Section 10-28: Starting the Nest
Section 10-29: Length-Nesting Report Format
Section 10-30: Plate-Nesting Report Format
Section 10-31: Varieties of Nested Reports
Section 10-33: Printing the Nested Report or Labels
Chapter 11: Length-Nesting into Inventory
Section 11-2: Types of Nesting Available
Section 11-3: Using Unlimited Quantities of Standard Stocks
Section 11-4: The Inventory / Prices Folder
Section 11-5: Creating an In-House Inventory List
Section 11-6: Removal of Stocks from In-House Inventory
Section 11-7: Addition of Drops Back to In-House Inventory
Section 11-8: A Sample Nest into In-House Inventory
Section 11-9: Creating a Supplier Inventory List
Section 11-10: Nesting into Supplier Inventory
Section 11-11: Nesting into In-House and Supplier Inventories
Section 11-12: Nesting into In-House and Standard Stocks
Section 11-13: Nesting into Previous Nested Results
Section 12-2: Printing to the Screen
Section 12-3: Saving the Screen Preview of the Printout
Section 12-4: Printing Directly to a Text File
Section 12-6: Printout Font Selection
Section 12-7: Supported Paper Types
Section 12-8: Selecting a Paper Orientation
Section 12-9: Printing of Title-Blocks
Section 12-10: Multiple Copies
Section 12-12: Printing to Fax or PDF “Printers”
Section 12-13: Automatic Saving of Printer Driver Settings
Section 12-14: Printing Reports to Dot-Matrix Printers
Chapter 13: Manipulating Jobs and Folders
Section 13-2: Renaming Folders and Folders
Section 13-3: Deleting Folders and Jobs
Section 13-6: Merging Two Jobs into a Third
Section 13-7: Backing up Folders to Archive Files
Section 13-8: Restoring Folders from Archive Files
Section 13-9: Merging Jobs from Separate Computers
Section 13-10: Sharing Data on Office and Home Computers
Section 13-11: E-Mailing Folders
Section 13-12: Backing up and Restoring via External Backup Utilities
Section 14-2: Beam and Channel Weights
Section 14-3: Volume-Density Weight Approximations
Section 14-4: Internal Look-up Tables
Section 14-5: Square and Rectangular Tube and HSS Weights
Section 14-7: Miscellaneous Item Weights
Section 14-8: Stainless Steel and Aluminum Weights
Section 14-9: Material Weight Rounding Options
Section 14-10: Welding Electrode Weights
Chapter 15: Material Surface Areas
Section 15-2: Beam and Channel Surface Areas
Section 15-3: Bolt and Miscellaneous Item Surface Areas
Section 15-4: Geometric Approximations of Surface Areas
Section 15-5: Separate Reporting of Stainless and Aluminum Areas
Section 15-6: Rounding of Figures
Chapter 16: Inches and Metric Dimension Formats
Section 16-2: Selecting a Dimension Format
Section 16-3: The Inches Format
Section 16-4: The Metric Format
Section 16-5: Metric Calculations
Section 16-6: Nesting with Metric Lengths
Section 16-7: Merging Jobs with Different Dimension Formats
Section 17-2: Entering Job Sequences
Section 17-3: Extracting Job Sequences
Section 17-4: Shipping Considerations When Using Sequences
Section 17-5: Nesting Considerations When Using Sequences
Section 17-6: Using “Dummy” Sequences
Chapter 18: The External Data Interface
Section 18-2: Types of ASCII Text Files
Section 18-3: Exporting Structural Material Manager Material Lists to ASCII-Delimited Files
Section 18-4: Importing Files into Structural Material Manager
Section 18-5: Importing Files Supplied by Outside Companies
Section 18-6: Importing ASCII-Delimited Files into Excel
Section 18-7: Exporting ASCII-Delimited Files from Excel
Section 18-8: Importing CAD Bills of Material As Fixed-Field-Width Files
Section 18-9: P2 Programs and Soft Steel Conversion Utilities for AutoCAD and SSDCP
Section 18-10: Custom Interfaces
Chapter 19: Adhesive Item Labels
Section 19-2: Required Label Printer
Section 19-3: Thermal-Transfer Ribbons
Section 19-5: Colored Labels or Ribbons
Chapter 1: General Information
Section 1-1: Introduction. Welcome to the Structural Material Manager software system! We thank you for choosing our software, whether you have purchased the full system or are evaluating the demonstration version.
From the beginning, E.J.E. Industries LLC has been firmly rooted in the structural steel industry. Formed in 1980 by the late Edward J. Easterday, Jr., we were initially a structural detailing firm. In 1984, when Mr. Easterday's son, Edward F. Easterday, joined the company, we diversified our operations to include custom-designed computer hardware and software, both of which were aimed specifically at the steel industry. Our flagship product - the Structural Material Manager software system - was released in 1985. By 1989, Structural Material Manager had become E.J.E. Industries' sole focus and remains so to this day.
This release of the software package is Version 20.0, the 60th edition of the system since it was first released in 1985. At the time of this writing, Structural Material Manager is installed in over 2,000 locations with more than 5,500 licensed users among them!
Regardless of version number or operating system, all releases in this series have been designed with a common goal in mind: to help steel professionals - fabricators, suppliers, estimators and detailers - manage structural steel material lists. Typical uses include producing job estimates, bills of material, length-cutting and plate-cutting lists as well as shipping tickets. It saves time and increases accuracy by automatically doing the following work:
∙ Weighs all steel, stainless and aluminum items. This is one of the most basic system capabilities, yet in and of itself eliminates hours of tedious manual calculations.
∙ Provides a total material cost for the job.
∙ Tallies the shop and field labor hours.
∙ Supplies bolt-counts for each size bolt.
∙ Provides item counts for each material type.
∙ Reports a lineal total for each section size.
∙ Computes surface areas of items for cleaning and painting estimates, and even uses these figures to calculate the actual gallons of paint and primer needed.
∙ Prints shipping tickets and master shipping lists.
∙ Prints a Production-Control history as a complete shipping status report or just a shortage report. At a glance, you are able to tell which items shipped, when they shipped and how many still need to go!
∙ Sorts items into proper order by size (material type, section size, length and grade) or by piece mark (whether by major marks only or by all piece marks).
∙ Nests lineal items into available stock lengths for an optimal cut, whether from in-house inventory, your supplier's stock or the best combination of both.
∙ Nests plates into available stock plates, providing an actual pictorial layout that represents the optimal cutting pattern! Both flame-cut and shear-cut patterns are available.
∙ Prints adhesive item labels based on the Sorted List, Nested List, Master Shipper or Shipping Ticket.
If you're currently doing these operations by hand, we think you'll find this system to be an incredibly powerful tool.
Thanks again for choosing our software. We eagerly look forward to assisting you in getting the most out of it!
Section 1-2: About this Manual. This manual describes operation of Structural Material Manager from initial setup, through entry of structural material items, sorting and nesting of material, to final printing of the material. No, it does not read like a good novel, and yes, it is rather dry. Still, it is necessary reading for anyone who intends to use the system effectively. So please bear with us and read the manual before trying to use the system. In this way, maximum benefit will be obtained with a minimum of difficulty.
Much effort has gone into making this manual as concise and easy to read as possible. Accordingly, computer jargon has been kept to a bare minimum. The reader is assumed to have a background in structural steel matters, but is also assumed to be a novice where computers are concerned. All computer-related operations are thus explicitly described in step by step instructions. Computer-literate readers will probably feel their intelligence has been insulted, but the fact is that the vast majority of Structural Material Manager users relatively little computer expertise.
This User’s Guide is available both in an electronic format and as a printed book. Some users may wonder why we’ve gone to the expense of a printed manual in this electronic age. It is true that electronic documentation systems have some distinct advantages: they can be updated instantly in order to make corrections or add new material, they are searchable and cost much less than paper books. However, despite the strengths of electronic media, some Structural Material Manager users are still comfortable with paper. The predicted “paperless office” is closer than ever but has not quite yet arrived. We’ve thus decided to retain printed documentation for the foreseeable future while also providing the User's Guide in the system's Help menu in two electronic formats: PDF (Portable Document Format) and HTML (HyperText Markup Language). Any user with the free Adobe Acrobat Reader program installed on the PC can view the PDF version, and anyone with a Web browser such as Internet Explorer, Edge, Chrome or Firefox can view the HTML version. The bottom line: by providing both paper and electronic documentation, E.J.E. Industries is allowing the strengths of each medium to be exploited while giving users freedom to choose the information source they prefer.
Some users may not have access to the printed version of this book. They may have received the software on physical media (formerly CD, now a USB Flash drive) without any accompanying printed materials. Perhaps their system was downloaded from the Internet rather than being received via a physical shipment, or maybe the printed manual was simply misplaced. The PDF format mentioned above is "printer-friendly" in that it retains good formatting regardless of which printer you are using, so such users can easily print their own copy of the User's Guide, if they wish, from within Acrobat Reader.
This chapter presents some general information concerning Structural Material Manager. Although the subjects discussed here are those that are generally skipped over in favor of more interesting topics, they are nonetheless important. Please take a few minutes to read this material and we will begin discussing actual system capabilities in the next chapter.
Section 1-3: Software Support. Lifetime technical support is included with your purchase. This service is free; there are never any annual renewal fees! We are definitely a customer-oriented company that always strives to support you to the best of our ability.
All we ask before providing technical support is that you please consult this User’s Guide first. If, after reading this guide, you experience difficulty with any aspect of system operation, please feel free to contact us for assistance.
To speak with a representative, call us at 724-228-8841. Representatives are available 8:30 AM to 5:00 PM Eastern Time, Monday through Friday.
Support is also available by e-mail at Support@ejeindustries.com.
E.J.E. Industries of course also provides support via our Internet site. That Web site allows you to download software patches or upgrades in a matter of minutes.
Section 1-4: Disclaimer. Although this software has undergone thorough testing, no claims pertaining to program accuracy or suitability for any particular purpose are made. This system is thus sold strictly on an "AS-IS" basis. E.J.E. Industries LLC will not be held responsible for any consequential or incidental damages arising from the use, misuse or inability to use this software system. An understanding of this disclaimer is the sole basis upon which this program is provided. If you find these terms unacceptable, please return the package immediately for a full refund.
Section 1-5: Warranty. The original purchaser may return the system for a full refund within thirty (30) days if not completely satisfied.
The media on which the Structural Material Manager software is distributed - formerly a CD but now a USB Flash drive - is warranted against defects for a period of one year from the date your package is received.
Structural Material Manager’s security keys (not to be confused with USB Flash drives on which the software is now distributed rather than CD) are backed by an unconditional lifetime warranty. In the rare event that one of our software keys becomes defective due to internal failure, a replacement is supplied at no charge. If failure is due to lightning strikes, flooding, accidental physical breakage, etc., there is only a $50.00 nominal charge for the replacement.
If a security key fails within ninety (90) days from the date your package is received, E.J.E. Industries will cover the shipping costs both to and from your location. After that time, you will be responsible for shipping charges in both directions.
Section 1-6: Software Replacement Policy. If, after the limited warranty has expired, the physical media on which the Structural Material Manager software was distributed (formerly CD but now a USB Flash drive) becomes damaged, replacement copies are available at a charge of $15.00 plus shipping.
It is important to note that replacement software media is available for a period of up to one year from the time a certain software version has been discontinued. After that, you may have to upgrade to the most recent version in order to purchase a replacement. As a past example, Version 18.3 was discontinued in September of 2023. Replacement Version 18.3 USB Flash drives were thus guaranteed to be available until at least September of 2024 after which a Version 18.3 customer would have to invest in a low-cost upgrade to the current system if they needed a replacement USB Flash drive.
As mentioned previously, USB Flash drives on which Structural Material Manager is now distributed instead of CDs should not be confused with the system’s software security keys.
Section 1-7: Program Errors. Please be aware that during the development of a software system as broad in scope as Structural Material Manager, there is always the possibility of a few errors going undetected. The system has undergone rigorous in-house testing, augmented with additional testing by an independent group of structural steel fabricators, in an effort to locate and correct as many errors as possible before release. However, if any errors are found during program operation or in the instructions, they may be reported to E.J.E. Industries and will be promptly corrected.
Section 1-8: Program Upgrade Policy. As corrections and/or improvements are made to the system, all original purchasers will be notified that a program upgrade is available. Purchasers may elect to receive the upgrade by submitting payment in the amount specified in the upgrade notice. Your investment is thus protected by having access to free or inexpensive upgrades as new program versions are released.
There are two different types of upgrades: maintenance releases and improvements to the existing system.
Maintenance releases are included with your purchase as part of our free technical support policy; they are provided at no charge via E.J.E. Industries’ Internet Web Site. These patches simply correct minor errors in the system and usually do not add any new features. See Section 3-9: Downloading Patches from the Internet for more information.
When improvements are made to the existing system, or options are added, upgrades may be purchased and are guaranteed to never exceed $149.95 per registered user.
Section 1-9: Hardware Requirements. Structural Material Manager Version 20.0 is a 64-bit Microsoft Windows application. Since the system automatically falls back to a 32-bit version of the program if 64-bit Windows is not running, it is compatible with any Windows 11, 10, 8/8.1, 7, Vista or XP operating system regardless of whether a 32- or 64-bit Windows version is installed. Of course the corresponding “Server” versions of those operating systems - Windows Server 2022, 2019, 2016, 2012, 2008 and 2003 - are also supported. Despite Structural Material Manager still supporting such a wide range of operating systems, it is hoped that only ones new enough to have not yet reached what Microsoft considers “end of life” will actually be used.
Processor speed is critical only for Structural Material Manager's material nesting functions. Users doing primarily data entry, estimates, shipping reports, etc. will not notice much of a difference when running Structural Material Manager on a slow CPU versus a fast one, but those making heavy use of the Length-Nesting and/or Plate-Nesting Modules will see performance gains from higher CPU clock speeds. While no specific recommendations are made regarding actual clock speed, suffice it to say that users accessing the Length-Nesting and/or Plate-Nesting Modules should have machines with the fastest CPU speeds that fit the budget.
At least dual-core CPU should be used, as Structural Material Manager’s Length-Nesting and Plate-Nesting Modules are designed to be run concurrently if enough cores are available. The system will still run properly if multiple cores are not available since it simply falls back to single-core mode if necessary.
When considering the issue of more or less CPU cores versus higher or lower CPU clock speeds, keep in mind that Structural Material Manager's material nesting functions benefit more from high clock speeds than numerous cores. Once a CPU has perhaps (4) cores, it would be preferable to concentrate more on a higher Gigahertz (GHz) rating than more cores so as to speed the nesting process.
Structural Material Manager's Material Entry Screen is designed for a screen resolution of at least 1024 x 720. At this minimum resolution of 1024 x 720, a horizontal scrollbar appears on the Material Entry Screen, and it must be slid with the mouse to reveal some of the item fields. Increasing the resolution - say to 1280 x 1024 - will bring more fields into view, and less scrollbar use is thus required. At extremely high resolutions, the scrollbar does not appear at all, and every item field is in view at all times. Note that Structural Material Manager can actually be used with resolutions less than the suggested minimum of 1024 x 720 (perhaps 800 x 600), but scrollbar use will be excessive.
Memory (RAM) requirements are not very important, as any machine capable of running modern versions of Windows will have adequate memory for this application. As a rule of thumb, assume that Windows 11, 10, 8/8.1 and 7 machines should have at least 4 GB of RAM. Windows Vista machines should have at least 3 GB and Windows XP machines at least 2 GB, but of course those operating systems (although still supported by Structural Material Manager) are mostly extinct.
Structural Material Manager supports two different types of printers. The first type is the printer that is used for generating the system’s normal reports. The second one is the printer used for printing adhesive labels that serve as item-identification tags.
Let’s first discuss the report printer. Any inkjet or laser printer using cut-sheet paper can be utilized as the report printer. Dot-matrix printers have, of course, been displaced by inkjet and laser printers in most cases but can still be utilized for printing Structural Material Manager’s reports. Since Structural Material Manager prints via Windows print drivers, it is not at all important as to whether your printer connects through the Universal Serial Bus (USB) port, via a network, or even through a now-rare parallel printer port.
Whereas the report printer can be a laser, inkjet or dot-matrix model, the adhesive label printer must be a thermal-transfer unit, as laser and inkjet printers are simply unacceptable for the task. Of course, if you do not wish to print item-identification tags, there is no need to have a thermal-transfer printer; users who do wish to print such labels should refer to Chapter 19: Adhesive Item Labels for more printer information.
Chapter 2: Overview of System Operation
Section 2-1: Introduction. This chapter provides a broad overview of Structural Material Manager's operation. Its purpose is to familiarize first-time users with the basics so that specific details may later be better understood. The topics discussed here are only briefly summarized; these and many others are covered in greater depth in their respective sections of this manual.
Section 2-2: Summary of Menu Functions. The main functions of Structural Material Manager are conveniently controlled from pull-down menus. To help familiarize you with Structural Material Manager’s capabilities, this section lists each menu heading as well as the items listed beneath it. Here are the most important menu options:
File:
Open Job
Close Current Job
Copy Job
Merge Job
Back up Folder to Archive
Restore Folder from Archive
Material List:
Print Unsorted List
Convert TS to HSS
Convert HSS to TSS
Convert Plates to Bars
Convert Bars to Plates
Sorting:
Sort Material
Print Sorted List (either as a report or a set of adhesive labels)
Nesting:
Nest Material
Build Buy List from Nested Summary
Print Nested List (either as a report or a set of adhesive labels)
Estimating:
Set Up Price Units
Apply Prices
Build Buy List from Nested Summary
Print Report (Unsorted-Estimating, Sorted-Estimating, Shipping-Estimating or Master Shipper-Estimating)
Production-Control:
Print Report (Shipping List, Master Shipper, Shipping Ticket, Status Report or Shortage Report; some of these can be sent to labels)
Export Master Shipper to ASCII-Delimited
Sequencing:
Extract Sequences
Data Exchange:
Import External Data
Export Entire Job to ASCII-Delimited
Export Master Shipper to ASCII-Delimited
Section 2-3: Entry of Structural Material Items. Structural material items are entered into the system via the computer's keyboard. Items may be entered for the following material types: W, S, M, HP, WT, ST, MT, C and MC Shapes, Plates, Checkered Plates, Bar Grating, Bars, Angles, Square and Rectangular Tubes, Square and Rectangular HSS, Round HSS, Round Tubes, Rods, Rebar, Pipes, Bolts and Miscellaneous Items.
Items are entered one "field" at a time. A certain type of Beam known as a W Shape, for instance, is composed of the following fields: Piece Mark, Quantity, Depth, Weight, Length, Grade, Mill Mark, Camber, Remarks, Sequence, Camber, Material Price, Shop Hours, Field Hours, Equipment Hours and Crane Hours. Of these fields, only the Quantity, Depth, Weight and Length must be entered; the other fields are optional.
Now consider a Plate. It has these fields: Piece Mark, Quantity, Thickness, Width, Length, Grade, Mill Mark, Camber, Remarks, Sequence, Camber / Mid-Ordinate Rise, Material Price, Shop Hours, Field Hours, Equipment Hours and Crane Hours. The only mandatory Plate fields are Quantity, Thickness, Width and Length; all others may be skipped.
Note that an optional Camber field was mentioned in both the W Shape and Plate examples. That field which describes the curvature of an item exists for Beams and Channels as well as Plates and Checkered Plates, but it is more appropriately referred to as a Mid-Ordinate Rise in the context of plate-type material.
Dimensions are entered in a very natural scheme. For example, a length of 5'-6 13/16 is entered exactly as such, without need for any cumbersome entry codes or decimal conversions. If your drawings express 5'-6 13/16 as 66 13/16", this can be entered directly when using the inches mode. Metric dimensions are also supported, so 5'-6 13/16 could also be entered as approximately 1697 MM.
An editing feature allows items to be modified at any time during entry. This allows a part of an item, such as the Piece Mark, to be easily modified without having to retype the entire line. Adding items to a list, editing them and deleting them can all be done conveniently from the same screen.
Section 2-4: Material Sorting. The sorting process arranges the material list in order such that larger items appear before smaller ones. The specific criteria used to determine which items are larger than others depend upon the specific material type being sorted.
Any identical items found in the material list are combined into one item, and their quantities are totaled. For example, if two identical entries have quantities of 10 and 15, they will be combined into one entry with a quantity of 25.
Structural Material Manager keeps jobs in sorted order by size by automatically sorting them “behind the scenes.” This automatic sorting process does not affect the order of the original unsorted material list; instead, it makes a properly ordered copy of it. This is useful since it allows later changes to be made to the unsorted list with the items in their original sequence. If, however, the unsorted items are required to be actually sorted, as is the case when the system is being used for inventory, the user may instruct the sorting module to physically sort the material list.
It should be noted that both sorting methods described above result in the same sorted printout; the difference between the methods is not noticed until the material list is viewed on the screen for further entry or editing of items. If only the normal, automatic sorting method is used, the items will appear on the screen in the order they were entered, but the second sorting method will cause the items to be listed on the screen in sorted order.
In addition to the sorting method described above which bases sorting decisions on material type and size, Structural Material Manager also offers two types of sort based on piece mark. One such sort rearranges the material list based on all piece marks whether they represent major shipping marks or minor detail marks. The other variety is a more complex sort that takes into account whether a mark is major or minor mark; it sorts the list based on major marks only and “carries” the detail marks along with their respective assemblies in the sorted listing.
Section 2-5: Material Nesting. One of the systems more interesting functions is that of nesting (some people refer to this as "multing"). This involves running large numbers of combinations on the material list to determine the most efficient way to cut items from available stocks. By determining the most efficient cutting pattern automatically, the incredible manual labor usually required to do this is eliminated, and costs associated with wasted material are drastically reduced.
The nesting feature is actually comprised of two different modules: the Length-Nesting Module and the Plate-Nesting Module. The Length-Nesting Module handles one-dimensional nesting by processing all lineal items, namely, all Beams, Channels, Bars, Angles, Tubes, HSS, Rods, Rebar and Pipes. The Plate-Nesting module operates in a two-dimensional fashion and is thus able to process Plates, Checkered Plates and Bar Grating.
Structural Material Manager's Plate-Nesting Module can provide either of two different nesting patterns: a free-form pattern or a shear-cut pattern. A free-form pattern is ideal when the equipment cutting the stock sheet uses a saw blade, water jet, flame, laser, plasma, etc. A different pattern in no reentrant cuts occur (that is, all cuts line up through the entire length of the plate and/or across the entire width of the plate) is produced when a shear will be used, as once a shear starts, it must pass all the way through the stock plate on each cut. Thickness ranges can be specified by the user, and those ranges determine whether Structural Material Manager will produce a free-form or shear-compatible nesting pattern.
Available stock lengths and stock sheet sizes may be specified by user. Since the user has control over these parameters, as opposed to having rigid pre-set values, the resulting cutting pattern is guaranteed to always utilize stock sizes that are known to actually be available at the time the nest is performed.
In addition to stock size information, the user is also able to specify the cut width (or "kerf") to leave between adjacent items cut from a stock. This allows the system to account for the width of a saw blade, flame cut, etc. and adjust the cutting pattern accordingly. For example, a 20'-0 stock will not be permitted to be cut in half to yield two 10'-0 items if the cut width between the items is larger than 0", such as 1/8".
A summary of stock sizes required for the job is presented on the nested report. Structural Material Manager has a feature that can transfer that nested stock summary information to a separate job file called a “Buy List” that represents the gross list of stock material required for the job.
Please note that nesting has no effect on the order of the unsorted material list. A nested printout is available, but you are still free to edit the material list on-screen in its original unsorted order.
Section 2-6: Inventory Tie-In. The Length-Nesting Module is able to access your in-house inventory, as well as your supplier's stock list, as a source of stock lengths. Please note that this feature applies only to lineal items, as the Plate-Nesting Module always accesses supplier stock rather than in-house inventory.
In order to give maximum flexibility based on your specific inventory needs, the Length-Nesting Module can perform the following five different types of nests:
1. Nest material using up to nine different standard stock lengths, assuming unlimited quantities of each length are available. A different set of stock lengths can be specified for each material type, so you can instruct the system that 16'-0 and 21'-0 stocks are available for Pipes while 20'-0, 40'-0, 55'-0 and 60'-0 sections (all hypothetical, of course) are available for the WT sections. Mode #1 of nesting is ideal for the fabricator that does not wish to nest into any in-house inventory and does not know (or care) what specific stock the supplier has.
2. Nest into your in-house inventory only. This mode is generally used by steel warehouses; it accounts for the exact lengths and quantities you have in stock for each material type and description and considers that stock to be the only available source for stock lengths. Fabricators wishing to nest only into in-house inventory will also find this mode of nesting useful.
3. Use only your supplier's stock. This type of nest is intended for the fabricator that knows what quantities and lengths the supplier has in stock, but does not want to use any in-house stock.
4. Utilize your in-house inventory as best as possible, and then resort to using your supplier's stock. This mode is ideal for the fabricator who has some sort of in-house inventory, whether it is a large stock or just a few remnants, and wants to use that stock before nesting into the supplier's specific stock. This mode can be thought of as a mix of mode #2 and mode #3.
5. Nest into in-house inventory until no further in-house stocks can be used, then nest the remaining list items into unlimited quantities of standard stock lengths. This mode is basically mode #4 with the exception that the supplier's exact stock is unknown; it can also be considered a combination of mode #1 and mode #2.
When nesting into any in-house inventory (modes #2, #4 and #5 above), the system can automatically remove from inventory any stocks that were utilized and add back "drops" (the remnants) that exceed a certain length that you specify. This allows it to maintain a "perpetual" inventory list without need for manually deleting utilized stocks and entering resulting remnants.
One important time-saving aspect of having the in-house inventory stored in Structural Material Manager is that total dollar value figures can be quickly generated whenever they are needed for accounting purposes. Most companies need such inventory tallies yearly, quarterly or even monthly. These totals can now be generated in minutes rather than the hours that manual methods sometimes require.
Section 2-7: Material Printouts and Adhesive Labels. The following types of printouts of the material list are available:
1. Unsorted Report. This report lists the items in the exact order they were entered into the system.
2. Unsorted-Estimating List. This printout is an expanded form of the Unsorted List; it tallies the job’s total material prices, shop hours, field hours, equipment hours and crane hours. The summary can provide such figures as total paint and primer requirements, welding electrode costs, etc.
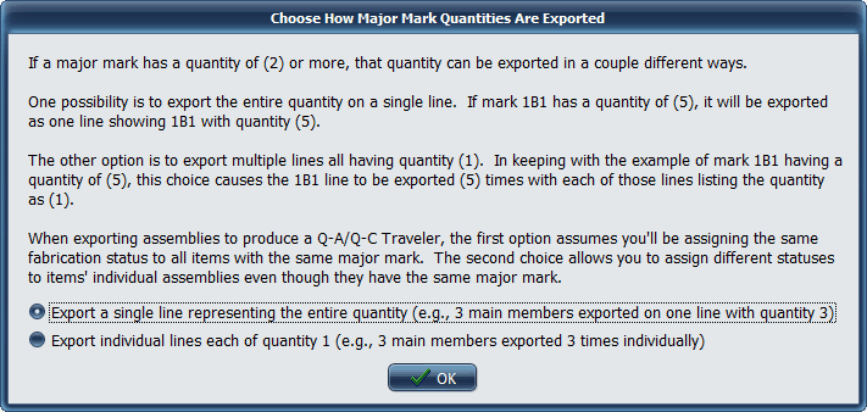
3. Shipping List. The piece mark sequence of the unsorted material list is used to group fabricated assemblies together on this printout. Because the system can interpret which marks are shipping marks on main members and which marks belong to detail items, the report provides a total weight for each separate assembly. This report can be produced in a "Master Shipper" format in which only main members with shipping marks are shown (detail items are omitted), but total assembly weights still include the weight of all items. The Master Shipper can not only be printed, but it can also be exported to an ASCII-delimited file that Excel and other applications can import.
4. Shipping Ticket. This report serves as a Loading List and is a specialized form of the Shipping List. Whereas the Shipping List shows all items for a particular job, the Shipping Ticket only lists items and quantities that were selected for shipping on a particular date. The system even keeps a running tally of the current truck weight as you enter piece marks and quantities that are to be shipped!
5. Production-Control Status report. As Shipping Tickets are printed, the Production-Control Module keeps track of quantities and dates for each item shipped. This information is then available on the Status Report, allowing the user to know at a glance when a certain item was shipped and what percentage of the job has already been shipped. An abbreviated form of this report, known as a Shortage Report, only lists items and quantities that have not yet shipped.
6. Shipping-Estimating List. This report provides all information presented on the Shipping List, but also provides a total material cost for each fabricated member.
7. Sorted Report. It lists the items sorted from large to small within material types and groups similar items together.
8. Sorted-Estimating List. This printout is essentially the same as the Unsorted Estimating List, except the items are presented in sorted order.
9. Nested List. This report, essentially a "Cut List", shows items that are to be cut from a single stock for optimum efficiency. For lineal items processed by the Length-Nesting Module, a listing of the items is provided. Likewise, two-dimensional items processed by the Plate-Nesting Module are presented in a list, but an actual pictorial layout is also provided to augment this listing. A summary of all stocks required to cut the list is provided; it indicates not only the stock used and the resulting drop, but also whether the stock came from in-house inventory or your supplier's inventory.
The printouts provide such per-line values as single item weight, line weight. Per-material-type and job-total figures are provided for weight, price, shop hours, job field hours, equipment hours, crane hours, etc. Surface areas, along with total paint and primer requirements, are also supplied on most of the reports. The specific values that appear on each report are discussed in each report's specific section of this manual.
This section has provided an overview of Structural Material Manager’s printouts. Some of these (the Sorted List, Nested List, Master Shipper and Shipping Ticket) can also be printed as sets of adhesive labels rather than normal reports. The labels contain such information as piece mark, length, weight, project name and contract number; they are applied directly to the steel and resist weathering. See Chapter 19: Adhesive Item Labels for more information.
Section 2-8: Sequencing. Structural Material Manager supports sequences which allow you to break a large job into manageable sections. Some fabricators refer to sequences as “zones,” “divisions,” or “phases.” Regardless of the terminology that you prefer, the sequencing feature permits you to enter a large project in its entirety and later extract only the sequences you wish to fabricate, ship, etc. at a certain time.
Section 2-9: External Data Interface. The External Data Interface is a very useful tool for companies that already have their material lists stored in another software system. This interface allows such users to import those jobs into Structural Material Manager and eliminates any need for retyping the list.
One of the most common uses for the External Data Interface is to import jobs from CAD systems. Below is an alphabetical list of the systems that support Structural Material Manager (where the company name is different from the name of the CAD package it produces, both names are provided):
AutoCAD (i.e., generalized AutoCAD without any third-party, add-on programs)
Advance Steel by Autodesk, 844-262-9170, http://www.autodesk.com/products/advance-steel
AutoSD, 601-679-5800, http://www.autosd.com
CadVantage, 704-344-9644, http://www.steeldetails.com
CDS, 843-552-7055, http://www.asteel.com
DetailCad, 205-324-5741, http://www.detailcad.com
SSDCP, 704-370-0840, http://www.ssdcp.com
SDS/2 by Design Data, 1-800-443-0782, http://www.sds2.com
Soft Steel by Soft Steel, Inc., 909-863-9191, http://www.softsteelinc.com/SoftSteel.html
SteelLogic by Computer Detailing Corporation, 215-355-6003, http://www.steellogic.com
Tekla Structures by Tekla, Inc., 770-424-8666, http://www.tekla.com
No custom programming is needed to import items from these CAD packages. Custom programming can be used, however, if you’d like to import bills of material from other CAD systems.
In addition to importing data supplied by CAD systems, the External Data Interface can also be used to both import and export ASCII-delimited files. This allows Structural Material Manager to communicate with spreadsheet, database and other types of programs.
No matter what software system your bills of material may be stored in, the bottom line is this: don’t retype items! Let the External Data Interface eliminate such wasteful redundancy.
Chapter 3: System Installation
Section 3-1: Introduction. Now that the required preliminary information was covered in Chapter 1, and an overview of system operation has been presented in Chapter 2, this chapter describes the steps necessary to set up the system for actual operation.
If you are evaluating a demo rather than installing the full system, you probably only need to read up though Section 3-4 of this chapter. Proceed directly to Chapter 4 at that time, as sections beyond 3-4 are not critical to getting the demo up and running.
Section 3-2: Instructional Notation. The instructions in this manual follow some basic notations. The first of these involves underlining; any underlined letters or words are what you are to type at the keyboard. All underlined information must be typed exactly as it appears in the instructions.
One exception to the above note concerning underlining occurs if you are viewing this User’s Guide in a PDF format using Adobe Acrobat Reader. In that particular viewer, “hyperlinks” to e-mail addresses and Web site addresses appear in blue with a black underlined Links to pages in the Table of Contents are also blue with black underlines. Let the blue color be your clue that such underlined text represents a hyperlink rather than something that you are type. Neither readers of the printed book nor those viewing it in a Web browser via HTML need to be concerned with this issue.
Another notation used is [Enter]. This is simply a prompt for you to hit the Enter key. Some computers may use a Return key instead of Enter; they are identical in their function.
As an example of the two basic notations described above, suppose you are instructed to type A:Setup [Enter]. This is accomplished by typing A:Setup and hitting the Enter key.
The Tab key is commonly used to move between fields in a Windows programs. The notation [Tab] means that you should hit the Tab key. So, if you are instructed to type a Piece Mark of 1B1 [Tab], you would type 1B1 before hitting Tab.
Shift-Tab moves between fields just like Tab except that Shift-Tab causes a move back to the previous field instead of forward to the next. So, notation of 12 [Shift-Tab] means type 12 before holding the Shift key and hitting Tab to move one field backwards.
Some common Windows terminology will be used freely. The terms “click” and “left-click” both mean to click the left mouse button once while the mouse pointer is positioned on the desired object. “Double-click” means to rapidly click the left mouse button twice without moving the mouse between clicks. Windows also makes extensive use of a “right-click” command which requires you to click the right mouse button once.
Certain areas of Structural Material Manager allow multiple selections. This is a Windows feature in which multiple items in a list can be selected by holding either the Shift or Ctrl key down while the mouse is dragged or the keyboard arrow keys are pressed. The Shift key is utilized when the selected items are adjacent in the list, that is, for a continuous selection. Ctrl is to be held down instead of Shift to select multiple items when those items are not adjacent in a list (this is a non-contiguous selection). So, in places in which the Structural Material Manager documentation refers to making multiple selections, it is referring to selections made while the Shift or Ctrl is pressed. See http://www.ejeindustries.com/video/multipleselections for a video that demonstrates the concept of multiple selections under Windows.
A vertical bar will be used to separate items when you are asked to click on several items. For example, if presented with the command Start | Structural Material Manager | Uninstall, you would first left-click the Start button, then the Structural Material Manager folder and finally the Uninstall item.
Of course, most Windows users are already familiar with the terms and notations described above, but they are reviewed here for the sake of completeness.
Section 3-3: Installing the System. It is now time to actually install the software on your computer.
Most users, and probably all those evaluating a demo, will be installing on a single-user computer. They may follow this section's instructions as-is. If you are installing on a network, please review the notes in Section 3-7: Network Setup before proceeding.
The same instructions will be used whether you are installing the system for the first time, are upgrading from an earlier version of the system, or are loading a maintenance release. The system will automatically detect which version of the Structural Material Manager system, if any, is installed. It then acts accordingly to perform either an upgrade or a complete installation.
Users that have owned the software for a number of years and now wish to load Version 20.0 on a new computer might have a collection of old Structural Material Manager installation media (formerly CDs but now USB Flash drives). You only need to load your most recent USB Flash drive; there is no need to load all previous versions in order of release date. So, don’t bother loading say a Version 17.1 system before 20.0. Likewise, there is no need to load 20.0a before 20.0b.
Installation steps will now be presented. You may already have Structural Material Manager's Setup program running, perhaps because you accessed these directions from within the Setup program rather than in printed form. If that is the case, then you can skip Steps A through E which deal with invoking the Setup program, and proceed directly to Step F. Only if the Setup program is not already running should you begin with Step A.
Here are the necessary procedures:
A) Structural Material Manager is supplied on a single CD or USB Flash drive. Insert the CD in your PC’s CD-ROM drive at this time, or plug the USB Flash drive into an available port. If your system was provided on a USB Flash drive rather than a CD, please be sure to not confuse that drive with the software’s security key.
B) On many PC’s, the “auto-run” feature will cause Structural Material Manager’s Setup utility to start soon after you insert the CD or USB Flash drive. If this occurs on your PC, simply skip Step C, and proceed to Step D at this time.
C) Only if the Structural Material Manager Setup utility did not automatically appear will you have to invoke it manually. If this proves necessary, right-click (not left-click) the Start button at the Windows desktop to display a pop-up menu. Left-click on the Explore or File Explorer option that appears in that menu. Once File Explorer (the newer name for Windows Explorer) opens, click the My Computer icon and then click the icon that corresponds to the CD-ROM drive in which you placed the Structural Material Manager CD or the drive letter Windows assigned to the USB Flash drive you inserted. Either way, the contents of the installation media should be displayed; double-click the SetupSMM item to run it.
Note that the directions indicate that you should double-click the SetupSMM item to run it. I.T. professionals are often in the habit of right-clicking such an application and choosing the “Run as Administrator” option. Resist the temptation to invoke the setup program in that way. Beginning with Windows Vista, the Windows operating system sets up a virtual log-in session behind the scenes when “Run as Administrator” is used, and that session unfortunately has no access to mapped network drives. Windows 11, 10, 8/8.1 and 7 all continue with that behavior introduced under Windows Vista. The bottom line: simply run SetupSMM in the usual way.
D) Some versions of Windows may display the “Open File - Security Warning” dialog. It reports that "The publisher could not be verified. Are you sure you want to run this software?" If this appears, it is important that you click Run rather than Cancel.
E) Depending on which version of Windows you are running, the "User Account Control" dialog sometimes appears. It may state that "An unidentified program wants access to your computer." If this dialog appears, you should click "Allow. I trust this program. I know where it’s from or I've used it before."
F) Structural Material Manager’s Setup utility is actually used for installing not only the application itself, but also “helper applications.” One such application is Adobe Acrobat Reader. If the PC on which you have installed Structural Material Manager does not already have the latest version of Acrobat Reader installed, click the “Install Acrobat Reader” button, as the Acrobat Reader program is required for viewing some of Structural Material Manager’s built-in documentation. If you are installing from an Internet-supplied download rather than from a CD or USB Flash drive, Acrobat Reader’s installer won’t be available since its presence would greatly increase download times; you can visit http://www.ejeindustries.com/support/download.html to download it.
G) Click the “Install Structural Material Manager” button at this time.
H) Click on the type of installation you wish to perform. Most users will be doing a complete installation to either a local hard drive or a network drive, and that option is indeed the default.
If you already have the system loaded on a network server, you might want to select the second option. That choice causes the system to install just those components that are needed to access an existing system across the network. See Section 3-7: Network Setup for more information on this option.
I) Use the drop-down list to select the drive onto which you wish to install Structural Material Manager.
J) Choose whether shortcuts should be placed on the Windows Desktop and/or in the Start Menu. You can select neither of these, just one or both, but it is recommended that you keep at least one of the options checked.
K) A box contains the name that will be used to label the shortcuts. The default is nearly always a good choice, but you may wish to customize this name if you want to maintain shortcuts to multiple Structural Material Manager systems. For instance, if you have the system installed on both Drive C: and Drive D:, you might want to specify a name of “SMM Drive C” for the C: installation and “SMM Drive D” for the D: installation. Note that Windows does not permit certain characters in shortcut names, and the colon (“:”) is one of these illegal characters; this is why the names “SMM Drive C” and “SMM Drive D” have been suggested as examples rather than “SMM C:” or “SMM D:”.
L) Click the Install System button to begin setup.
M) If the system detects that it is being installed over an older, existing Structural Material Manager system, you will receive a warning message. Installing over an older system is not at all a problem; the system simply informs you as to what is happening so you can make sure that other network users are not accessing Structural Material Manager during installation, verify that you want to upgrade the old Structural Material Manager system to the current version, etc. The messages vary depending on the individual situation, so read the message (if any) carefully, and respond by clicking the appropriate button. If presented with an option as to whether a backup of the existing system may be created, it is highly recommended that you click "Yes."
N) The computer now begins copying programs to the hard drive. Since the programs are stored in compressed form, they must be expanded as they are copied. This can take a few minutes on slower computers.
O) Once the system reports that installation is complete, you can click the Ok button to return to the Setup program’s main screen.
P) Demo users (as opposed to full-system users) may skip this step, and proceed to the next one at this time.
If this is the first time Structural Material Manager has been installed on this computer, or if you are upgrading from an earlier version of Structural Material Manager, it is necessary to install “key drivers.” These drivers are software components that coordinate the interaction of Windows with the Structural Material Manager’s hardware security keys. There is no need to install these drivers if you are loading a maintenance release in which the numeric part of the version has stayed the same and only the letter has changed (i.e., loading Version 20.0b over Version 20.0a), as the most recent drivers are probably installed already.
If you do need to install key drivers, please refer to Section 3-6 at this time. Once the drivers are installed, please return to this point in the directions.
Q) Simply click Exit in main setup screen’s File menu once you have installed Structural Material Manager and any desired related components. IMPORTANT: as Structural Material Manager's setup program closes, Windows 8/8.1, 7 or Vista (but probably not Windows 11 or 10) may pop up a Program Compatibility Assistant dialog that warns that the program might not have installed correctly. If it does appear, be sure to click "This program installed correctly." DO NOT click "Reinstall using recommended settings."
R) If you are installing from a CD or USB Flash drive, please remove it from your PC at this time.
Following the above steps results in both the 32- and 64-bit editions of Structural Material Manager being installed. See Section 3-11: 64-Bit Architecture for more details.
Section 3-4: Running the System. The following instructions describe the steps necessary to run Structural Material Manager.
If you placed Structural Material Manager on a desktop shortcut, just make sure the desktop is visible, and double-click on the “Structural Material Manager” shortcut. If you opted to place the system in the Windows Start Menu, then just click on the Start button, click on the Programs folder, and click on the “Structural Material Manager” shortcut.
If and only if you did not create a shortcut to Structural Material Manager, you will have to launch the system by running C:\EJE\SMM.Exe. If the system is loaded on some drive other than C:, be sure to substitute the actual drive letter in place of C: in this example. You can run the system in this fashion either from the Start | Run dialog or from within File Explorer.
Both the 32- and 64-bit editions of Structural Material Manager are always installed. There is no need to determine which to run, as the proper one is chosen automatically based on whether the computer has 32- or 64-bit Windows. See Section 3-11: 64-Bit Architecture for more details.
If an "Open File - Security Warning" dialog appears and states that "The publisher could not be verified. Are you sure you want to run this software?", simply click Run. Such a dialog may appear with newer versions of Windows. You may also see it with slightly older Windows versions such as XP if all of the operating system’s Microsoft-supplied updates have been installed.
If your system is a demonstration version rather than the full package, you will be presented with a User ID Code the first time that Structural Material Manager is run. That code is supplied to E.J.E. Industries LLC which will, in turn, provide a corresponding Demo Activation Code. The Demo Activation Code is the key that unlocks your demo by providing an electronic “coupon” worth 25 reports from the full system. If you are evaluating a demo, you should refer to Section 6-2: Demo “Coupon” for more details on how your demo system operates and how it differs from a full system.
Please proceed to the next section for information on installing the security key.
Section 3-5: Installing the Security Key. If and only if you have actually purchased the Structural Material Manager system, your package has been provided with a hardware key. No such device is needed for the demonstration version; demo recipients thus need not follow the steps in this section, but they may wish to read a bit about the reasons why the full version of Structural Material Manager employs security keys.
From 1985 through 1990, Structural Material Manager had no copy protection. During this time, E.J.E. Industries was actually receiving tech support calls from companies that never purchased the software! Since E.J.E. Industries' software support policy grants free, lifetime support to the purchasers of our software, support calls from companies with "bootleg" copies posed a real dilemma. In 1991, the decision was finally made to protect all new systems. This decision has proven to benefit both E.J.E. Industries and the end-user.
If we did not protect our software system, we would have to raise the price significantly, thus "hiding" the cost of extra users by incorporating them into the base price. We think you'll agree that a customer with only a few users should not pay the exact same price as a client running Structural Material Manager on 20 stations!
As we mentioned earlier, our software began as an unprotected system, and "bootleg" copies were making their rounds. Such copies, which violate federal copyright laws, were quite often taken by ex-employees to their new jobs. To see the real impact of this, imagine for a moment that you paid for Structural Material Manager, and a former employee then began using it for his new employer: your competitor. Suddenly, your hard-earned estimating and production tool has become a weapon against you!
Another way that you as the end-user benefit from our software protection is that E.J.E. Industries is guaranteed to receive continuing revenues as more and more companies begin to use this system. This ensures that sufficient funds are available for further software development, and further development translates into better and better software for you.
You are free to load the system on as many computers as you wish, but it will only run if the security key is attached. Some users simply move the key to whichever computer they need at a given time, while others choose to purchase additional keys.
If you would like to invest in additional keys, they can be obtained for $995.00 each. We always maintain a large inventory of keys, so your order can usually be on its way to you the same day the order is placed. Once you receive your new key, all Structural Material Manager modules that you already have licensed on existing PC's will now be accessible on an additional PC; there is no need to re-purchase the Main System or any optional modules such as Length-Nesting, Estimating, etc.
Our software security keys are backed by an unconditional lifetime warranty which includes not only defective units but even lightning strikes and accidental physical breakage. See Section 1-5: Warranty for more information.
Network users must install a security key on every workstation that will access Structural Material Manager. There is no need to install a key on the server, however, if the server will simply host the Structural Material Manager system without being used to actually run the system. Stated another way, if a user will actually sit at the server and execute the program, then a key is needed there; if users will only access the server’s Structural Material Manager system from other network workstations, the server does not need a key.
Please note that E.J.E. Industries utilizes many different types of security keys, and the key color and labeling can be used to differentiate the units. Here are the possibilities:
1. “Micro” USB key with a green case. This category can be further broken down into two varieties: that with a slot in the tip and that without a slot. The slotted type bears the word “Sentinel” at the plastic tip. The type without a slot has E.J.E. Industries printed directly on one side of the key.
2. Full-size USB key with a black case accented with two purple, curved stripes. E.J.E. Industries is engraved on one side of the key.
3. Full-size USB key with an all purple case (no accent stripes). E.J.E. Industries is printed directly on one side of the key.
4. Full-size USB key with an all red case (no accent stripes). E.J.E. Industries is printed directly on one side of the key
5. Large- or medium-size parallel printer port key with an off-white case. E.J.E. Industries is printed on a blue and white adhesive label.
6. Small-size parallel printer port key with an off-white case. E.J.E. Industries is printed directly on one side of the key.
It does not matter which type of key you have, as each performs the same function of informing the Structural Material Manager software system that you are a licensed user.
Although the green key is considered a “micro” USB key, this term refers only to its small size and does not imply that it requires a micro USB port as found on many cell phones, cameras, etc.; it also connects to the same type of standard USB port as do the various types of full-size security keys. Only the various off-white keys, which are legacy units at this point but are still supported, connect to the computer’s parallel printer port.
Most keys issued from 1991 through 2004 were intended for the parallel port. By 2005, almost all new key shipments were in the full-size USB format, as the once-commonplace parallel printer port began to disappear as a standard feature in new computers. The “micro” USB key with a green case was introduced in 2012 as the smallest key ever offered.
A full-size USB key, regardless of color, remains the standard-issue unit for desktop and tower PCs. The green “micro” USB key has become standard-issue for laptop and tablet PCs since it protrudes only slightly from the PC once inserted.
It is common for a USB device to require that its software driver be installed under Windows before the device itself is attached to the computer. The USB keys follow this convention and should not be installed until you have followed the directions in Section 3-6: Installing the Key Drivers. So, if you have a USB key, please proceed to Section 3-6 at this time.
It does not matter whether the key drivers are loaded before or after a parallel-port key is connected to the computer. Since parallel-port keys are fairly uncommon at this point, we’ll not present steps here for connecting them. However, very complete instructions for doing so were provided up to and including the Version 17.0 User’s Guide. If you need help in connecting a parallel-port key, please contact E.J.E. Industries so that we can provide the Version 17.0 documentation.
Section 3-6: Installing the Key Drivers. Structural Material Manager makes use of software known as “key drivers.” The drivers are comprised of software that coordinates the interaction between Structural Material Manager’s security key and the Windows operating system.
Demo recipients can skip this section. Demo packages do not utilize hardware security keys and thus have no need for key driver software.
A common misconception is that a key driver is a hardware device. For instance, customers will sometimes mention that “the key driver is attached to the computer.” Actually, the key is the physical security device, i.e., hardware, whereas the key driver is the software that provides Windows operating system support for the key.
Structural Material Manager’s off-white parallel-port keys as well as the various colors of USB keys all use the same software driver. It may seem odd that the old parallel-port keys use the same driver as the modern USB-style keys, but this is indeed the case. Only the green, “micro” style of USB key that lacks a slot in its plastic tip requires an additional driver (the secondary driver is not needed for the green micro USB key that does have a slot).
Generally, key drivers only need installed when you install Structural Material Manager on a machine for the first time or when you upgrade it from one major version to another. If you are simply loading a maintenance release in which the numeric part of the version has stayed the same and only the letter has changed (i.e., loading Version 20.0b over Version 20.0a), the key drivers on the PC are probably current and will not need re-installed.
It is mentioned in Section 3-7: Network Setup that Structural Material Manager’s setup program should be run on each network PC that will be used to access Structural Material Manager. One of the primary reasons for this is that it is the setup program that is used to install key drivers. If you bypass the setup program, and simply create a shortcut to Structural Material Manager across the network, there is a good chance that the security key will not be recognized since the drivers were not installed.
Under Windows, installation of any driver requires administrative privileges from a network security standpoint. Thus, Structural Material Manager’s setup program will be able to install key drivers only if the user that is currently logged on to the system has administrative rights.
Here are the necessary steps for installing key drivers:
A) Make sure you have administrative privileges. This is critical in loading drivers under Windows.
B) Launch Structural Material Manager’s Setup program from the CD or USB Flash drive on which the program is distributed. If you were referred to this section while following the system installation directions in Section 3-3, then the Setup utility probably already up and running. If not, run it now by following the first three steps (A, B and C) in Section 3-3.
C) One panel of the Setup program’s screen is dedicated to key driver installation. Regardless of which type of key you have, click the “Install Main Driver” button that appears in that panel. Remember: all users need the main driver installed, even if they have the green, “micro” style of USB key.
You will be presented with a message requesting that you should remove any “USB Sentinels” before proceeding. “USB Sentinels” are Structural Material Manager’s USB security keys. You can safely ignore the warning if your Structural Material Manager key is the parallel-port type. If you do have a USB key - whether from Structural Material Manager or some other program - be sure to remove it now.
The Sentinel Protection Installer will now be launched. Just follow the on-screen prompts until installation is finished. You won't have to worry about selecting very many specific options in this program, as the defaults will usually be the correct choices. Thus, just click Next or Ok to move through the setup screens as options are presented. For instance, if upgrading over a previously-installed driver version is the appropriate course of action, the "Upgrade" option is what you should choose, but that will most likely be the default anyway. Similarly, the "Complete" option should typically be chosen rather than "Repair / Modify," but once again that is probably going to be the default option. If your PC has a Windows Firewall running, the installer will ask if it may modify the firewall settings, and it is very important that you allow it to do so. If you are presented with a license agreement, choose the "Accept" option. At some point you'll be able to click the "Install" button to finish the installation.
Note that it may be necessary to re-start your PC at one or more points during the installation; do so as directed by the setup program.
D) If you have the green, “micro” style of USB key, click the button to install the additional driver that key requires. This will launch the Sentinel Runtime Setup program. Simply follow through the prompts to allow it to install the driver.
Once the key driver software has been installed, it is finally safe to connect the USB style of security key. If your key is the parallel-port type, it does not matter whether you connect the key before or after the drivers are installed, but it is indeed critical that USB keys are not connected until now. So, if you do have the USB style of key, connect it at this time to any free USB port. If your PC’s case is designed such that its front-panel USB ports stick straight out rather than being angled upward, and your PC is on the floor in a foot-traffic area, inserting the USB key on the front might invite damage as people walk by; try to use a rear-mounted USB port in such cases. Once the USB key is connected, the presence of the key driver software you already installed will allow Windows to automatically identify and activate the key.
In a network environment in which the Structural Material Manager software is loaded on a server, the server itself only needs key drivers installed if there is actually a key is attached to the server. If the machine is simply acting as the central file-sharing point from which other network PC’s access Structural Material Manager, and no key is attached to a parallel or USB port of the server, then there is no need to load key drivers on that machine. The basic rule-of-thumb is simple: if you physically installed a key on the server, load the drivers; if no key will be attached to this computer, skip the key driver installation.
Let’s close this section by presenting some troubleshooting tips in case installing the key drivers have not allowed Structural Material Manager to properly detect the key. Here are some hints in case you have difficulty:
∙ Shutting down and re-starting the system can sometimes help. Close all programs including Structural Material Manager, and shut down (don’t just restart) the PC. If you have a parallel-port key connected to a printer, also power down the printer (only if the printer is connected directly to the PC’s parallel port; don’t bother powering down a network printer or USB-connected printer). Wait 10 seconds before powering back up, and try Structural Material Manager again.
∙ If cycling the system’s power did not help, try removing and re-installing the key drivers. After installing the key driver software from Structural Material Manager’s Setup program, select the Remove option for the driver. After it has been successfully removed, repeat the procedure, but select the Install option. This often helps. A key point to keep in mind, however, is that the USB key should be unplugged before uninstalling its driver and be reconnected after re-installing the driver.
∙ Visiting our Web site at http://www.ejeindustries.com/support ensures you access to the very latest drivers. These drivers may be more recent than the ones on your program CD or USB Flash drive. Downloading and installing the desired drivers from this site will solve most key problems.
∙ If you can successfully open a job in Structural Material Manager after clicking File | Open, the key is being properly detected.
Section 3-7: Network Setup. This section presents information on installing Structural Material Manager on a network. Since anyone installing on a network is assumed to be fairly computer-literate, we'll deviate from the "no-jargon" rule that applies to nearly all parts of this User’s Guide and get right to the point in this section. If you are a computer novice installing on a standalone PC, please don't be intimidated by this information! I.T. professionals love this sort of lingo, but you are free to simply skip this information.
If you have any doubt as to your ability to carry out the instructions in this section, it is recommended that you enlist the aid of a professional before attempting to install Structural Material Manager on a network.
Structural Material Manager’s Version 1.0 release in 1985 was not intended for network use. When the application first became network-compatible in 1990 under Version 2.2, customers ordering the software had to specify whether they needed the standalone or network version. Ever since Structural Material Manager Version 6.0 in 1998, all systems have been automatically network-ready. So, all Version 6.0 through 20.0 packages can be installed in either standalone or network fashion without need for requesting a certain software edition.
Structural Material Manager runs properly on all true server-based networks running Windows Server 2022, 2019, 2016, 2012, 2008 or 2003. It also runs properly on all peer-to-peer networks implemented via Windows 11, 10, 8/8.1, 7, Vista and XP.
In a peer-to-peer network, the “server” is of course not really a server at all but, rather, just one of the network workstations designated as such. We’ll refer to that machine as the server for purposes of these directions as if it were a true server.
The basic premise behind networking Structural Material Manager is that the system’s program files and data files all reside on the server, and workstations access the programs and data from a shared location there. All that actually exists on each workstation is a Windows Start Menu and/or Desktop shortcut from which the shared system is launched. As the program and data files are accessed by multiple users, the application automatically handles network file-sharing duties such as setting and releasing the Windows operating system’s “locked in use” file states.
Structural Material Manager expects to be run in an X:\EJE directory, that is, an EJE folder off the root of some drive C: through Z:. Standalone systems run in the \EJE folder of some local hard drive (usually C:, but any local drive is acceptable), and network systems run in the \EJE folder of some mapped network drive. Do not try to move Structural Material Manager to any directory other than \EJE. The system automatically installs to \EJE and assumes that it is being invoked in that folder. Other directory names are not supported, and manually moving the system to another folder will prevent Structural Material Manager from operating properly.
When Structural Material Manager is run on a standalone PC, of course it usually resides at C:\EJE which easily complies with the restriction that the system must run in an EJE directory of some drive’s root (again, a path following the general format X:\EJE where X: is some local or network drive, and EJE is the folder name that is always used). Guaranteeing compliance with the required X:\EJE format in a network installation is only slightly more complicated than doing so for a standalone one. First, a shared folder is set up on the server; its exact name is unimportant, but what does matter is that all of its allowed users are granted full file-access permissions. Each workstation then maps a network drive to the server’s shared folder. Structural Material Manager’s setup program creates an \EJE folder subordinate to that mapped drive, and it is from that \EJE folder that the system runs.
The key concept to understand is that, due to the network drive mapping, the workstation does not “see” the shared folder as a folder at all but, rather, considers it to be a drive. It’s all a matter of perspective: the server considers the shared folder as such, but the workstations all treat that same resource as a drive. From a workstation’s perspective, the EJE directory is one level below the root of the mapped network drive, and compliance with the required X:\EJE format is thus obtained.
An example is in order. Consider the case of a server on which you will manually create a folder named EJE_Software. The EJE_Software folder might be created directly off the root of the server’s drive, or perhaps it will be created as a subdirectory of some existing sever-based folder and thus exist multiple levels down from the root; either way is fine. Further assume that the EJE_Software folder’s sharing properties have been configured under Windows so as to allow full access by all users. With those tasks out of the way at the server, each workstation must then map a network drive - let’s assume Drive J: - to the server’s shared EJE_Software folder. Structural Material Manager’s setup utility is then run at each workstation (not at the server). The setup utility is instructed to install to Drive J:, and it automatically builds an EJE folder on Drive J: unless that folder already exists. All program and data files are sent to J:\EJE as far as the setup program - which is running at the workstation - is concerned, but of course all such files ultimately end up residing at EJE_Software\EJE on the server. After setup is complete, the program file J:\EJE\SMM.Exe is able to be executed at each workstation in order to run Structural Material Manager across the network.
You cannot obtain proper Structural Material Manager operation if you make the EJE folder shareable on the server and have a workstation map a network drive to that shared folder. As an example, assume that Structural Material Manager is installed to the C:\EJE folder of some local PC, and another PC in a peer-to-peer network maps network Drive X: to correspond to the first machine’s C:\EJE folder. This will not work. Also consider the case of Structural Material Manager residing at C:\EJE_Software\EJE on a true server, and a workstation maps Drive X: to the EJE folder at the end of that path rather than the C:\EJE_Software portion of that full path. Again, this will not work. From the workstation’s perspective, such mappings do not produce an X:\EJE folder that is required for proper operation but rather, make it appear to Structural Material Manager as if it is running in the root of Drive X:. The rule to remember is that you always need to map the network drive one level higher than the EJE folder rather than to the EJE folder itself. Simply put: if you find yourself mapping to the EJE folder, you are making a mistake and need to review these directions.
A lot of preliminary information has been presented. That information will now be put to use in the following list of tangible steps:
A) Manually create a shared folder on the server’s drive. That folder will ultimately be used to hold the EJE folder. However, you are not to actually create the EJE folder but, rather, are to provide another folder at which Structural Material Manager’s setup utility will later build EJE (albeit via a network drive mapping). The shared folder you create could be called EJE_Software, EJE_System, EJE_Drive, etc., and it can be located anywhere on the server’s drive (it does not necessarily have to be in the root). You are free to call it anything you want, but naming it EJE would be unwise since the setup program later creates an EJE subfolder; redundantly-named folder hierarchies such as SomeFolder\SomeFolder (in this case EJE\EJE when viewed from the server’s perspective) are technically acceptable under Windows but are also sure to lead to confusion. We’ll assume for purposes of the remaining instructions that you’ve named the folder EJE_Software.
B) Make the server’s EJE_Software folder shareable. Full read-write privileges will be needed by each workstation that accesses it.
C) At a workstation, map a network drive such as J: to the EJE_Software folder.
D) Install the system at the workstation (not the server). To do so, launch the setup program, and click its “Install Structural Material Manager” button. If this is the first workstation onto which the system has been installed, be sure that the “Install all components to local hard drive or network drive” radio button is selected. At the “Install to Drive” drop-down list, select Drive J: or whatever mapped network drive letter you chose, and click the “Install System” button. The setup program will create an EJE folder at the root of the network drive, and it will copy all necessary files to that location. Behind the scenes, that location will correspond to an actual server-based folder of perhaps C:\SomeDir\EJE_Software\EJE, but since the setup program is running at the workstation instead of the server, it is able to view the target location as X:\EJE in general and J:\EJE in this specific example rather than C:\SomeDir\EJE_Software\EJE. The appropriate Windows Desktop and Start Menu shortcuts will automatically be built on the workstation.
E) Repeat steps C and D for each workstation that needs to access the system across the network. Whereas the “Install all components to local hard drive or network drive” option was necessary when installing on the first workstation, all subsequent workstation installations can benefit from the “Just install components needed to access existing network system” option. That second option results in a slightly faster installation since all of the system’s files are known to be already be in place and thus do not need copied again. If you accidentally leave the default option of “Install all components to local hard drive or network drive” selected when installing at the second workstation or beyond, rest assured that no harm will come; the installation will merely take slightly longer because already-installed program files are being overwritten with identical copies.
We started this section with an overview of the system’s required networking technique and then presented actual procedures to follow. This section will now be closed out with some additional information you may find useful in deploying Structural Material Manager across a network.
You’ll notice in the preceding discussions and concrete list of steps that there really are only two operations that must be performed at the server. First, you need to create a shared folder. Second, you need to set the appropriate user-access privileges. Once this is done, all other tasks (such as installing and running Structural Material Manager) are done at the workstations. In most cases, if you find yourself about to install or run Structural Material Manager at the server itself, you’re probably making a mistake. Installation and execution are normally performed at workstations, and that perspective guarantees that the target location appears to be of the required X:\EJE format.
It is assumed that nobody needs to operate Structural Material Manager at the server itself. Doing so is not immediately possible since the path from the server’s perspective is along the lines of C:\SomeDir\EJE_Software\EJE rather than the required X:\EJE format as seen from the workstation. That is rarely a concern since true servers and even many peer-to-peer “servers” are usually located in some out-of-the-way place and get directly accessed only for occasional system updates and maintenance. One of the few scenarios in which it might be necessary to run Structural Material Manager at the server could occur in which an employee actively uses the peer-to-peer “server” as his or her day-to-day workstation. That is hardly an ideal situation since any mishaps on that user’s machine such as virus activity, Windows crash or reboot, etc. would affect all connected users, but it does sometime arise in very small companies. If it is absolutely necessary for an end-user to run the software directly at the server, it can be accomplished through an easy workaround. Simply map a network drive to the shared folder that exists on that very same machine, and access Structural Material Manager via that drive letter just as any other workstation would. Supposing the peer-to-peer “server” has C:\SomeDir\EJE_Software set up as the shared folder, and Drive J: has been mapped to EJE_Software folder, Structural Material Manager will run on Drive J:. This works because Windows permits drive mappings to be made even on the same machine where the shared resource actually resides.
In most environments, granting read-write privileges to all of the server’s Drive C: would pose a serious security risk. That is precisely why these directions make no mention of sharing a server’s entire Drive C: and, instead, rely on a shared subfolder such as EJE_Software. An entire Drive C: would of course rarely be shared when an I.T. professional sets up the network, but some amateur-implemented peer-to-peer “servers” may be set up this way. This is neither advised nor required.
In keeping with the example folder name of EJE_Software presented in previous instructions, full access rights must be granted to the EJE_Software. Anything less than full rights would cause the system to crash during certain internal file- and folder-handling operations! To avoid such problems, Structural Material Manager runs some tests at startup to see whether full access rights exist, and it shuts down after displaying an appropriate message if full rights are not detected.
Granting full access rights under older Windows operating systems such as NT 4.0, 2000, XP and XP Service Pack 1 was fairly straightforward. However, beginning with Windows XP Service Pack 2, the subject of file access permissions became a bit more complex. XP SP2 and newer operating systems allow much finer or “granular” control of permissions than was formerly possible, and this can lead to cases in which some users can successfully access Structural Material Manager across the network while others are denied access. Structural Material Manager’s setup program has an option for “Allow setup program to set file permissions under Windows” that can help when rights need tweaked. Since this is usually not needed, and the process of propagating rights down through the folder hierarchy can be time-consuming, the option is deselected by default; check it during installation only if some rights-oriented issues are reported or are suspected. E.J.E. Industries has posted a technical support bulletin at http://www.ejeindustries.com/support/permissions that should prove helpful if you encounter problems related to access rights.
Using consistent mapped drive letters at the various workstations surely will simplify network administration, but it is not mandatory. Different network users can access Structural Material Manager using different drive mappings. It is not a problem if one user has his or her workstation mapping Drive F: to the server’s shared folder while another maps Drive H: to that same folder. These users can simultaneously access the system in their F:\EJE and H:\EJE directories, respectively.
It is not possible to load Structural Material Manager locally on the network workstations and allow those installations to access a common data set stored elsewhere on a server. Some software packages allow this sort of arrangement, but Structural Material Manager assumes that all network users are accessing both program and data files from the same server location. Because of this, there is no need to load Structural Material Manager onto the local hard drive of an individual network workstation. Just install to mapped network drive, and the workstation will access both program files and data files via the network.
In keeping with above discussion, the Setup program contains an option for installing just those components needed in order to run an existing system across the network. You typically use the normal, full installation on just the first workstation and then perform the network-client style of installation on each subsequent workstation that will access that same shared Structural Material Manager system. When you select the network-client option, the only drives that are shown are the network drives, so be sure to have the workstation’s drive mappings in place before invoking the setup utility. Such an installation builds the proper shortcuts, but it does not actually load the software again. Use this setup option rather than just creating shortcuts manually at each workstation, as if you bypass the setup program, you also bypass the automatic tests for sufficient network access rights! Also, only by running the setup program at each station can you guarantee that the key drivers are loaded for each machine (see Section 3-6: Installing the Key Drivers).
If some users would like to have local copies of Structural Material Manager available, there is no harm in loading on a workstation’s local drive as well as the server. In cases where individual workstations do indeed have local copies of Structural Material Manager loaded, the user can use the local system by invoking it from the local drive (such as C:\EJE\SMM.Exe) while being able to access the server’s system by using a network drive (such as F:\EJE\SMM.Exe). It is sometimes convenient to let users employ a local copy of the system for work that does not have to be shared with others, while inventory lists and projects being worked on by multiple people are best kept on the network. In practice, it is often estimators who most appreciate having local installations since they tend to work on their own bids. Once a bid successfully results in an awarded contract, the “live” job belongs in a network installation that can be accessed by the various non-estimating staff members involved in the job’s production phases. When running Structural Material Manager’s setup program twice at the same workstation so you can do both local and network installations, pay particular attention to the Shortcut Name box. If you don’t type anything differently at that box, the default shortcut name of “Structural Material Manager” will be used, and the second installation will then overwrite whatever shortcut the first installation built. “SMM Local” and “SMM Network” work well as the shortcut names for the standalone and shared systems, respectively, but the actual choices are yours. Just be careful to not try names such as “SMM Drive C:” and “SMM Drive F:” since Windows prohibits the use of special characters such as the colon (“:”) in shortcut names.
As you manually map network drive letters at workstations, you’ll employ UNC paths. However, UNC paths to Structural Material Manager are not supported within program shortcuts; drive and path designations are required in those shortcuts. Suppose you manually create a Windows Desktop shortcut to Structural Material Manager that invokes SMM.Exe with UNC syntax such as \\Server\EJE_Software\EJE\SMM.Exe. When the program executes, it attempts to determine the drive from which it was launched, but \\Server\EJE_Software\EJE of course does not provide the expected drive letter from C: through Z:. The program would then close after presenting an error message. It is generally best to use the system’s setup program at the workstation, as that assures you that the proper shortcuts will automatically be built. If you have reason to manually create a shortcut, make sure that the “Target” value is in the form of X:\EJE\SMM.Exe and that the “Start In” value is similar to “X:\EJE”.
When Structural Material Manager is run across the network, Windows might pop up an "Open File - Security Warning" dialog asking something to the effect of "Do you want to run this file?" or "Are you sure you want to run this software?" Since Structural Material Manager’s splash screen is implemented as a separate program that automatically invokes the main application, it is possible to see this warning twice each time the system runs: once before the splash screen appears and then again before the main program loads. For any network workstation that displays such messages, see http://www.ejeindustries.com/support/securitywarning which provides detailed instructions on configuring Windows to avoid these interruptions.
As mentioned above, Structural Material Manager’s splash screen is actually a separate program. It is the SMM.Exe item that appears in Structural Material Manager's program shortcut such as X:\EJE\SMM.Exe. However, SMM.Exe not actually the main application. SMM.Exe is really just a 32-bit loader stub that presents the splash screen while it carries out its actual goal: chaining control to the main application. That main application resides in either X:\EJE\SMM32\SMM32.Exe or X:\EJE\SMM64\SMM64.Exe depending on the target operating system. When Structural Material Manager is installed on the network, the SMM.Exe loader stub - which is quite small - is always launched across the network, but the much larger SMM32.Exe and SMM64.Exe programs are only launched across the network only initially. After the program has been up and running and has had enough time to silently copy SMM32.Exe and SMM64.Exe (and any of their dependencies) to the Windows Temp folder, future launches of the main program will be done locally. One advantage of launching SMM32.Exe and SMM64.Exe locally is that local load times are typically faster than those across network connections. Another advantage is that locally-launched programs tend to be faster and more stable; due to the manner in which the Windows operating system only loads certain parts of large executables at a time, networked-launched programs might run slower, and they can crash if there is even a momentary interruption in network connectivity. The speed and stability benefits of locally launching the main program are achieved with absolutely no extra configuration work required on the part of the I.T. staff during initial setup or later updating; everything is automatically handled by the SMM.Exe loader-stub. If for some reason you want to block this behavior and force all program components to always be launched across the network, simply modify the program shortcut to explicitly launch X:\EJE\SMM32\SMM32.Exe or X:\EJE\SMM64\SMM64.Exe rather than SMM.Exe; the loader-stub will be bypassed thus causing the main application to always be loaded from the network.
Section 3-8: Network Printing. Structural Material Manager prints via the Windows print drivers, so any network printer can be used by simply selecting it from the drop-down list of available printers in Structural Material Manager’s print dialogs.
If you intend to print to a network printer rather than a local one, no special setup steps are needed in Structural Material Manager since, as mentioned above, the system utilizes Windows print drivers. Before printing to a network printer, however, you may wish to verify that you can print to the desired network printer through some other Windows application (perhaps Microsoft Word, Excel, etc.). This will guarantee that printer sharing is already working properly.
The fact that Structural Material Manager makes use of Windows print drivers not only allows users to conveniently access network printers, but it also makes it simple for different network users to access their own local printers. Supposing Structural Material Manager is loaded on the network server and is accessed from many workstations, there is no problem with some of those users printing to shared network printers while others print to their own, local printers. The system automatically keeps track of which printer - whether network or local - was last used by a particular user and automatically restores the appropriate printer driver settings the next time that user requests a printout (see Section 12-12: Automatic Saving of Printer Driver Settings for more details).
Section 3-9: Downloading Patches from the Internet. As free Structural Material Manager maintenance releases are made available, they can be downloaded at no charge from the E.J.E. Industries Internet site. Note that this applies to “patches” to your current version rather than feature-adding upgrades. A free patch changes only the letter part of the software version identifier, for instance, 20.0b gets replaced by 20.0c. Major upgrades in which the version number also changes are not free but are available at low cost.
Visit http://www.ejeindustries.com/support for directions on downloading patches. You might want to add that site to your Internet browser’s list of “bookmarks” or “favorites.”
You should periodically visit our Internet site’s support page to see what the latest release is. By comparing the latest release with the one displayed on your Structural Material Manager title-screen (also available under Structural Material Manager’s Help | About option), you can determine whether a new system should be downloaded.
Section 3-10: Removing the System from your Hard Drive. If you ever need to remove Structural Material Manager from your hard drive, this can be easily done through File Explorer (the newer name for Windows Explorer). Here are the steps to follow:
A) Right-click (not left-click) the Start button at the Windows desktop to display a pop-up menu, and left-click on the Explore or File Explorer option that appears in that menu.
B) Find the \EJE folder on the appropriate hard drive, and right-click it. A pop-up menu appears.
C) Left-click the Delete option.
D) When asked whether the contents of \EJE can be moved to the recycle bin, click on Yes.
The directions above explained how to remove from your computer any files associated with Structural Material Manager. The following information shows how to remove any Structural Material Manager shortcuts you may have created in Windows.
If you have a Structural Material Manager shortcut on your desktop, remove it as follows:
A) At the Windows desktop, locate the Structural Material Manager icon. Right-click on this icon, and a menu containing the item “Delete” appears.
B) Left-click on the “Delete” item.
C) Hit Enter when asked whether the shortcut should be deleted.
If you have placed a shortcut to Structural Material Manager in your Start Menu, it may be removed by following these steps:
A) At the Windows desktop, right-click on the Start button. A menu with “Open” at the top will appear
B) Left-click on “Open”.
C) Double-click on the Programs folder; this will open that folder.
D) Find the Structural Material Manager icon. Right-click on this icon, and a menu containing the item “Delete” appears.
E) Left-click on the “Delete” item.
F) Hit Enter when asked whether the item should be deleted
Section 3-11: 64-Bit Architecture. Every Structural Material Manager package includes both 32- and 64-bit editions. A convenient aspect of this dual-architecture strategy is that neither the end-users nor I.T. personnel have to do anything to decide which version to install or run. Both 32- and 64-bit versions are always installed, and the appropriate version is automatically chosen at runtime.
Even in a network scenario in which some machines have 32-bit Windows and others have 64-bit Windows, the correct Structural Material Manager edition for each particular user is automatically launched. You can verify this at the application's title screen (also available in the Help menu by clicking About) which always reports "32-bit Version 20.0x" or "64-bit Version 20.0x".
Both 32- and 64-bit versions access the exact same data format. Jobs created with one edition can be used seamlessly by the other.
The 64-bit edition of Structural Material Manager is of course larger than the 32-bit edition in terms of the executable file's size. It thus may take longer to load across slow network connections than the 32-bit version. If the load time is unacceptable, you can force the 32-bit edition - which can run under either Win32 or Win64 - to be loaded. Load time can be further reduced by eliminating the program's splash screen that appears before the application's actual title screen. Visit http://www.ejeindustries.com/support/win64 for details.
Chapter 4: Material Entry Basics
Section 4-1: Introduction. The largest part of operating Structural Material Manager is actually entering the material items at the keyboard. E.J.E. Industries has gone to great lengths to make entry as painless as possible, even for non-typists.
A sample material list is entered over the course of this manual. Basic material entry will be covered in this chapter, and only a few time-saving techniques being presented. Chapter 5 will then cover the finer points of material entry and explain many features intended to make the entry process faster and easier.
Section 4-2: The Sample Material List. A total of 23 items will be entered as our sample material list. This list contains examples from all general classes of the material types supported. It will later be used to demonstrate operations such as sorting, nesting, etc. The sample list is shown below with the items in the order they will be entered into the system:
1. 6 Channels, 10 x 30 x 8'-9 3/4, Piece Mark "1C1"
2. 6 W Shapes, 14 x 30 x 15'-11, Remark: No Paint, Piece Mark "4B1"
3. 24 Angles, 3 x 3 x 1/4 x 0'-9, Remark: Square 2 Ends, Piece Mark "a4"
4. 12 Plates, 3/8 x 9 3/16 x 2'-0 3/4, Grade A588, Piece Mark "p4"
5. 1 Bar Grating, 1 1/4" x 1/8" x 24" x 10'-0 (19-W-4), Piece Mark “BG1"
6. 8 Bars, 6" x 12 GA x 2'-10 ½
7. 5 Square Tubes, 3 ½ x 3 ½ x 5/16 x 6'-0
8. 2 Round Tubes, 1 3/4 Diameter, 0.341 wall X 3'-0
9. 5 Rods, 1 1/2" Diameter x 3'-0
10. 3 Rebars, #3 x 2'-0
11. 3 Pipes, 4" Schedule 40, 6'-0
12. 18 Bolts, 7/8" Diameter, 0'-2 1/2, Grade A307
13. 2 Crane Rails, 39'-0, 85 Lbs. per Foot
14. 1 Frame Assembly, Piece Mark "F1"
15. 1 W Shape, 12 x 58 x 10'-0
16. 5 Channels, 10 x 30 x 10'-9 7/16
17. 19 Channels, 10 x 30 x 6'-8 7/16
18. 1 W Shape, 12 x 58 x 10'-0
19. 1 Angle, 3 x 3 x 1/4 x 0'-9, Piece Mark "a4"
20. 2 Rebars, #7 x 3'-4
21. 2 W Shapes, 10 x 54 x 3'-0
22. 7 Angles, 2 x 2 x 1/4 x 5'-0 Remark: Galvanized
23. 2 W Shapes, 12 x 27 x 18'-0
Section 4-3: Opening and Closing Jobs. Once you have started the system as described in Section 3-4 and moved beyond the title screen, Structural Material Manager’s main window appears. It is now time to open a job.
Normally, the “Open Job” dialog automatically appears at this point. However, the very first time Structural Material Manager is run on a particular PC, a dialog allowing you to choose your preferred display style pops up before the “Open Job” dialog. If a dialog titled “Set the Entire Application's Display Style” is not displayed at this time, it means that Structural Material Manager has already been run at least once before; the “Open Job” dialog will be thus be displayed as usual. If you do see the “Set the Entire Application's Display Style” dialog, Structural Material Manager has never before been run, and you should take a moment to choose a style. Since the normal “Windows” style appears rather bland under modern versions of the Windows operating system, Structural Material Manager uses a more vibrant style as its default. Of course you are free to select from any of the available styles, and you should experiment with the styles listed in the drop-down list to see which best fits your personal taste and individual eyesight. Our purpose is this section is to merely open a job, and you can see Section 5-23: Changing the Application's Display Style if you want complete details on how the application's appearance can be radically altered via different style selections. You may also wish to visit http://www.ejeindustries.com/video/styles where a video demonstrates the easy process of selecting styles.
The Open Job dialog automatically appears if you have just launched the program. To access the Open Job dialog manually at a later time, select the Open Job item in the File menu.
Related jobs are organized into folders. You’ll generally create a folder to hold all jobs for a particular client, or, in the case of a large job, perhaps an entire folder will be dedicated to one job. Existing folders are listed in a box when you select the Open Job function, and you are free to either choose one of them or to create a new one.
Structural Material Manager can contain 9,999 folders of 9,999 jobs each for a grand total of 99,980,001 jobs. That means you’re sure to always have room to create a new folder and/or job to organize projects however you prefer.
For the purpose entering the sample material list presented in this chapter, as well as entering any other jobs you might create while learning to use the system, it is probably best to create a folder called “Learning Examples.” If you’ve not already created such a folder, click on the Create New Folder button, type Learning Examples, and click the Create button. If you’ve already created a Learning Examples or similar folder, just select it from the drop-down list at this time.
Now that the folder has been selected, it is time to specify a job. Just as was the case with selecting a folder, you may choose an existing job or create a new one. Assuming you are entering the sample material list, type a job name such as “Sample List.” The system now informs you that the job does not yet exist, and it asks whether you want to create it; click the Yes button. You are then asked to choose a dimension system of standard feet and inches, inches only or millimeters. For the purposes of this sample material list, just click the Ok button in order to choose the default system of feet and inches. The inches and millimeters formats will be discussed in a later chapter.
Of course, if you’ve already created a job, you may just select it from the list. Double-click it to open it immediately. If you prefer to select the job name with a single-click, you’ll also have to click the Open button.
If you already have a job open and would like to close it, the File | Close Current Job menu item can be used to accomplish this. Note that exiting Structural Material Manager automatically closes the currently-open job, so there is no need to close it before selecting File | Exit. Likewise, opening another job automatically closes the currently-open one.
Some users familiar with word processors, spreadsheets and other common applications might wonder whether a job has to be “saved” before closing it. That is true with such programs, as they keep data in the computer’s memory and don’t commit it to the hard drive until you explicitly save the file. Structural Material Manager, however, automatically writes the material list to the hard drive. One instance in which this happens is when the list contains new items or changes to existing ones, and you initiate a sub-function such as closing the job, opening another job, sorting or nesting the material, printing a report, etc.; changes are automatically saved before the sub-function is carried out. Automatic saving also is done after a certain number of changes have been made to the list. Yet another automatic save is performed when only a few changes have been made to the list, but more than a certain amount of time has elapsed since the last save. So, whether lots of items are being entered in a short time-frame, or just a few changes are being made over a long one, Structural Material Manager’s auto-save mechanism will automatically record list entries and edits. There is thus no need for the system to ever ask whether you want to save changes before closing a job.
Section 4-4: The Material Entry Screen. As its name implies, the Material Entry Screen is the screen at which you input items. It is also the screen at which existing items can be edited or deleted.
There is no need to invoke the Material Entry Screen through any sort of menu option; it is available any time a job is open.
At the top of the Material Entry Screen, you will notice the main menu for selecting sub-functions such as sorting, nesting, etc. Just below this menu is a group of buttons, and beneath those buttons is the material list itself. Under the material list, buttons exist for each material type - W Shape, Plate, Angle, etc.
By default, new items get added at the end of the material list, and all previous items are scrolled up to make room for them. As you will later see in Chapter 5, the group of (3) radio buttons located to the left of the different material type buttons offers other possibilities so you can insert new items at any point in the list rather than just at the end.
When a new job is first used there are, of course, no items available to display on the Material Entry Screen. The screen thus starts off with the middle portion completely blank and fills as items are entered. However, when a previous job is opened, the Material Entry Screen begins by displaying the latest entries for that file, or essentially the end portion of the material list. This is a great convenience because it allows the user to see exactly where material entry left off for that job’s previous entry session.
A vertical scrollbar appears at the right edge of the material list if there are more items than can be displayed at once. That scrollbar allows you to easily use your mouse to view different portions of the list.
Depending on your computer’s screen resolution, a horizontal scrollbar may appear beneath the material list. If it is present, then your screen resolution is not high enough for Structural Material Manager to be able to show all item fields from Piece Mark on the far left through Sequence on the extreme right. Some fields towards the right side of the screen - usually Price Unit, Shop Hours, Field Hours, Equipment Hours, Crane Hours and Sequence - will be partially or completely out of view. In that case, just slide the horizontal scrollbar with your mouse to choose which fields are in view at any given time.
Section 4-5: Field Structure of Item Entries. Items are considered to be composed of many different "fields" of information. Here is a list of the fields that may be entered:
• Piece Mark
• Quantity
• Description
• Length
• Grade
• Mill Mark
• Remarks
• Sequence
• Camber / Mid-Ordinate Rise
• Material Price
• Shop Hours
• Field Hours
• Equipment Hours
• Crane Hours
The Description field is listed above as one field, but it is actually composed of between one and three fields such as Diameter for Rods, Depth and Weight for Beams and Channels or Leg 1, Leg 2 and Thickness for Angles.
Not all fields exist for every item. For instance, Mesh Type does not apply to any material type except Bar Grating. Also, many fields are completely optional.
Section 4-6: Selecting a Material Type. Before any item fields can be entered, you must select a material type. By knowing in advance which type you intend to enter, Structural Material Manager is able to ask you only for fields that apply to that type.
Material types are spelled out in full when possible, i.e., “W Shape” rather than just “W,” but there are times at which Structural Material Manager must abbreviate them due to space constraints. The table below lists these abbreviations and their corresponding types:
Abbreviation |
Corresponding Material Type |
W, S, M, HP |
W, S, M and HP Shape Beams |
WT, ST, MT |
Tees formed from W, S and M Shape Beams |
C, MC |
Channels and Miscellaneous Channels |
PL |
Plates |
CP |
Checkered Plates |
BG |
Bar Grating |
B |
Bars (i.e., "Flats") |
L |
Angles |
TS |
Square and Rectangular Tubes |
HSS |
Square and Rectangular HSS |
TR |
Round Tubes |
HSS |
Round HSS |
P |
Pipes |
R |
Rods (i.e., "Rounds") |
RB |
Rebar |
SB |
Shop Bolts |
MISC |
Miscellaneous Items (for items not directly supported by the system) |
MAIN |
Main Members (such as a shipping heading "T1 TRUSS") |
When using the material type buttons at the Material Entry Screen, you’ll see most material type names in their full form. Exceptions are “Square and Rectangular Tube” which is abbreviated as “Sq./Rect. Tube”, “Square and Rectangular HSS” abbreviated as “Sq./Rect. HSS” and “Miscellaneous Item” abbreviated as “Misc. Item.” So, the abbreviations in the table above don’t really come into play when clicking a material type button. However, after the item of the corresponding type is entered and appears in the material list, you’ll see the abbreviations in use.
Any material type can be selected clicking its corresponding button with the mouse. Some of the material type buttons have underlined letters, and these buttons have keyboard shortcuts associated with them so you can quickly select them without using the mouse. For example, note that “W Shape” appears on the button for entering a new W Shape. The underlined “W” indicates that the Alt-W key combination - made by holding down the Alt key and then striking W - lets you add a new W Shape without ever clicking the W Shape button. Most time-saving techniques are covered in Chapter 5, but this particular one will be used in this chapter as well.
Whichever material type button is currently “focused” is the one for which you can just hit Enter to immediately select that particular material type. Depending on which version of Windows you are using and how your Windows system is configured, the focused button might have an outline around it, or it might be visually distinguished from the other, non-focused button in some other way.
You are able to move between material type buttons with the Tab key and Shift-Tab key combination. Each Tab keystroke moves one material type forward, and each Shift-Tab key combination moves one type backwards. Supposing the Plate button has an outline and is thus focused, hitting Tab once will make the Checkered Plate button have focus. Hitting Shift-Tab when Checkered Plate has the focus would move focus back to the Plate button.
When moving through the material buttons, the Right Arrow key serves the same function as Tab. Likewise, the Left Arrow key acts in the same way as Shift-Tab.
Our first item is 6 Channels 10 x 30 x 8'-9 3/4, Piece Mark "1C1." Click the C Shape button, or hit Alt-C. The system then knows you will be entering a Channel and brings up an entry dialog. The actual entry of this Channel will be performed in the next section.
Section 4-7: Entry of Steel Beams and Channels. We’ll now enter the Piece Mark field. Before we actually type a mark, a word is in order concerning the difference between capital letters and lower-case letters where Piece Marks are concerned. Capital letters are used for “major marks” that correspond to major assembly items, and lower-case letters are used for “minor marks” corresponding to detail items. The distinction is important when using Structural Material Manager’s Production-Control Module for shipping purposes. Chapter 8: Production-Control gives much more information on this subject, but all you need to be concerned with during material entry is that you are careful to use the same case (upper or lower) as shown in Section 4-2's sample material list if you intend to later experiment with any of the system’s shipping features.
Type 1C1 [Tab] to specify our first item’s Piece Mark, noting that the “C” is capitalized. Remember, the 1C1 [Tab] notation means to type 1C1 and then hit the Tab key. The system has accepted that Piece Mark and - because the Tab key was hit to move to the next field - the cursor is now in the Quantity field. Type 6 [Tab]. Next, enter the Depth by typing 10 [Tab]. The Weight is to be entered by typing 30 [Tab]. Now enter the length by typing 8-9 3/4. Please note that the length is typed exactly as you would expect it to be without any need for decimal conversions.
The item has now been completely entered; all that must now be done is to tell the system that you are finished and want to add the item to material list. A few ways exist for doing this. The fastest way to do so is to hit the Insert key. Only slighter slower is to use the Alt-O key combination: hold down Alt, and hit O to “click” the Ok button without ever reaching for the mouse. The slowest way to complete the entry is to click the Ok button with the mouse; it has the exact same effect as hitting Insert or Alt-O but requires you to reach for the mouse.
Just as Tab was used to move forward to the next field, it is worth noting that Shift-Tab moves back to the previous field. So, if the cursor is in the Quantity field, and you hold Shift and hit Tab, the cursor will move to the previous field: Piece Mark. Tabbing forward and Shift-Tabbing backwards are standard Windows keystrokes.
Before the Material Entry Screen was converted to a Graphical User Interface under Windows, Structural Material Manager had a DOS-based screen at which the Enter key was used to move to each new field. Veteran Structural Material Manager users are thus in the habit of hitting Enter rather than Tab after each field. Structural Material Manager still accepts the Enter key to mean “move to the next field” so that such users can continue entering material this way. Some new users, too, may even appreciate the fact that Enter moves to the next field, as this seems to be more intuitive for some people than reaching for the Tab key. Let there be no misunderstanding: Tab is the official way of doing this, and Enter is an unofficial alternative. In practice, the two have nearly the same function with one notable difference: Tab can be used to move past the Material Entry Screen’s Ok and Cancel buttons in a “wrap around” effect in which you move from the last entry field to the first. Enter, however, will automatically “click” the Ok button if it is ever hit while the Ok button has the input focus; there is thus no way to move beyond the Ok button with Enter. As long as you are not trying to wrap around from the last field to the first, Tab and Enter can be thought of as being equivalent at the Material Entry Screen. All further documentation will instruct you to hit Tab after typing item field, but feel free to substitute Enter if you are more comfortable with it.
Section 4-8: Steel Bar-Size Channels. Small channels, often referred to as bar-size channels or simply as bar-channels, are not normally designated in the same Depth x Weight format presented in the previous section. In order to enter such items into Structural Material Manager, you simply need to convert the description to a corresponding Depth x Weight format.
As an example of converting a bar-size channel description to Depth x Weight format, consider the size 2 1/2" x 5/8" x 3/16" at 2.27 pounds per foot. Since the depth is 2 1/2", it is converted to decimal form as 2.5. The weight per foot is taken directly from the given figure of 2.27. Note that the 5/8" and 3/16" parts of the description, which represent the flange width and web thickness, respectively, are disregarded.
Although no sample bar-size channel will actually be entered, the above example should adequately demonstrate the required entry method.
Section 4-9: Stainless and Aluminum Beams and Channels. The same system discussed in the previous section on entering steel bar-size channels also applies to some stainless and all aluminum structurals. All stainless beam and channel descriptions are simply converted to a corresponding Depth x Weight format if they are not already specified that way.
Stainless beams are entered under either the "W" Beam category, which represents "Wide-Flange" Beams or the "S" Beam category, which represents "Standard" Beams. Likewise, all corresponding stainless tees are entered under the "WT" or "ST" category, respectively.
All aluminum beams are entered under the "S" Beam category, and corresponding aluminum tees are entered under the "ST" category.
Some stainless and aluminum beams and channels have weights that are designated to 3 decimal places. Since Structural Material Manager accepts a maximum of 2 decimal places, rounding to 2 decimal places is required. Specifically, "4/5" rounding is to be used. This type of rounding stipulates that the digit in the second decimal place remains the same if the third place contains a 4 or less; if the third place contains a 5 or higher, the digit in the second place is rounded up by 1.
Some rounding examples: 3.135 rounds to 3.14, 1.597 rounds to 1.60 and 2.331 rounds to 2.33.
If an item weight must be rounded for entry, all further weight calculations will indeed be based on this rounded value.
While we won't actually enter a sample stainless or aluminum beam or channel, let's consider an example that requires rounding. Suppose an entry must be made for an aluminum beam 3" x 0.349", with flange width 2.509" and weight per foot 2.591. The 0.349 (the web thickness) and the 2.509 can both be disregarded, as the system is expecting entry in a Depth x Weight format. The depth would be quite naturally entered as 3 or 3.0, but the weight per foot requires rounding. Since only (2) decimal places are permitted, the weight would be rounded to 2.59 for entry purposes.
Section 4-10: Canadian WWF and WRF Sections. Canadian users will appreciate the fact that Welded Wide Flange and Welded Reduced Flange items are supported. These items, commonly designated as WWF and WRF, are both entered under the W Shape category.
Please note that Imperial measure rather than metric must be used to specify the Depth x Weight format for WWF and WRF shapes.
No "tees" can be formed from these items by specifying the WT material type; only tees formed from true W, S, and M Shapes are supported.
Section 4-11: Error Checking of Entries. When you attempt to add an item to the material list, the system checks that item for entry errors. If errors are found, a descriptive message is shown, and you may then correct the error(s).
In entering the next item from the sample material list, we will deliberately make an entry mistake to demonstrate the system's error-checking capabilities.
The next item is 6 W Shapes, 14 x 30 x 15'-11, Remark: No Paint, Piece Mark "4B1". Begin entering the item by clicking the W Shape button or simply hitting Alt-W.
Type a Piece Mark of 4B1 [Tab]. Remember from the Piece Mark information presented at the beginning of Section 4-10 that the capital “B” here designates this as a “major mark” for shipping purposes.
Now type 6 [Tab] as the Quantity.
The beam Depth is 14, but we will now type 11 [Tab] for the Depth field to purposely make an error. By deliberately entering the wrong depth, we’ll soon be able to see an example of Structural Material Manager’s intensive error-checking.
Type 30 [Tab] as the Weight field. Next, type 15-11 [Tab] as the Length field.
At this point, the cursor is in the Grade field for which we intend to leave accept the default value for this particular item. We need to skip over the Grade to get to the Remarks field. Either of two methods can be used: hit Tab again to move to Remarks, or click in the Remarks field using the mouse. Of course, a quick hit of Tab is most efficient. Regardless of how you get to the Remarks field, type No Paint once you are there.
The item is finished, so hit Insert or Alt-O. The system immediately responds that the item description is invalid, which we of course deliberately caused. This is because there is no actual W 11 x 30 in production, and the system detects this when that size cannot be found in its list of valid sizes. Close the error message dialog by clicking its Ok button. In order to correct the mistake, we need to move to the Depth field; do so either by hitting Shift-Tab several times or clicking in the Depth field. Change the Depth from 12 to 14 to correct the mistake, and hit Insert or Alt-O to add the item to the material list.
Section 4-12: Instant Erasing of Item Fields (demonstrates Angle entry). When you use Tab or Shift-Tab to move into a field that already contains data, the text in that field is automatically selected. Since it is selected, the first regular keystroke you hit instantly erases the field. This saves you the trouble of having to backspace over the existing data when making changes. “Regular” keystroke in this context means a letter, number or character other than one of the arrow or editing keys. In demonstrating this, we will enter a sample Angle.
Angles are always supposed to have Leg #1 be larger than Leg #2 if they are unequal. Our system gives a bit of flexibility in this regard, as it will automatically switch the order of the Legs if you happen to enter them backwards. Accordingly, if we had entered the last example as a 6 x 8 rather than an 8 x 6, it still would appear on-screen as an 8 x 6.
The next item from our sample material list is 24 Angles, 3 x 3 x 1/4 x 0'-9, Piece Mark "a4", Remark “Square 2 Ends”. Select the Angles for entry by either clicking the Angle button or hitting Alt-L. Note that “L” is commonly used as an abbreviation for Angle in the steel industry, and this is why the keyboard shortcut is Alt-L rather than Alt-A as someone not familiar with steel might suppose. Type the Piece Mark as a “minor mark” using lower-case letters by typing a4 [Tab]. Type 3 [Tab] for the Quantity field (a deliberate mistake; we really need 24 Angles), 3 [Tab] for Leg 1, 3 [Tab] for Leg 2, 1/4 [Tab] for the thickness and 0-9 [Tab] for the Length. Next, skip over the Grade field and move to the Remarks field; do this either by hitting Tab or by clicking the mouse in the Remarks field. Type Square 2 Ends as the Remarks field.
The cursor is still in the Remarks field, but what we actually want is to go back to the Quantity field to change it from 3 to 24. As mentioned earlier, Tab moves forward through the fields, and Shift-Tab moves backwards. A wrap-around effect exists so that if you hit Tab when in the last item field and then a couple of more times to move past the Material Entry Screen’s Ok and Cancel buttons the first field will be selected. Likewise, Shift-Tabbing from the first field eventually causes the last field to be selected. It’s about the same number of fields to get from the Remarks field to the Quantity field whether you Tab forward or Shift-Tab backwards, so the choice is yours; use either method to get to the Quantity.
When the cursor arrives in the Quantity field, notice that the existing 3 is selected. Type 24 which is what we really intended the Quantity to be, and the 3 gets automatically erased. No backspacing or deleting is needed. After making the change, hit Insert or Alt-O to add the item to the list.
It is important to note that fields do not automatically become selected when you focus them with a single click of the mouse. However, a double-click of the mouse does have that effect. So, whereas we used Tab or Shift-Tab to get to the Quantity field and automatically select that field’s contents, double-clicking the Quantity field would have achieved the same goal.
Section 4-13: Aborting an Item Entry. What if you begin entering an item but then decide you don't really want to keep it? It is a simple matter to correct this, and we will now demonstrate just that.
Click the Plate button, or hit Alt-P. The system now asks for a Piece Mark; type TEST.
At this point let's assume that this entry is a mistake and that we were really supposed to enter another type of item, perhaps an Angle or Round Tube, rather than a Plate. Just click the Cancel button, and the entire entry is discarded.
Section 4-14: Material Grades (demonstrates Plate entry). In entering the first few items, we have ignored the Grade field. There was no harm in doing this, as the system assumes a certain grade for each material type if we do not change it. As you can probably imagine, not having to enter a Grade field for each item can save a great deal of entry time!
Three pre-defined sets of default grades are available: United States, Canadian and Multi-Cert. The defaults for each category are summarized in the table below:
Material Type |
Default U.S. Grade |
Default Canadian Grade |
Default Multi-Cert Grade |
Square/Rectangular Tubes |
A500 |
50W |
A500 |
Round Tubes |
A513 |
50W |
A513 |
Rebar |
A615 |
G60 |
A615 |
Pipes |
A53 |
A53 |
A53 |
Bar Grating |
A569 |
A569 |
A569 |
Bolts |
A325 |
A325 |
A325 |
All others |
A36 |
44W |
A992 |
As you can see, the U.S. assumption is A36 for most types, and for the Canadian grades it is 44W. Multi-Cert grades are the same as the U.S. grades except A992 replaces A36.
In addition to the U.S., Canadian and Multi-Cert default grades that are pre-defined, a fourth category consisting of user-defined grades is available. This feature permits the user to specify the default grade for each and every material type. For instance, if all Plate entries are known to be of A588 material, the default grade for Plates can be changed to A588. The next chapter - Chapter 5 - discusses the manner in which U.S., Canadian or user-defined default grades are selected. This chapter - Chapter 4 - will proceed under the assumption that the U.S. default grades (which are active when the system is shipped from E.J.E. Industries) are still in effect.
Technically speaking, Structural Material Manager considers a valid grade to be an optional letter A though Z as a prefix, up to (4) digits as the numeric grade, and an optional suffix of up to 10 characters. Think of the Material Grade field in those terms and in that order: optional prefix, numeric part and optional suffix.
Whereas A is usually specified before steel grades such as A36, A572, A325, etc., no grade prefix is typically used for aluminum grades. You’ll thus usually enter aluminum simply as 6061, 6063, etc.
Some users are in the habit of prefacing stainless grades with S, but this is not necessary. Grades 201, 202, 205, 240, 276, 301, 302, 303, 304, 305, 308, 309, 310, 314, 316, 317, 321, 329, 330, 347, 348, 384, 403, 405, 409, 410, 414, 416, 420, 422, 429, 430, 431, 434, 436, 440, 442, 446, 479, 480, 789, 790, 798, 815, 904, 928, 988, 1049 and 2205 are automatically recognized for what they are - stainless steel - whether or not the S prefix is present.
Whereas the optional grade prefix is normally a single letter, the exception is a certain 2-character grade prefix that you may use: AR. This special prefix means Abrasion-Resistant. AR400 is a common grade specified for abrasion-resistant steel plates that are used in construction equipment buckets, mining equipment wear-plates, etc. Structural Material Manager’s support for the special AR prefix allows you to easily specify this grade.
If a Grade field is entered without the optional letter in front of it, an "A" will automatically be assumed for nearly all steel grades. This is done in an effort to reduce typing time. So, if 572 is entered as a steel grade, it will automatically become A572 without any need for typing the "A." Exceptions to this involve numeric grades that correspond to aluminum (6061, 6063, etc.) and stainless steel (303, 304, etc.), as no letter will be automatically added for those metals. Thus, if 6015 is entered, it will not become A6015. Likewise, an entry of 316 will not become A316. The final exception is grade 400 steel; since that grade is usually meant as abrasion-resistant AR400, entering 400 will not result in A400. You can rely on automatic prefixing of "A" for all grades not covered by these aluminum, stainless and abrasion-resistant exceptions.
As mentioned earlier, in addition to the optional grade prefix you may also specify an optional grade suffix. Up to 10 characters - whether they are letters, digits, symbols or any mix thereof - can be added after the numeric grade. This facilitates, for example, entry of the 44W and 50W grades frequently encountered by Canadian users. A500B is a common HSS and Tube grade, and A53B is frequently encountered as a Pipe grade. Also, structural bolts are often designated as A325-N or A325N, and either format makes use of the optional suffix: -N in the first example or simply N in the second. Grade A572 is often designated as A572 GR50, A572-GR50, A572-50, etc. 304L is sometimes specified instead of 304 since 304L is low-carbon and can be more easily welded. All of these examples illustrate the importance of grade suffixes.
All letters used as prefixes and suffixes in the Material Grade field are assumed to be upper-case (A, B, C, etc.). If the prefix or suffix is entered in lower-case (a, b, c, etc.), it will automatically be converted to upper-case.
Maintain consistency when using optional grade prefixes and suffixes. Don’t designate one stainless item as S304 and another as simply 304, otherwise Structural Material Manager will treat them as “apples and oranges” by not combining them on the sorted report, not nesting them together on the nested report, etc. Likewise, use A325-N or simply A325N, but don’t use both.
One grade is different than all others in that no numeric portion is needed. Grade CQ is accepted by Structural Material Manager to simply mean “Commercial Quality” without specifying any certain grade number. It is implied that CQ items are steel rather than aluminum or stainless.
Let's put this grade information to use in entering our next sample item, 12 Plates, 3/8 x 9 3/16 x 2'-0 3/4, Grade A588. Click Plate or hit Alt-P to specify that a new Plate will be entered. A minor Piece Mark is to be specified by typing p4 [Tab]; be sure to use a lower-case “p.” Type 12 [Tab], 3/8 [Tab], 9 3/16 [Tab] and 2-0 3/4 [Tab].
All fields have now been entered except the Grade. This field is currently assumed to be A36, but we need A588. Type A588. Now hit Insert or Alt-O to save the item.
We have just entered a sample Plate. It is worth noting at this point that Section 5-18: Conversion from Plates to Bars and Section 5-19: Conversion from Bars to Plates provide information on switching items back and forth between Plates and Bars.
Section 4-15: Entry of Bar Grating. When entering Bar Grating, the first field for which you are prompted is the bearing bar depth or height. This is the height of the bearing bar as you view the Bar Grating item from the side. The bearing bar width or thickness is the other dimension that describes the bearing bar. There is no need to enter the cross rod or cross bar size, as Structural Material Manager already knows the cross rod or cross bar size from internal “look-up” tables once the bearing bar depth and width are specified. The next field that must be entered for Bar Grating items is the mesh type such as 19-W-4, 15-W-2, etc. that describes how closely bearing bars are placed center-to-center as well as how closely cross rods or cross bars are placed center-to-center. The Bar Grating width must also be specified, and it is the overall width of the item.
Examples of Bar Grating items are 3/4 x 1/8 x 24 19-W-4, 1 x 1/8 x 36 19-W-2, 1 1/4 x 3/16 x 24 19-W-4, etc. These examples illustrate the bearing bar dimensions, overall width and mesh type described above.
The bar grating mesh type is displayed on the entry screen and material printouts only if there is enough room for it to be shown. This compromise is necessary because the bearing bar size, overall Bar Grating width and the mesh type together make for an extremely long description. In most cases, there is room to display the mesh type. However, if the Bar Grating description is too long to permit this, the mesh type is considered to be of the lowest priority and will not be shown. The bearing bar size and the Bar Grating overall width are always displayed.
Structural Material Manager considers any Bar Grating with a 1/4" or thicker bearing bar to be heavy-duty grating. Mesh types such as 19-H-4, 15-H-2, etc. where the H means “heavy” can be used for such items. This is completely optional so that you can specify heavy-duty grating either using “normal” mesh types such as 19-W-4 or the heavy-duty specification such as 19-H-4. Both designations are frequently seen in industry, and item weights, surface areas, etc. are unaffected by your choice of the W or H designation. You should, however, remain consistent within a given project since Structural Material Manager’s sorting and nesting modules will, for example, separately list 3 x 3/8 x 24 19-W-4 and 3 x 3/8 x 24 19-H-4 grating items that occur on the same job.
Light-duty Bar Grating is defined as grating with 3/16" or thinner bearing bars. The H designation is never accepted for such items. Accordingly, 3/4 x 1/8 x 24 19-W-4 is perfectly valid whereas 3/4 x 1/8 x 24 19-H-4 is not.
The dashes that are commonly seen in mesh types such as 19-W-4, 15-W-2, etc. are removed by Structural Material Manager in the interest of conserving space. So, 19-W-4 appears in this system as 19W4.
Let’s now actually enter a sample Bar Grating item, 1 1/4" x 1/8" x 24" x 10'-0 with mesh-type 19-W-4 and quantity 1. Select Bar Grating by clicking that material type button or by hitting Alt-G (where the shortcut “G” stands for Grating). Type BG1 [Tab] using capital letters to enter this Piece Mark as a major mark. Next, type 1 [Tab] for the Quantity field, 1 1/4 [Tab] as the bearing bar depth or height, 1/8 [Tab] as the bearing bar width or thickness. Using either the mouse or keyboard, choose 19W4 from the drop-down Mesh Type list, and hit Tab to move into the Width field. Type 24 [Tab] for the overall width. Now type 10 as the item length. Finally, hit Insert or Alt-O to add this item to the list.
Section 4-16: Gauge Thicknesses (demonstrates Bar entry). Most thickness dimensions entered into Structural Material Manager are in inches. A thickness of 3/4", for instance, would be entered as simply 3/4. However, gauge thicknesses are also valid for Plates, Checkered Plates, Bars and Tubes.
We will now enter a Bar with a gauge thickness. The next item in the sample material list is 8 Bars, 6" x 12 GA x 2'-10 1/2. Click on the Bar button or hit Alt-B to select this material type. No Piece Mark needs entered, so hit Tab to leave that field blank. Now type 8 [Tab] as the Quantity field.
Now for a small point of confusion: the system is now asking for the Bar Width, not the Thickness field as some of you might expect. Actually, standard American Institute of Steel Construction (A.I.S.C.) Bar nomenclature uses a Bar format of Width x Thickness, but even many steel catalogs list dimensions as Thickness x Width. We have chosen to follow the A.I.S.C. designation here, so some of you may have to adjust to entering Bars in this format. Type 6 [Tab] as the Width.
Now we will enter the gauge value. Type 12G [Tab]. Note that the "G" lets the system know that you mean 12 Gauge rather than 12 inches.
Type 2-10 ½ as the length, and hit Insert or Alt-O to add the item to the material list.
It is critical that you enter an item as a Bar if you intend it to be a Bar and as a Plate if you intend it to be a Plate. The system allows you to edit all item fields within an item, but an item's material type cannot be changed once the item is entered (Chapter 5 presents details of editing and deleting items). So, if you enter a list of material as Plate and later decide that it should be designated instead as Bar, then it is not possible to change the type of each item from Plate to Bar. In this example scenario, each Plate item would have to be deleted and re-entered as Bar. It may seem of little consequence whether an item is considered to be a Plate or a Bar, but the Nesting Module makes an important distinction: Bars are lineal items to be cut from stock lengths and Plates are square or rectangular items to be cut from stock sheets. Chapter 10 describes the Nesting Module in detail, but all you need to know for now is that Plates and Bars, which intuitively seem fairly similar, are "apples and oranges" as far as the Nesting Module is concerned.
Note that Bar widths of up to 24" are acceptable. Any item over 24" wide should be entered as Plate.
If you ever need to convert one or more items back and forth between Plates and Bars, refer to the information presented in Section 5-18: Conversion from Plates to Bars and Section 5-19: Conversion from Bars to Plates.
Section 4-17: Entry of Square and Rectangular Tubes. The entry format for Square and Rectangular Tubes is identical to that of Angles except the first two description fields are referred to as Faces rather than Legs.
Type “TS” is used to designate Square and Rectangular Tubes as opposed to type “TR” which you will soon learn refers to Round Tubes.
Let's enter the next item from the sample material list, 5 Square Tubes, 3 ½ x 3 ½ x 5/16 x 6'-0. Either hit Alt-T or click the Sq./Rect. Tube button, and skip over the Piece Mark field by hitting Tab. Type 5 [Tab], 3 ½ [Tab], 3 ½ [Tab], 5/16 [Tab] and 6. Hit Insert or Alt-O to finish the entry.
Just as the case with Angles with unequal Legs, Tubes with unequal Faces should list the larger Face first. For instance, TS 6 x 4 x ½ is proper whereas TS 4 x 6 x ½ is not. Structural Material Manager will automatically switch the order for you if you accidentally specify the smaller Face first.
Section 4-18: Entry of Square and Rectangular HSS. Structural tubes are often referred to as HSS, which stands for Hollow Structural Sections. HSS is available in square, rectangular and round sizes. It is Square and Rectangular HSS with which we are concerned here, as Round HSS is covered in a separate section.
Square and Rectangular HSS is designated as Face A x Face B x Wall Thickness. HSS 3 ½ x 2 ½ x 1/8 is one example. American Institute of Steel Construction (A.I.S.C.) standard practice dictates that fractional dimensions are to be used, thus the HSS 3 ½ x 2 ½ x 1/8 designation instead of HSS 3.500 x 2.500 x 0.125.
When A.I.S.C. began specifying Square and Rectangular Tube (type TS) under the newer Square and Rectangular HSS designation, there was no actual change to the physical items. The switch from TS to HSS was in name only. Thus, HSS 4 x 4 x ½ is the exact same item as TS 4 x 4 x ½.
Despite the fact that the switch from TS to HSS is only a nomenclature change, A.I.S.C.'s printed Steel Construction Manual - formerly known as the Manual of Steel Construction - at one time listed lower HSS item weights than were previously published for the very same TS items. That situation existed up to and including the 13th edition of A.I.S.C.’s tables, but it was fortunately corrected with the release of the 14th edition tables. Published HSS item weights now match their TS counterparts exactly, and Structural Material Manager bases all HSS weights on the updated tables. Please refer to Section 14-5: Square and Rectangular HSS Weights for a complete discussion of this issue.
Whereas relatively new to U.S. market which is governed by A.I.S.C., the Canadian market - overseen by the Canadian Institute of Steel Construction (C.I.S.C.) - has used the HSS designation for many years. HSS is often specified in a metric format in Canada, but the metric designations really correspond to Imperial items. It is the Imperial designations that must be used to enter the items into Structural Material Manager, so be sure to specify inches and fractions rather than millimeters.
It is important to note that decimal representations of inches must be avoided when entering Canadian Square and Rectangular HSS. For instance, a metric rectangular HSS item of 254 x 152 x 11 is listed in the Canadian Institute of Steel Construction handbook as corresponding to Imperial size 10 x 6 x 0.438. This would be entered as 10 x 6 x 7/16 with 7/16 replacing the handbook’s 0.438 value.
There is no need to enter a sample material list item for Square and Rectangular HSS, as such items are entered almost exactly as the TS items covered in the previous section. For instance, a sample line of 5 Square Tubes, 3 ½ x 3 ½ x 5/16 x 6'-0, was entered in Section 4-17. If that TS item is to be specified as HSS instead, you simply enter 5 Square HSS, 3 ½ x 3 ½ x 5/16 x 6'-0 in the exact same way except you begin by clicking the Sq./Rect. HSS button rather than Sq./Rect. Tube. You could also hit Alt-H to instantly click the Sq./Rect. HSS button without need for using the mouse.
Note that all Square Rectangular HSS sizes can be alternately entered as TS if you wish, but not every TS can be represented as HSS. For example, HSS 5 x 4 x 3/8 can also be entered as TS 5 x 4 x 3/8; the two designations represent the exact same item. TS 1 x 1 x 1/8, however, cannot be expressed as HSS 1 x 1 x 1/8 since the 1 x 1 x 1/8 size exists only as TS without a corresponding HSS designation.
In Structural Material Manager’s Material List menu, you will find “Convert TS to HSS” and “Convert HSS to TS” functions. These functions are useful when a detailer has specified the square and rectangular tube items one way, but the fabricator wants to change to the other designation. They are also helpful when a job uses one designation whereas the in-house inventory file against which you want to nest uses the other one, as TS items will not nest into HSS stocks nor will HSS items nest into TS stocks. When going from TS to HSS, there is an option to limit the conversion to only those TS sizes that truly exist as HSS (see information in the preceding paragraph). When converting from HSS to TS, the conversion is always valid, and no such option is needed.
Section 4-19: Entry of Round Tubes. Round Tubes have descriptions that consist of an outside diameter and a wall thickness, and the material type is designated as type “TR.”
What is special about Round Tubes in contrast to other material types supported by Structural Material Manager is that decimal diameters and decimal wall thicknesses can be specified. Also, many fractions can be entered in 32nds, whereas 16ths are the smallest fractional increments supported for other material types. These deviations are necessary because of the various ways Round Tube dimensions are commonly specified: decimal inches, gauge sizes and fractions containing 32nds, all in addition to the usual fractions involving 16ths that are commonly used in designating other material types.
Three examples of Round Tube sizes are 1 x 15GA, 2 x 0.244 and 7.99 x 1/4. Note in these examples that the outside diameter and wall thickness don’t necessarily have to use the same type of designation, even within a single item’s description. For instance, the outside diameter might be specified with fractions while the wall thickness uses a decimal value, or vice-versa.
Our next line in the sample material list consists of 2 Round Tubes, 1 3/4 Diameter, 0.341 wall X 3'-0. Select Round Tubes by clicking that material type’s button, and skip the Piece Mark field by hitting Tab. Type 2 [Tab] as the quantity. The description is specified by typing 1 3/4 [Tab] and .341 [Tab]. Simply type 3 for the Length field, and hit Insert or Alt-O.
Section 4-20: Entry Round HSS. The Round Hollow Structural Section - or Round HSS for short - was specified Canada for many years before the same designation was introduced by the American Institute of Steel Construction (A.I.S.C.) for use in the United States. This Round HSS material type is now quite common in both countries.
A Round HSS item is specified as an outside diameter followed by a wall thickness. Although items of the Round Tube (TR) type presented in the previous section are also designated by diameter and wall dimensions, it is important to note that Round HSS sizes are not necessarily the same as TR Sizes. Contrast this with the case of Square and Rectangular HSS in which the HSS items are nothing more than Square and Rectangular TS under a new name. Such correspondence does not occur between Round HSS and TR, as Round HSS is an entirely new material type. Any overlap between existing Round Tube sizes is purely coincidental.
When A.I.S.C. introduced Round HSS, Pipe was still commonly specified for structural work. Today, however, Pipe is sometimes forbidden on structural jobs due to its A53 grade designation, and HSS - usually in one of the A500 structural grades - must be used instead. Since many structural designs are based on Pipe sizes which originally had no equivalent HSS sizes, tube manufacturers are now producing A500 HSS items in the same sizes that were traditionally available as A53 Pipe. At first glance the new HSS sizes might not appear to be the same as the usual Pipe sizes, but closer examination shows that they are indeed the same. The confusion arises from nomenclature issues in which Pipe sizes less than 12" don't match up with their true Outside Diameter (O.D.) dimensions, but Round HSS is always specified by true O.D. values. For instance, 1 1/4" Pipe corresponds not to 1.250" HSS but, rather, 1.660" HSS. A 1 1/4" Sch. 40 Pipe in grade A53 matches up with HSS 1.660 x 0.140 in grade A500 when a structural item is needed. Similarly, a 1 1/4" Sch. 80 Pipe in grade A53 could be replaced by structural member HSS 1.660 x 0.191 in grade A500. Since A.I.S.C.'s tables do not currently list all of the available Pipe-size HSS items, Structural Material Manager has implemented them using data supplied by tubing manufacturers.
A.I.S.C.’s standard practice dictates that Round HSS is specified using decimal numbers to (3) places. For example, HSS 5.563 x 0.258 indicates Round HSS with an outside diameter of 5.563" and a wall thickness of 0.258". A leading zero is always to be used if a value is less than 1.000, thus the 0.258 thickness designation rather than simply .258 in the HSS 5.563 x 0.258 example.
Although Structural Material Manager always reports Round HSS to (3) decimal places with a leading zero when necessary, it does not require you to enter any insignificant zeroes. For instance, you can enter HSS 7.500 x 0.250 very conveniently as HSS 7.5 x .25, and the system will properly expand the designation to HSS 7.500 x 0.250 on the display screen and all printed reports.
By industry-standard practice, printed bills of material typically do not place the adjectives Round, Square and Rectangular before HSS. Instead, HSS is usually all that is displayed. That means that one basic designation - HSS - is used to refer to two very different varieties of items: round versus square/rectangular. The fact that decimals are used for Round HSS sizes helps to visually distinguish those items from Square and Rectangular HSS, as the Square and Rectangular HSS type uses fractions instead of decimals. For instance, when you see HSS 3.50 x 0.250, the decimals immediately clue you in to the fact that it is a Round HSS item. On the other hand, the presence of fractions in designations such as HSS 4 ½ x 4 ½ x 1/4 and 2 ½ x 2 x 3/16 instantly lets you know that these are Square and Rectangular HSS items. If it were not for the visual cues provided by decimal versus fractional representations, you’d be forced to count description fields knowing that HSS with a pair of description fields (Diameter x Wall) represents Round HSS, and HSS with a description field trio (Face A x Face B x Wall) is Square and Rectangular HSS.
No sample material list item representing Round HSS needs entered here, as such entries are made quite easily. After clicking the Round HSS button, simply specify the desired outside diameter, wall thickness and other item properties at the Enter/Edit Round HSS dialog.
Section 4-21: Entry of Rods. Rod entry is very simple because there is one only description field needed: the Diameter field.
We'll now enter 5 Rods, 1 1/2" Diameter x 3'-0. Click the Rod button, or hit Alt-R. Skip over the Piece Mark with a single hit of the Tab key. Now type 5 [Tab], 1 ½ [Tab] and 3. Hit Insert or Alt-O, and the item will be added to the material list.
Section 4-22: Entry of Rebar. Non-typists will enjoy entering Rebar since it requires very little keyboard work. This is because there is only one description field, the Diameter, and since this field only has 12 possible sizes, the system can simply list them and have you select the size you want.
Consider the next example item of 3 Rebars, #3 x 2'-0. Click the Rebar button, hit Tab to skip over the Piece Mark field, and type 3 [Tab] for the Quantity field. The possible sizes are loaded into a drop-down box; "#3" is needed, so this size can be chosen with the mouse or keyboard. Tab into the Length field, and type 2. Hit Insert or Alt-O to finish the entry.
Section 4-23: Entry of Pipes. Pipe descriptions consist of a Diameter and a Strength. The Diameter is entered in inches, and the strength is easily selected by simply selecting the proper one from a list.
We will now enter 3 Pipes, 4" Schedule 40, 6'-0. Start by clicking the Pipe button or by hitting Alt-i. Note that this keyboard shortcut of Alt-i is one that does not start with the first letter of the word Pipe but, rather, the second letter. After using Tab to move past the Piece Mark field, type 3 [Tab] and 4 [Tab].
The system now lists available Pipe Strengths. You'll notice the first three "Std.", "XS" and "XXS" are different from the others; they represent "STANDARD", "EXTRA-STRONG" and "DOUBLE-EXTRA-STRONG", respectively. The remaining strengths are Schedules, such as 40 and 80. Schedule 40 is needed here, so select it with the mouse or keyboard.
Tab into the Length field, and type 6 before hitting Insert or Alt-O.
Section 4-24: Entry of Bolts. Bolts are very simple to enter in much the same format as Rebar: there's only one description field and it can be quickly selected from a list.
Let's add 18 Bolts, 7/8" Diameter A307, 0'-2 ½ to the material list. Click the Shop Bolt button, and hit Tab to skip over the Piece Mark. Type 18 [Tab] as the Quantity field.
The Bolt Diameter of 7/8 can now be selected with the mouse or keyboard. Hit Tab after selecting the proper size. Now type -2 ½ noting that no leading "0" is needed to indicate that there are no feet in this length. Hit Insert or Alt-O to finish the Bolt entry.
Section 4-25: Entry of Miscellaneous Items. Miscellaneous Items are essentially a catch-all material type for items that are not directly supported by the system, such as Guy Wire, Crane Rail, etc. These items are just like any others, except they have a "free-style" Description field and do not have a Remarks field.
The next example in the sample material list is 2 Crane Rails, 39'-0, 85 pounds per foot. Click the Misc. Item button. Hit Tab to skip past the Piece Mark field, and type 2 [Tab] as the Quantity. Next, type Crane Rails [Tab]. Type the length as 39 and hit Tab. You are now prompted for the weight of this item; respond with 3315, which is 39'-0 multiplied by 85 pounds per foot since this example item is assumed to be an 85-pound-per-foot crane rail. Hit Insert or Alt-O to add the Miscellaneous Item to the list.
Note that up to 24 characters may be entered as a Miscellaneous Item Description field. Also, you should be aware of the fact that the Length, Grade and Weight fields are completely optional for these items.
Section 4-26: Entry of Main Members. The Main Member material type is intended for placing shipping headings in a list. These items have Piece Mark, Quantity, Heading and Price fields.
Note that the Piece Mark field must always contain capital letters; no lower-case letters are accepted. This is necessary because of the manner in which the Shipping Lists operate; this is explained in detail in Chapter 8: Production-Control.
Main members are useful for a type of estimating called "Unit Pricing." This type of estimating is described in Chapter 9: The Estimating Module.
We will now enter a sample Main Member of "F1 1 FRAME ASSEMBLY." Click the Main Member button. Next, type F1 [Tab] and 1 [Tab]. Type FRAME ASSEMBLY, and hit Insert or Alt-O to complete the entry.
Section 4-27: Exiting from the Material Entry Screen. There is no real need to exit from the Material Entry Screen, as it basically serves as Structural Material Manager’s main Window now appears. If you wish, however, you can select File | Close to close the current job; this disables the Material Entry Screen until another job is opened.
Section 4-28: Exiting from the System. If you plan to continue in this manual at some other time instead of going directly on to Chapter 5, you may wish to exit from the system. To do this, simply select the Exit item in the File menu.
Chapter 5: Material Entry Fine-points
Section 5-1: Introduction. Chapter 4 presented a lot of basic information to teach you how to enter items into Structural Material Manager. In many cases, there were faster ways the material could have been entered, but we did not want to overwhelm you with the "tricks of the trade" before the basics had been mastered.
This chapter first discusses inserting, editing and deleting items and then goes on to show you many ways to reduce entry time. While some of these concepts may seem trivial in that each may save only one or two keystrokes per entry, this can really add up to a significant time savings with a long material list.
We’ll assume here that you have Structural Material Manager up and running, have re-opened the sample job as discussed in Section 4-3: Opening and Closing Jobs.
Section 5-2: Inserting Items in the List. All items entered up to this point have been added to the end of the list. It is also possible to insert new items in the middle of the list rather than just add them to the end.
To the left of the various material type buttons, the Material Entry Screen shows a list of (3) radio buttons that provide these options:
• Insert above currently-selected item(s)
• Insert below currently-selected item(s)
• Add to end of list
Since any new item is always added relative to the current selection, you must be able to move the list up and down to make that selection and thus change the point in the list where the item will be inserted. The up-arrow, down-arrow, PAGE UP, PAGE DOWN, HOME and END keys all move the list. Here is a summary of their actions:
Key |
Action |
Up-Arrow |
Moves one item closer to the first item in the list. |
Down-Arrow |
Moves one item closer to the last item in the list. |
Page Up |
Moves one screen closer to the first item in the list. |
Page Down |
Moves one screen closer to the last item in the list. |
Home |
Jumps instantly to the beginning of the list. |
End |
Jumps instantly to the end of the list. |
Experiment with these six keys at this time to get a feel for the types of list movements they cause.
Let's insert 1 W Shape, 12 x 58 x 10'-0 as the second item in the list; that is, we only want one item to be above it. Before we insert the item, the list must be properly positioned. First, focus the list as per the discussion above; just click the mouse somewhere in the list. Once the list has input focus, one way to get to the second item position is to click HOME and then the hit down-arrow. Now you'll notice that the 2nd material item is highlighted; it is the selected item relative to which list additions will be positioned.
For purposes of this example, click the radio button corresponding to “Insert above currently-selected item(s).”
Select the W Shapes for entry by clicking the W Shape button or hitting Alt-W. Skip the Piece Mark field with the Tab key, and type 1 [Tab], 12 [Tab], 58 [Tab], 10. Hit Insert or Alt-O, and notice that the item has been inserted as the second one in the list.
Astute readers may have noticed that a slightly faster technique could have been used to make the new item become the 2nd one in the list, and we’ll use it now in entering 5 Channels, 10 x 30 x 10'-9 7/16. Focus the list with a single click, and hit Home as we did before. This time, however, do not bother hitting the down arrow; just leave the 1st item selected. Click the radio button corresponding for the “Insert below currently-selected item(s)” option. Select the Channels for entry by clicking the C Shape button or hitting Atl-C. Skip over the Piece Mark field by hitting Tab, and type 5 [Tab], 10 [Tab] and 30 [Tab]. Type 10-9 7/16, and hit Insert or Alt-O to add the Channel to the list. Note that it has become the 2nd item in the list.
For purposes of the sample material list being entered over the course of Chapter 4 and Chapter 5, please click the “Add to end of list” radio button at this time. That will cancel the “Insert above currently-selected item(s)” setting we just used and guarantee that further sample items will be added at the bottom of the material list.
One final word is in order concerning your ability to insert above the current selection, below the current selection, or at the end of the list. Inserting at the end of the list is intuitive; you always know where the item will be added. When there is only one selected item, inserting above the current selection and inserting below it are also intuitive. However, what if multiple items are selected, and you are inserting above or below the current selection? Where will the new item be inserted? Here’s how this works: if you are inserting above the current selection, the new item will be placed above the topmost item in the current selection. When inserting below the current selection, the new item gets inserted below the bottommost item in the current selection. So, if you stop and think about, even these cases really are intuitive.
Section 5-3: Editing Items. Structural Material Manager allows you to easily edit items without retyping them. Let's edit one of the sample material list items that was previously entered: 5 Rods, 1 1/2" Diameter x 3'-0. The Quantity field will be changed from 5 to 6.
Perhaps the quickest way to bring up an item for editing is to double-click it in the material list. The material line is which we are interested is 5 Rods, 1 1/2" Diameter x 3'-0. Double-click the line at this time.
Notice that the edit dialog is exactly like the dialog at which new items are added to the list with one important exception: the data fields already contain the information for the item that is being edited.
Double-click the Quantity field. The double-click instantly selects the 5 contained in that field, so as you type 6 as the new value, the 5 is replaced. Hit Insert or Alt-O to save your changes to this item.
As mentioned, double-clicking an item is probably the easiest way to edit it. However, other techniques can also be used. You could right-click the desired item and then select Edit Selected Item from the pop-up menu that appears. Another way is to select the item and then click the Edit Selected Item button at the lower left corner of the Material Entry Screen. The final method is to select the item, and hit the F2 function key; the F2 key is provided for veteran Structural Material Manager users who are used to that keystroke from earlier editions of the software, but even new users might adopt its use in the interest of efficiency.
Since this is the first time that a function key such as F2 has been mentioned, we’ll take a quick aside for owners of certain Toshiba laptops. Unfortunately, some Toshiba laptops have what Toshiba calls "Special Function Mode" set by default. Under that mode, you'd have to press the FN key and then F2 in order to activate Structural Material Manager's "Edit Selected Item" function. This is unacceptable to most users, as a simple press of F2 (the normal PC behavior) should be all that is needed. If your Toshiba laptop has Special Function Mode as its default, resetting to standard function key behavior can be easily done by visiting http://www.ejeindustries.com/support/ToshibaFunctionKeys.html and following the simple steps presented there.
Structural Material Manager supports the concept of multiple selections in that more than one material list item can be selected at once, even if those items are not adjacent in the list. While this powerful feature is useful for operations covered later in this chapter, such as copying multiple items to the clipboard or deleting more than one item at a time, it does not help with editing. You can only edit one item at a time. Double-clicking a multiple selection to invoke the edit mode makes that selection revert to a single-item selection, and only the item immediately beneath the mouse pointer is edited. If you right-click a multiple selection, you’ll notice that the “Edit Selected Item” option is disabled in the pop-up menu.
There is no way to edit an item’s material type. That is “fixed” at the time the item is added to the material list and cannot be changed later. Supposing you want to change a Plate to a Bar, for example, you would add a new Bar entry and then delete the original Plate item. Item deletions are covered in the next section.
Section 5-4: Deleting Items. You will sometimes need to delete items from the material list. We will now delete the item 5 C Shapes, 10 x 30 x 10'-9 7/16. One way to delete it is to locate it in the material list, click it once with the mouse to select it, right click it with the mouse, and select the Delete Selected Item(s) option in the pop-up menu. You are of course asked for confirmation before any items are deleted.
A pop-up menu was used in the preceding paragraph to select the Delete option, and that is a fairly efficient way to get the job done since you can select the item with the mouse and then immediately right-click the item while still holding the mouse. However, there are other ways to delete items assuming you’ve already made the selection. For instance, you can simply hit Delete on the keyboard. Another way is to click Structural Material Manager’s Delete Selected Item(s) button which is located at the lower left corner of the Material Entry Screen. Hitting the F3 key also deletes items; this is a throwback to earlier Structural Material Manager versions and is still supported since literally thousands of Structural Material Manager users have grown accustomed to that keystroke over the years.
Although the entry screen allows you to edit only one item at a time, multiple deletions can be performed simultaneously. Since true multiple selections are supported - not just simple "range" selections in which all the selected lines are contiguous - you can select perhaps the 5th, 11th and 99th items and then delete them all from the list at once.
Perhaps not all Windows users know how to make multiple selections. While the subject of making multiple selections under Windows is not directly related to deleting items, this knowledge will certainly help you efficiently delete them.
Multiple selections involve the concepts of Shift-clicking and Ctrl-clicking. What this means is that you make an initial selection with the keyboard or mouse, press and hold either Shift or Ctrl, and continue selecting items. Shift or Ctrl is released when you are done making the selection. Shift-clicking is used to select a continuous range of items, and Ctrl-clicking allows you to select multiple, non-contiguous items.
Note that Ctrl-clicking an item toggles its selected state. That is, if the item is already selected, and you Ctrl-click it, it will now be deselected. The reverse is also true. So, Ctrl-clicking is a very powerful technique when making multiple selections.
Suppose you want to delete the majority of items in a list. It probably makes the most sense to first select the entire list, and later deselect certain items. There are several ways to select all items in the list. After clicking with the mouse anywhere in the material list to give the list “input focus,” you can hit Ctrl-A to select all items. Another way is to right-click anywhere in the list, and choose the Select All Items item in the pop-up menu. Yet another way is to click Structural Material Manager’s Select All Items button located just above the material list. Regardless of how you select the entire list, you can then use the technique of Ctrl-clicking to deselect certain items that are to remain in the material list. Invoke the “Delete Selected Item(s)” function using the method of your choice when you are done making the selection.
If you are not familiar with the concepts of Shift-clicking and Ctrl-clicking, go ahead and experiment with any Structural Material Manager material list. Of course you don’t need to actually carry out the deletion of the items, but try some different selections.
See http://www.ejeindustries.com/video/multipleselections for a video that demonstrates the concept of multiple selections under Windows.
Section 5-5: Repeatedly Entering Items of the Same Type. Any time you enter an item of a certain material type, that material type’s button becomes “focused.” That means that you can simply hit Enter to add another item of that type to the list. There is no need to click the material type’s button to use it successively.
For example, suppose you are entering a list solely containing Angles without any other material types. Click the Angle button or hit Alt-L to bring up the Add New Angle dialog. After you add that first Angle to the list, the Angle button has the input focus by default, and hitting Enter immediately brings up the Add New Angle dialog again. After each Angle is added, just hit Enter again to bring up the dialog for the next one.
This tip leads to a small time savings per item, and it can really add up over the course of a long material list comprised mostly of one material type. Given a list of mixed types, it is not beneficial.
Section 5-6: Cut, Copy and Paste Operations with the Clipboard. Clipboard operations for Cut, Copy and Paste are available. These functions are not intended for transferring data from other applications such as word processors and spreadsheets to Structural Material Manager. Rather, they are used for manipulating material lines within a Structural Material Manager job or even between different jobs.
In order to make full use of cut, copy and paste operations, you need to understand how multiple selections work under Windows. That info was presented as an aside in a previous section on deleting items.
Let’s discuss the Copy to Clipboard function first. With some items selected in the material list, you can click the Copy Selected Item(s) to Clipboard button, right-click the selection and click the Copy Selected Item(s) to Clipboard pop-up menu item, or simply hit Ctrl-C. Any of these methods will achieve the same result, and you can then paste the clipboard item(s) into the list.
Cutting can be done with the Ctrl-X shortcut, by clicking the Cut Selected Item(s) to Clipboard button or by right-clicking the list and choosing Cut Selected Item(s) to Clipboard in the pop-up menu. Cutting to the clipboard differs from copying to it in that the items are deleted from the material list as they are cut from it.
Since cutting deletes items, this of course leads to the possibility of items being lost if you cut them and forget to paste them back into the list, but Structural Material Manager goes to great lengths to protect you against such a mistake. The system knows when the clipboard contains cut items that have not yet been pasted back into the material list. If such cut items are on the clipboard, you will be warned before doing any further cut or copy operations, as each time you cut or copy items to the clipboard, the existing clipboard contents are replaced by the new item(s). The warning dialog will protect you not only in this case but also if you try to exit Structural Material Manager while cut items that have not yet been pasted are still on the clipboard.
Pasting is done by clicking the Paste Clipboard at Insertion Point button, or you can use the Ctrl-V key combination. It is important to click the radio button corresponding to “Insert above currently-selected item(s),” “Insert below currently-selected item(s),” or “Add to end of list” before you paste the items, as those radio buttons determine where in the material list the items will be pasted.
When a single item is on the clipboard, a Paste operation always brings up the usual Add New Item dialog. That dialog appears with the item fields pre-loaded with the values from the clipboard item. In this way, you can make changes to one or more of the fields if you care to, or simply hit Insert or Alt-O to quickly paste the item into the list as-is.
If two or more items are on the clipboard, Structural Material Manager will ask whether you want to review each one before it is pasted (i.e., paste them one at a time) or if you prefer to automatically paste all of the items into the list without review.
A paste operation does not clear the contents of the clipboard. Once items are on the clipboard, they can be pasted as many times as you like without having to re-cut or re-copy them to the clipboard. The items will remain on the clipboard until some other items are cut or copied to it or until you exit Structural Material Manager.
The clipboard contents are lost when you exit the Structural Material Manager program but not when you simply close a job or open a new one. The fact that Structural Material Manager maintains the item clipboard between jobs can be very useful. For instance, suppose you open a job and cut or copy the 3rd, 9th and 12th material line to the clipboard; you can then paste those lines somewhere within that job or open a different job into which the items can be pasted.
Section 5-7: Using the Copy to Clipboard Feature for Repetitive Lists. An earlier section discussed the situation of repeatedly entering items of the same type (perhaps all W Shapes). This section concerns lists that have a lot of items that are basically identical but have different Quantity and/or Length fields; not only are they of the same material type, but their descriptions and most other fields remain consistent.
The “Copy to Clipboard” feature presented in the last section elegantly handles this case, as it allows you to make the last item entered serve as a starting point for the next item to be entered. This means you only need to edit the field or fields that is/are different in each subsequent item instead of constantly retyping the entire item.
Let’s assume that 6 Channels, 10 x 30 x 8'-9 3/4, Piece Mark "1C1" was the last item entered and that a lot of similar C 10 x 30 items are being entered. Click the 6 Channels, 10 x 30 x 8'-9 3/4, Piece Mark "1C1" item once to select it. Now, click the Copy Selected Item(s) to Clipboard button. Click Paste at Insertion Point, and the Add New C Shape dialog comes up with the data fields pre-loaded for the copied Channel. Delete the 1C1 Piece Mark, hit Tab to get into the Quantity field, and type 19 [Tab]. Hit Tab twice more to move the Length field, and type 6-8 7/16 before hitting Insert or Alt-O. Notice that the item has been added to the list as a slightly modified copy of the previous one.
We’ll stop there after adding one slightly modified copy of the item. However, we could just as easily keep pasting more copies since the original item remains on the clipboard even after it - or a modified copy of it - has been pasted into the list.
We just used the Copy to Clipboard feature to get a copy of the last item entered. Of course, the same technique applies not only to the last-entered item but for items that were previously inserted anywhere in the list. For instance, 1 W Shape, 12 x 58 x 10'-0 is an item that was entered earlier in the sample material list. Find that item in the list, and click it once to select it. Click Copy Selected Item(s) to Clipboard, and then click Paste at Insertion Point. Immediately hit Insert or Alt-O to accept this new item as-is, and we have another copy of 1 W Shape, 12 x 58 x 10'-0 in the list. Although we chose to make an identical copy of the item in this example, keep in mind that you could easily make changes to the item before inserting it as was done in the previous example.
Section 5-8: Copying Items by Piece Mark to Clipboard. While the Copy Selected Item(s) to Clipboard function is useful when you need a copy of an item that you can easily locate in the material list, Copy by Piece Mark to Clipboard is better suited to cases where you need a copy of an item with a certain piece mark.
Let's now try this feature. One way to do so is to click the Copy by Piece Mark button which is located in the Clipboard Operations group of buttons. Another way is to right-click the material list and then select the Copy by Piece Mark to Clipboard option that appears in the pop-up menu. Users who are familiar with the classic keystrokes of older Structural Material Manager systems will glad to know that the F6 key can also be used as a shortcut to the Copy by Piece Mark function.
Regardless of which way you chose to invoke the Copy by Piece Mark function, you are prompted to enter a piece mark. Type a4 which is the piece mark of one of the items in our sample material list. Hit Enter or click the Ok button, and the system immediately copies the a4 item to the clipboard. A confirmation message that item a4 is now available on the clipboard appears; hit Enter or click the Ok button to clear the message. Next, click Paste at Insertion Point, and the Add New Item dialog appears with all of the a4 item’s fields pre-loaded. The information from that item can then be changed or used as-is. We will change the Quantity field from 24 to 1 before inserting the copied item in the list, so hit Tab once to move from the Piece Mark field to the Quantity field. Type 1, and hit Insert or Alt-O to accept the item.
In cases where the same mark appears more than once in a list, this feature will retrieve the occurrence of the Piece Mark that is closest to the top of the material list (in other words, the first one found).
Blank search marks are not permitted. If a blank search mark is specified, the system will simply ask you to enter the mark again.
Section 5-9: Quickly Selecting Items in a Drop-Down List. Structural Material Manager allows you to simply select information from a drop-down list when feasible. This applies when specifying:
• Rebar Sizes
• Pipe Strengths
• Bar Grating Mesh Types
• Bolt Diameters
• Price Units
Many users will undoubtedly use the mouse to make selections in such drop-down lists. However, reaching for the mouse interrupts typing and wastes a lot of time. Structural Material Manager has thus been carefully designed so that typists who prefer to use the mouse only when necessary can quickly make drop-down list selections using the keyboard.
The idea is to use the Tab key to move into the drop-down list from the entry field before it, make your list selection with the up- and down-arrows, and hit Tab to move out of the drop-down list and into the next field. This eliminates times that would have been wasted in switching between the keyboard and mouse!
The next item that will be entered from the sample material list is 2 Rebars, #7 x 3'-4. Go ahead and select the Rebar type for entry by clicking the Rebar button. Skip the Piece Mark field by hitting Tab, and type 2 [Tab].
Here you are faced with a drop-down list for quick entry. Experiment with the up- and down-arrow keys to see what happens, but don’t reach for the mouse. Use the arrow keys to scroll to 7, and hit Tab to move to the Length field.
Type 3-4 as the Length field, and hit Insert or Alt-O to save the item.
Section 5-10: Quicker Methods of Entering Lengths. There are a several short-cuts that can be taken when entering lengths that will help to save keystrokes.
Either the apostrophe (') or the dash (-) in a length is actually optional. Although both of these characters may be entered, only one is really needed to denote the end of the feet part of a length. You generally will want to use just the dash rather than the apostrophe, as it can be easily hit on the computer's numeric keypad.
Another time-savings occurs when you must enter a whole-number length such as 10'-0. You do not need to type the "'-0" part of that entry; although 10'-0 or 10-0 could be specified, just typing 10 is much quicker.
When a length contains only inches, there is no need to type "0'-" to indicate the absence of feet. For example, a Bolt length of 2 1/2" could be entered as 0'-2 ½ or 0-2 1/2, but -2 ½ is a faster alternative.
Section 5-11: Saving One Keystroke on Each Item. In all item-entry examples, including those presented in the previous chapter, we have hit the Tab key after every item field except the last one. For instance, if a certain sample W Shape requires Piece Mark, Quantity, Depth, Weight and Length fields to be entered, we hit Tab after typing each of the Piece Mark, Quantity, Depth and Weight fields but not after typing the Length.
There is no problem with hitting Tab after the last item field you type, and doing so might almost come naturally as you get into the habit of hitting it after all the preceding fields. However, to do so does waste one keystroke for each item and should be avoided.
Consider the next sample material list item of 2 W Shapes, 10 x 54 x 3'-0. Click the W Shape button, and skip over the Piece Mark field by hitting Tab. Type 2 [Tab], 10 [Tab] and 54 [Tab]. Next, type 3 as the Length field, but do not hit Tab. Just hit Insert or Alt-O, and note that the item is accepted without need for hitting Tab at the last field.
Section 5-12: Changing Default Material Grades. As mentioned in Chapter 4, four sets of possible default grades exist: U.S. defaults, Canadian defaults, Multi-Cert defaults and user-defined defaults. This section explains how the default grade set is changed.
Before proceeding, you may wish to refer back to Chapter 4 briefly. That chapter contains a section that discusses the composition of a legal grade field as well as many technicalities concerning material grades.
The following steps demonstrate the manner in which the default grades are changed:
A) Open a job, and click the Set Default Grades button which is located just above the material list. All material types and their corresponding default grades are instantly listed.
B) Notice the buttons at the right side of the dialog; they are labeled “Load U.S. Defaults,” “Load Canadian Defaults,” and “Load Multi-Cert Defaults.” Clicking any of these buttons will immediately institute the corresponding set of grades.
C) Whereas the buttons described above change the default grades for all material types at once, you are also free to modify the defaults for individual types as well. Simply click on the grade you wish to change, and type the grade that should become the default for this type.
D) When ready to quit changing grades, click Ok. Any changes you have made to the default grades will now apply to this particular job. Even if you exit completely from the system and delay further entry of items for this job until another day, the new defaults will automatically apply to this job.
E) If you did not change any grades, clicking Ok in the previous step would instantly cause the Material Entry Screen to be displayed. If, however, you did make some changes, then you are asked whether these changes should apply system-wide. As already noted, the changes automatically apply to this particular job, but this prompt is asking whether you also want them to apply to all other jobs that do not already have existing customized defaults. If you respond by clicking No, the scope of the changes is limited to only this job. Clicking Yes causes other jobs to receive these changes as well, but only those jobs for which a user has not explicitly made default grade changes in the past. The fact that existing custom defaults will not be overwritten is an important one, as it gives you the freedom to answer "Yes" to this question without fear of destroying defaults that may have previously been painstakingly set up for some other job.
Section 5-13: Repeating the Previous Entry. Some material lists involve line after line of similar items. When entering such lists, Structural Material Manager’s Repeat Previous Entry function should be used. While not effective if the list is somewhat random - say a W Shape followed by a Plate followed by an Angle - the Repeat Previous Entry function can be quite a time saver if the list has perhaps 10 Angles one after another. It causes a new entry to be started, and the previous entry is used as a template for the new one.
The Repeat Previous Entry function can be invoked in any one of (3) ways. The first way is to click the Repeat Previous Entry button; it appears right after the Main Member material type’s button. Another way is to right-click the material list display and then select Repeat Previous Entry from the pop-up menu that appears. The final way is throwback to Structural Material Manager’s earlier days and is provided as a convenience to veteran users familiar with the system’s classic keystrokes: simply hit the F5 key.
Suppose you edit an item. Once the edit is complete, that edited item is the one remembered by the Repeat Previous Entry function.
The Repeat Previous Entry function is of course only available if you have entered or edited at least one item since the Structural Material Manager application was opened. As soon as you have done an entry or edit, the function is enabled, and it stays so until the Structural Material Manager is closed. That is true even if you close the current job and open a new one. As long as Structural Material Manager was not shut down in between closing one job and opening another, the Repeat Previous Entry function will remain available. As you begin working in the new job, the last entry or edit done in the job that was just closed is the one that will be remembered.
The Copy by Piece Mark function is covered elsewhere in this chapter. Copy by Piece Mark uses Structural Material Manager’s internal clipboard and thus affects the clipboard’s contents. In contrast, the Repeat Previous Entry function presented in this section does not rely on the clipboard and does not alter its contents in any way.
Section 5-14: Generating Instant Fractions. Although fractions such as 13/16 can be entered manually, Structural Material Manager actually provides a way to generate any fraction from 1/16 through 15/16 instantly from the function keys. Here is a table of the function keys and their corresponding fractions:
Key Combination |
Instant Fraction |
Shift-F1 |
1/16 |
Shift-F2 |
1/8 |
Shift-F3 |
3/16 |
Shift-F4 |
1/4 |
Shift-F5 |
5/16 |
Shift-F6 |
3/8 |
Shift-F7 |
7/16 |
Shift-F8 |
1/2 |
Shift-F9 |
9/16 |
Shift-F10 |
5/8 |
Shift-F11 |
11/16 |
Shift-F12 |
3/4 |
Ctrl-F3 |
13/16 |
Ctrl-F4 |
7/8 |
Ctrl-F5 |
15/16 |
As you might have noticed, the number of the function key corresponds to the number of 16ths in the fraction. For example, Shift-F3 produces 3/16. This takes a bit of mental conversion when dealing with fractions that are not expressed directly in 16ths, such as ½ which is the same as 8/16 and is thus produced by Shift-F8.
Since PC-compatible computers have 12 function keys rather than 15, there are not enough function keys to cover the full range of fractions from 1/16 through 15/16. Accordingly, fractions larger than 3/4 begin with the Ctrl key instead of the Shift key. Thus, Ctrl-F3 produces 13/16.
Although not shown in the table above, Ctrl-F1 produces 11/16, and Ctrl-F2 produces 3/4. Since these two key combinations duplicate the functionality of Shift-F1 and Shift-F2, respectively, they will probably receive little use. They can be utilized if you wish and are mentioned here for the sake of completeness.
Some PC keyboards have an "F-Lock" key or something similar that must be pressed to keep the F1..F12 keys functioning at all times. If that key is not pressed, it might seem that Structural Material Manager's F-keys are not working when, in fact, the keyboard is temporarily configured to use F1..F12 for other PC functions.
Not only is the fraction itself produced by the instant fraction keys, but a leading space is also generated. That is, pressing Shift-F11 is the really the equivalent of hitting the spacebar followed by 11/16. The leading space is useful in cases in which the fraction follows a whole number, say in 5 3/4, for example. Sticking with that example, you just hit 5 followed by Shift-F12 to produce the entire 5 3/4 value including the space between the 5 and 3/4.
If you are used to thinking of ½ as actually being 8/16, this feature will be a tremendous time-saver and will probably become second-nature to you. If this whole discussion sounds confusing, you can do one of two things: 1) pretend you never read this and don't worry about it, or 2) place a "cheat-sheet" near the function keys to act as a reference as to which key produces which fraction.
Section 5-15: User-Defined Function Keys. This system has a special feature that allows the key-combinations Alt-F1 through Alt-F12 to be defined by the user. Up to 15 characters may be specified for each of these keys. The result is that a large string of letters and/or digits may be entered at once by simply holding down the Alt key and hitting a key from F1 to F12.
The ability to give these normally-blank keys your own custom values can be a great time saver in cases where a material list contains many items with identical fields. For instance, suppose that many items in a given list have the same Remarks field of "Galvanized." This note could be consolidated onto the Alt-F1 key combination; after that, holding down Alt and hitting F1 would produce the entire word "Galvanized."
Whenever a new job is created, the Alt-F1 through Alt-F12 key combinations are blank; they take on values only when the user defines them. Use the following procedure to re-define the Alt-F1 through Alt-F12 key combinations:
A) Open a job, and click the Material List | Define Alt-Function Keys menu items.
B) The User-Defined Function Keys dialog lists key combinations Alt-F1 through Alt-F12 on the in a column on the left and their corresponding values in the right-hand column. If the key combination is currently blank, “(no value assigned)” is listed. You can assign a new value by simply clicking on the existing value with a single click of the mouse and typing the new text. As mentioned earlier, up to 15 characters can be specified.
C) After making all changes, click Ok to close the User-Defined Function Keys dialog. As the dialog closes, the key values are stored internally with the currently-open job’s information. This allows those same values to be automatically loaded the next time the job is opened, thus eliminating any need for redefining the keys every time a previous job is used.
Section 5-16: Decimal Lengths and Widths. The Length field for all items and the Width field for Plates, Checkered Plates, Bar Grating and Bars can optionally be entered using a decimal format. If that is done, rounding to the nearest sixteenth of an inch will be done for English / Imperial jobs, and rounding to the nearest millimeter will occur for metric jobs. See Chapter 16: Inches and Metric Dimension Formats for information concerning the different dimension systems that Structural Material Manager supports.
"4/5" rounding is the traditional rounding scheme with which most of us are familiar, and it is used to round decimal Lengths and Widths. It rounds a digit upward if the number to its left is 5 or higher; the digit is left unchanged if the number to its left is 4 or lower.
Rounding is completely straightforward for metric jobs, as the millimeters simply round to nearest whole number. For example, a Length of 35.6756 rounds to 36 mm in a metric job.
A bit of explanation is in order concerning decimal rounding for jobs that express lengths in feet, inches and fractions or just inches and fractions. The important concept to consider for those jobs is that rounding is done after conversion to sixteenths of an inch, and it is done to the nearest sixteenth. Consider a decimal Length of 35.6756 feet. That converts internally to 6849.7152 sixteenths which then rounds to 6850 sixteenths yielding 35'-8 1/8 as the final length.
That same 35.6756 decimal entry should now be examined as a Length in an inches and fractions job. Here 35.6756 inches equates to 570.8096 sixteenths. The rounded value of 571 sixteenths is then used to arrive at a final Length of 35 11/16".
Decimal support is provided merely as an entry convenience for the Length and Width fields. The decimal entry is not actually stored internally by Structural Material Manager. Only the rounded equivalent is maintained, and it is that value - not the original decimal entry - that will appear both at the material entry screen and on material reports.
Section 5-17: Support for Digital Plan Measures. When estimating steel jobs, you are typically working off of printed drawings and are not provided with CAD files. Without access to such CAD files, you cannot simply use Structural Material Manager's optional External Data Interface to import the bills of material needed for the estimate.
Any item lengths that appear on the drawings can of course be typed into Structural Material Manager as-is. In lieu of having CAD files that can be imported, hand-entering printed lengths is the quickest and most accurate way to input them.
Whereas some lengths appear on plans, it is usually the case that not all of the lengths that you need are actually printed on the drawings. Unknown lengths thus must be approximated based on measurements made on the scaled drawings.
Some companies make digital plan measures that make it easy to determine unknown lengths from drawings. These are rolling tools that are used by selecting a scale factor to match the plan and rolling the tool along the distance to be measured. Although an LCD display built right into the device shows the measured length, a far more effective way to work is with an optional PC interface kit that sends that length to the current input area of any Windows application. In terms of using such a tool with Structural Material Manager, you would have the material entry screen ready to input the Length field (i.e., the Length field would be "focused" with the blinking cursor located there) before rolling the digital measure. The measurement sent by the device then appears in Structural Material Manager's Length field.
Digital plan measures typically send values in a decimal format (such as 7.5625) rather than the more traditional format of feet, inches and fractions (such as 7'-6 3/4 in keeping with this 7.5625 example). That is no problem, as Structural Material Manager can accept lengths in either format. Section 5-16 discusses the manner in which Structural Material Manager rounds decimal length values to the nearest sixteenth of an inch for English / Imperial jobs or the nearest millimeter for metric jobs.
Calculated Industries (http://www.calculated.com) makes the Scale Master II in both standalone and PC-connected versions. Their Scale Master II PC Combo Kit (Model # 6325, list price $149.95) comes with both the Scale Master II plan measure and the necessary components to wire it to your PC's USB port.
Scalex Corporation (http://www.scalex.com) produces digital measuring tools known as PlanWheel and Scale-Link. More so than a standalone PlanWheel, their Scale-Link USB2 kit (list price $124.95) is the combo that would be of interest to many Structural Material Manager users since it includes both a digital measure and the components needed to wire it to your PC via a USB port. They even make a $200-$300 version of the Scale-Link that interfaces to your PC wirelessly.
You can order digital measures directly from the manufacturers: Calculated Industries (http://www.calculated.com) and Scalex Corporation (http://www.scalex.com). Tiger Supplies (http://www.tigersupplies.com) and Nationwide Drafting and Office Supply (http://www.nationwidedrafting.com) are also worth considering, as each of these resellers carries both brands at less than list prices.
E.J.E. Industries LLC is in no way related to Calculated Industries or Scalex and earns no commissions from them. We merely refer you to these third parties because their digital plan measures are able to be effectively used in conjunction with the E.J.E. Industries Structural Material Manager system.
Section 5-18: Conversion from Plates to Bars. Material lists sometimes specify items as Plates that would be better treated as Bars instead. This has ramifications when nesting and ordering material. For instance, if the list specifies an item as Plate, that item will be cut from sheet stock by the Plate-Nesting Module. If you actually intend the item to be cut from a stock length by the Length-Nesting Module, then that item must be considered as a Bar instead of a Plate. Structural Material Manager contains a "Convert Plates to Bars" function that allows you to easily make the change.
The "Convert Plates to Bars" function is selected at the Material Entry Screen. With a job open and its items displayed at that screen, click the Material List menu in order to find the "Convert Plates to Bars" function.
A maximum width for conversion to Bar can be specified so that Plates that are too wide to be considered Bars are automatically left as Plates. That maximum width is referred to as the Threshold Width, and it defaults to 12" for English jobs or 305 mm for metric jobs. Those defaults serve nicely since most users want items 12" wide and less to be considered as Bars, but you are of course free to override the defaults. Plates with widths less than or equal to your specified Threshold Width are converted to Bars, and other Plates are left as-is.
Any Bar can be represented as a valid Plate size, but the reverse is not always true. For instance, a 1/2" x 10 5/8" Plate is always legitimate, but a 10 5/8" wide Bar probably cannot be purchased since Bars are sold only in certain width increments. By checking or clearing the appropriate box, you can specify whether the Plate-to-Bar conversion should be limited to just commonly-available Bar sizes. Structural Material Manager refers to internal look-up tables to determine whether a Bar is likely to be available for actual purchase, and metal suppliers helped E.J.E. Industries develop those tables. Of course actual Bar availability can vary from region to region, and for that reason E.J.E. Industries invites each licensed user to submit their own list of available Bar sizes; such a list will be implemented on a customer-specific basis at absolutely no charge.
Consider a Plate 3/8" thick x 4 1/16" wide x 6" long. That cannot be converted to a commonly-available Bar size as-is. However, swapping the Width and Length fields will indeed allow successful conversion, as a Bar 3/8" thick x 6" wide x 4 1/16" is a common size. Structural Material Manager provides a checkbox so you either allow or prevent automatic Width and Length swapping during the Plate-to-Bar conversion.
Radio buttons at the "Convert Plates to Bars" dialog allow you to tell the system whether it should perform the conversion on the entire material list or just the currently-selected items. If you intend to apply the conversion only to selected items, it is important that you make that selection before invoking the "Convert Plates to Bars" function.
Multiple item selections are supported in Structural Material Manager, and they can be very powerful when used in conjunction with the "Convert Plates to Bars" function. If you are not familiar with how to make multiple selections using the Shift and Ctrl keys, please refer to Section 3-2: Instructional Notation which briefly covers the required techniques.
Don't worry if a multiple item selection includes non-Plate and non-Bar items such as W Shapes, Angles, Rods, etc. Those items which obviously have no bearing on the "Convert Plates to Bars" function will simply be ignored as if they were not even selected. This feature makes it much easier to build a multiple item selection since you do not have to bother painstakingly de-selecting non-Plate and non-Bar items.
See http://www.ejeindustries.com/video/platebarconversions for a video that demonstrates how Structural Material Manager can convert back and forth between Plates and Bars.
Section 5-19: Conversion from Bars to Plates. A reciprocal function to "Convert Plates to Bars" covered in the previous section also exists: "Convert Bars to Plates." This feature works in much the same manner as "Convert Plates to Bars" except that the Threshold Width is treated differently. When converting Plates to Bars, any items less than or equal to the specified Threshold Width are converted. When converting Bars to Plates, items greater than or equal to the Threshold Width get converted.
It is uncommon for material lists to accidentally specify material items as Bars that would be better treated as Plates instead. Normally, if an item is specified as a Bar, it should indeed be a Bar. You may then wonder why the "Convert Bars to Plates" function even exists. The answer is that the function serves mainly as a way to quickly reverse any unintended effects of the corresponding "Convert Plates to Bars" function. Suppose that you accidentally used "Convert Plates to Bars" to convert all Plates less than or equal to a Threshold Width of 15" when you actually intended to use a Threshold Width of 12". No problem: simply tell the "Convert Bars to Plates" function to convert all Bars with widths greater than or equal to 12 1/16".
Note that default Threshold Width is 12 1/16" for English jobs or 306 mm for metric jobs when converting from Bars to Plates. The system deliberately uses defaults very slightly larger than the 12" and 305 mm defaults that apply when converting in the opposite direction.
At http://www.ejeindustries.com/video/platebarconversions, a video demonstrates both Plate-to-Bar and Bar-to-Plate conversions.
Section 5-20: Standardizing Plate Descriptions. It is common practice for Plates to be specified with the smaller dimension (the thickness) before the larger one (the width). Examples are 3/4" x 48" and 1/2" x 36". Structural Material Manager prefers this industry-standard format whether Plates are manually entered or automatically imported.
Nearly all CAD systems use the standard thickness x width format for Plate designations. There are some CAD systems, however, that specify Plate descriptions backwards from what is usually expected, and they thus place the larger dimension (the width) before the smaller one (the thickness). Example descriptions are 48" x 3/4" and 36" x 1/2" when expressed in this non-standard order. This is very uncommon.
Regardless of the order of the thickness and width, Structural Material Manager will properly compute the Plate weights and surface areas. It thus might seem that the order is unimportant, and that is true as long as the same order is consistently applied within one job. Problems arise when a job contains some items in one format while others are in the opposite order. Inconsistency would cause a 3/8" x 19" Plate, for example, to be sorted and nested separately from another Plate specified as 19" x 3/8" even though they actually represent the same size.
With a job open in Structural Material Manager, you can click the “Material List” menu followed by the“Standardize Plate Descriptions” sub-menu to force all Plate descriptions to be in the same format. You can specify the desired dimension order. Although you can instruct the system to place larger dimensions before smaller ones, most users will accept the default behavior of having smaller values (thicknesses) before larger ones (widths). Clicking the “Standardize” button then causes the descriptions of all Plates in the job to conform to the chosen order.
Note that the “Standardize Plate Descriptions” function automatically applies to all Plates in the material list. You do not need to first make an item selection in order to choose the item(s) on which the function will operate.
Despite allowing Plate thicknesses and widths to exist in either order, Structural Material Manager’s design is such that the standard order of thickness first and width second is the better choice. This is a technical consideration based on the fact that the system can store larger numbers in the second Plate description field than in the first one. This affects the actions the system takes when attempting to standardize Plate descriptions. With certain exceptions (to be covered in the next couple of paragraphs), most any Plate originally in a format of width x thickness can be successfully converted to thickness x width. However, a Plate originally in a format of thickness x width cannot be reversed if its width is very large. Consider an example of a ½" x 6" Plate; there is no problem representing that size as either ½" x 6" or 6" x ½". Now consider a very wide Plate size of ½" x 69"; that Plate can exist in the thickness x width order, but internal size constraints will prevent it from being reversed to 69" x ½". If one or more conversions cannot be carried out due to size constraints, Structural Material Manager will clearly notify you of this before the “Standardize Plate Descriptions” dialog closes.
Structural Material Manager’s “Standardize Plate Descriptions” function is never able to reverse the description order of plates containing gauge thicknesses. Whereas a Plate 36" x ½" can be represented in that order or as ½" x 36", a Plate 10 ga. x 36" cannot be represented as 36" x 10 ga. Only the technically-correct order of thickness x width is supported for gauge-thickness Plates. This restriction arises from the manner in which Structural Material Manager internally stores gauge thicknesses; they must be in the first position within the Plate description. If the “Standardize Plate Descriptions” function encounters gauge-thickness sizes that it must skip, you will be notified before the dialog closes.
Based on the information above concerning Plates that have gauge thicknesses, it is clear that there is no way for Structural Material Manager to reverse the description order of such Plates. Less obvious, however, is that there are also some cases in which the “Standardize Plate Descriptions” function cannot reverse Plate descriptions even though they do not contain gauge thicknesses. Specifically, Plates with widths of 13 11/16" through 16 1/16", inclusive, cannot have their description orders reversed. That range of width values overlaps with gauge thickness values when stored within Structural Material Manager, and that leads to ambiguity as the system attempts to make a decision concerning the possible swap of thickness and width. Without getting into technical details, suffice it to say that the occurrence of one more such ambiguous cases will be reported before the “Standardize Plate Descriptions” dialog closes. If that happens, you are free to later look through the material list to see whether any Plate descriptions that Structural Material Manager could not automatically switch might be able to be manually reversed via line-by-line editing.
After you have applied used the “Standardize Plate Descriptions” function for a particular job, keep in mind that further Plates entered or imported into that job will not automatically conform to the chosen order. That is because the function affects only the Plates the job already contains.
As mentioned above, the “Standardize Plate Descriptions” function affects only items that are already in the material list as opposed to ones that will later be manually entered or automatically imported. However, Structural Material Manager does indeed provide another way for you to standardize the order of Plate descriptions as a material list is being imported. You can read about that capability in Section 18-4: Importing Files into Structural Material Manager.
Astute readers may have noticed the mention of Checkered Plates - as opposed to regular Plates - is conspicuously absent in the information regarding the “Standardize Plate Descriptions” function. That omission is deliberate, as the “Standardize Plate Descriptions” function does not apply to Checkered Plates. That is because Checkered Plate descriptions are expected to always be in a thickness x width format. Structural Material Manager performs such strict size-checking on Checkered Plates during entry that the chances of a certain Checkered Plate size being able to be successfully entered both in a thickness x width format and a width x format order are about zero. For example, a Plate can be represented as either ½" x 4" or 4" x ½", but a Checkered Plate is acceptable only as ½" x 4"; any attempt to specify a Checkered Plate as 4" x ½" will be rejected as an invalid size. Although the “Standardize Plate Descriptions” function does not operate on Checkered Plates already present in the material list, the import function covered in Section 18-4: Importing Files into Structural Material Manager does provide this capability.
In practice, the Standardize Plate Descriptions function is not needed very often. This is because there is such strong agreement in the steel industry that Plate descriptions should list the thickness first and the width second. You’ll most likely need the Standardize Plate Descriptions function only if you are dealing with one of the very few CAD systems that for some reason reverses this order.
Section 5-21: Standardizing Bar Descriptions. The previous section discussed Structural Material Manager’s Standardize Plate and Checkered Plate Descriptions function. This section now covers a very similar function that is likely to see much more day-to-day use: Standardize Bar Descriptions.
Bars are usually expected to have the larger dimension (the width) before the smaller one (the thickness). Following this convention, 4" x ½" is one Bar example. This is standard nomenclature in the steel industry. Since this is the technical standard, this order helps the system properly check for valid Bar sizes during entry and import. It is Structural Material Manager’s preferred order.
Some companies would rather specify Bars in the exact same way as Plates are usually specified: the smaller dimension (the thickness) appears before the larger one (the width). An example Bar description is ½" x 4" using this order. Despite the fact that this order is technically incorrect for Bars, it is commonly encountered.
Since Bar weights and surface areas are calculated correctly using either order of Bar width and thickness, the exact order is not important. What is critical, however, is that the order stays consistent within a particular job. Mixing the two systems will cause otherwise-identical Bars (4" x ½" versus ½" x 4" in the examples above) to be sorted and nested apart from each other.
A function is available within Structural Material Manager to make sure that all Bar descriptions are consistently in one order or the other. To utilize this function for the currently-open job, click the “Material List” menu and then the “Standardize Bar Descriptions” sub-menu. You can then click the appropriate option to choose whether Bars will have the larger dimension (the width) before the smaller one (the thickness) as in 4" x ½" or if their descriptions will have the smaller dimension before the larger one as in ½" x 4". After making your selection, click the “Standardize” button to cause the descriptions of all Bars in the job to conform to the chosen order.
The “Standardize Bar Descriptions” function automatically applies to all Bars in the material list. There is no need to first make an item selection in order to choose the item(s) on which the function will operate.
Although Structural Material Manager allows Bar widths and thicknesses to exist in either order, its underlying program architecture is designed such that it is best to have the width first and the thickness second. One reason for this is that the system can store larger numbers in the first Bar description field than in the second one. This has ramifications when standardizing Bar descriptions. With certain exceptions (to be covered in the next couple of paragraphs), most any Bar originally in a format of thickness x width can be successfully converted to width x thickness. However, a Bar originally in a format of width x thickness cannot be reversed if its width is very large. Consider an example of a 6" x ½" Bar; there is no problem representing that size as either 6" x ½" or ½" x 6". Now consider a very wide Bar size of 22" x ½"; that Bar can exist in the width x thickness order, but internal size constraints will prevent it from being reversed to ½" x 22". If one or more conversions cannot be carried out due to size constraints, Structural Material Manager will clearly notify you of this before the “Standardize Bar Descriptions” dialog closes.
Gauge-thickness Bars can never be reversed by Structural Material Manager’s “Standardize Bar Descriptions” function. So, whereas a Bar 3" x ½" can be represented in that order or as ½" x 3", a Bar 3" x 10 ga. cannot be represented as 10 ga. x 3". Only the technically-correct order of width x thickness is supported for gauge-thickness Bars. This restriction arises from the manner in which Structural Material Manager internally stores gauge thicknesses; they must be in the second position within the Bar description. If the “Standardize Bar Descriptions” function encounters gauge-thickness sizes that it must skip, you will be notified before the dialog closes.
As noted above, there is no way for Structural Material Manager to reverse gauge-thickness Bars. There are also some cases in which the “Standardize Bar Descriptions” function cannot reverse Bar descriptions even though they do not contain gauges. Specifically, Bars with widths of 13 11/16" through 16 1/16", inclusive, cannot have their description orders reversed. That range of width values overlaps with gauge thickness values when stored within Structural Material Manager, and that leads to ambiguity as the system attempts to make a decision concerning the possible swap of width and thickness. Without getting into technical details, suffice it to say that the occurrence of one more such ambiguous cases will be reported before the “Standardize Bar Descriptions” dialog closes. If that happens, you are free to later look through the material list to see whether any Bar descriptions that Structural Material Manager could not automatically switch might be able to be manually reversed via line-by-line editing.
Applying the “Standardize Bar Descriptions” function to a job does not automatically affect future Bars entered or imported into that job. The function applies only to Bars that already exist. For example, suppose you use the function to convert all Bars to the technically-correct format in which the larger dimension (the width) comes before the smaller one (the thickness). That does not mean that future Bars - whether manually entered at the Material Entry Screen or automatically imported via the External Data Interface - will automatically have their descriptions forced into that order.
Despite the fact that the “Standardize Bar Descriptions” function affects only existing Bars rather than ones to be later entered or imported, Structural Material Manager does provide a different way to reverse Bar descriptions during import. That feature is discussed in Section 18-4: Importing Files into Structural Material Manager.
Section 5-22: Changing the Material List’s Colors. You can change the foreground and background colors of the material list to whatever combination you find most pleasing or easiest on your eyes. When you right-click the material list, you'll see the "Change list's foreground color" and "Change list's background color" options. Those same options are also available within the Material List menu which is immediately to the right of the File menu.
Color settings are remembered on a per-user basis. This means that changes made by one user will not affect others accessing the same system across the network.
The next section of this chapter discusses how display styles can be chosen to radically change Structural Material Manager’s appearance. Foreground and background color choices apply only when the default display style of “Windows” is in effect, and all of the other display styles override those color choices. See the next section for more details.
Section 5-23: Changing the Application’s Display Style. Structural Material Manager supports many different display styles. These styles are sometimes referred to as “themes,” but they are actually more closely related to a concept often called “skins.”
To choose a different display style, open the Material List menu, and choose the “Set the Entire Application's Display Style”option. Alternatively, you can also find the “Set the Entire Application's Display Style”option by right-clicking anywhere on the material list display grid.
The default style that the Windows operating system uses is named, appropriately enough, “Windows.” Under that particular style, all user-interface controls will take on their normal colors and appearances. As the Windows operating system has evolved, Microsoft has made design decisions that render those normal appearances in such a way that many users find somewhat bland. Those design choices have also affected the Microsoft Office suite of applications which is comprised of Word, Excel, Outlook, PowerPoint, and other programs. Many of the default displays are now comprised of a lot of light gray, dark gray and white color combinations. To see the dramatic differences, one has to merely have a look at a Windows 7 PC running Word 2007 versus a Windows 11 PC running Word 2016; many users will find the former combination bright and colorful but the latter quite dull. Today’s computer users have come to expect a more vibrant user-interface experience, and that is precisely why Structural Material Manager offers myriad display alternatives.
All styles other than “Windows” present user-interface elements in some out-of-the-norm manner. Some of the styles make subtle changes to colors and appearances whereas others provide dramatic flare. Many of them are just too whimsical to be practical and seem to be have perhaps created more for fun than serious work. Many, however, are very useful in that they not only bring a fresh look to the application but also provide an optimal contrast between text elements and their backgrounds. Personal preferences of course come into play here, and readability on your particular system is also important.
Users who run Structural Material Manager only once in a while - perhaps to periodically check inventory levels or to inspect a job’s Production-Control status - won’t care much about choosing a certain display style. On the other hand, their coworkers who spend a large portion of their workdays using the application will appreciate the ability to personally choose a preferred style. Since display styles are remembered on a user-by-user basis, everyone can feel free to experiment and choose their own favorite.
As mentioned earlier, the “Set the Entire Application's Display Style”option can be found either by opening the Material List menu or right-clicking anywhere on the material list display grid. Experiment with that feature to see which display style you personally prefer. Although you can do so without any material items displayed in the material list, it is best to carry out such experiments with at least a few items listed there so you can see the full effect a particular style choice has on the material list display.
If you absolutely want the default settings, choose the “Windows” style. The “Windows11 Modern Light” style is also worth exploring if you prefer a default Windows operating system appearance. Note that the style name of “Windows11 Modern Light” has no space between Windows and 11 (it is just a style name, and for some reason its creators omitted the space). It is interesting to also note that even if you are not running the Windows 11 operating system and instead have Windows 10, 8/8.1, 7, Vista or XP, the “Windows11 Modern Light” style is still a valid choice since it does not actually rely on having the Windows 11 operating system installed.
Structural Material Manager’s Graphical User Interface (GUI) performance is slightly better when the default display style of “Windows” is used. That makes sense when you consider that “Windows” is the one and only style that comes naturally to the Windows operating system; it can quickly render the display without any additional effort. When any other style is selected, the system must carry out extra work in order to modify each and every user-interface element to appear exactly as dictated by that particular style. In practice, the difference will probably be noticeable only when utilizing the External Data Interface to import large numbers of material items or when pasting lots of clipboard items at once, as both operations stream large numbers of items across the display. Most users will probably agree that the small performance penalty incurred by the non-default display styles is minor when compared to the wonderful aesthetic benefits they provide.
As covered in the previous section of this chapter, Structural Material Manager allows the user to control the foreground and background colors of the material list. That ability is available only under the default display style of “Windows”. If any other display style is chosen (even the “Windows10” style), foreground and background color settings will be overridden by whatever colors are predetermined by that particular style choice.
This section has thoroughly described the concept of display styles and explained how they can radically change Structural Material Manager’s appearance to suit personal tastes and individual eyesight. Please visit http://www.ejeindustries.com/video/styles if you’d like to see a quick video tutorial showing display styles action.
Chapter 6: Material Printouts and Labels
Section 6-1: Introduction. Various material printouts are available in such forms as unsorted, shipping, sorted, estimating, nested, etc. The Unsorted Report is the only one that will actually be printed in this chapter, but all general information concerning this printout also applies to other reports which will be printed in their respective chapters.
Some printouts are also available on adhesive labels rather than paper. For instance, Sorted Reports, Nested Reports, Master Shippers and Shipping Tickets can all be directed to special adhesive labels that adhere well to steel. A discussion of those particular varieties of labels can be found in their respective chapters of the book (Chapter 7 for the sorted labels, Chapter 8 for the Master Shipper and Shipping Ticket labels and Chapter 10 for the nested labels). Adhesive labels are covered in more detail in Chapter 19: Adhesive Item Labels.
Section 6-2: Demo "Coupon". Owners of the complete Structural Material Manager system should proceed to Section 6-3 at this time, as this section applies only to demonstration versions.
Each demo system is permitted to produce 25 reports from Structural Material Manager. As long as less than 25 reports have been produced, the demo system is absolutely identical to the complete software package. This enables demo recipients to get a "hands-on" test-drive of the system.
The ability of the demo to give access to the full system until 25 reports have been produced is due to the fact that, upon the successful entry of a Demo Activation Code, a demo system receives an electronic "coupon" worth 25 reports. Every time another report is generated, whether it is printed to the screen or paper, the number of uses remaining on the coupon is reduced by one.
Once the last report is printed, the system will no longer allow jobs to be opened. The demo is essentially useless at this point, but since 25 reports were generated, the user should have received an adequate demonstration in order to make a purchasing decision.
A common misconception is that reports from other systems, such as word processors, spreadsheets, etc., count toward the 25-report allotment. This is not true; only Structural Material Manager printouts are counted.
Another misunderstanding involves the number of pages in a given report. Regardless of how many pages are produced in a particular printout, it will count as only one report.
During printing, demo users will see an extra prompt that full-system customers will not notice. This special prompt simply informs you as to how many reports the demo has generated and how many remain.
Section 6-3: Availability of Printouts. Unsorted Lists are available at all times for any job that contains at least one material item. This is true even after the job has been sorted or nested, as these processes do not disturb the unsorted listing.
A Shipping List is available at any time, provided that the list contains the proper piece-mark sequence described in Section 8-2: Shipping List Format or Section 8-17: Alternate Shipping Mark Scheme.
Sorted printouts are always available since Structural Material Manager automatically sorts all jobs. A Nested List, however, is available only if the user has previously processed the job with the Nesting | Nest Material function.
Note that if a job is altered in any way at the Material Entry Screen, the nested copy of the job is automatically erased. Consequently, a Nested List will not be available until the file is re-nested. See Section 10-20: Automatic Erasure of Nested Files for more information.
Section 6-4: Printout Title-Blocks. Title-block information is provided at the top of each printout page. This heading contains the following information that cannot be changed:
• Your company name
• Type of report (Unsorted, Sorted, Nested, etc.)
• Job name
• Page number
The following information also appears in each title-block; you may change it as desired:
• Project description
• Contract number
• Remarks
• Date
By default, a complete title-block will appear on each page. As is discussed in Chapter 12: Printout Options, you may also choose to print a complete heading only on the first page and an abbreviated heading on all pages thereafter.
Section 6-5: Unsorted Printout Format. One of the main purposes of the unsorted printout is to provide an effective means of checking material entries. For this reason, the items on the unsorted printout are listed in the exact order they were entered. The only case in which this does not hold true is when the user has specified that the sorting program should physically rearrange the unsorted material list; the unsorted printout then actually lists the items in sorted order (refer to Section 7-5: Sorting Modes for details).
The unsorted printout provides both single weights and line total weights for each item printed. A summary of all total material type weights is provided at the end of the printout. This summary also lists a total item count for each material type, which is the sum of all quantity fields entered for items of that type. The last value provided in the summary is an approximate total job weight.
Section 6-6: Printing the Unsorted List. We’ll now print an actually material list. The exact prompts and options vary between the different types of reports, but printing an Unsorted List should give a good overview of the process:
A) Start by opening any existing job with File | Open Job.
B) Next, select Material List | Print Unsorted List. A dialog appears at which you can specify different printout options.
C) If you so desire, enter a contract number, project name and remarks. These will be retained from printout to printout for this job so there is no need to specify them more than once.
D) The default date is the one obtained from your computer’s clock, so it is generally acceptable as-is. If you wish to change it, however, do so at this time.
E) Reports are expected to ultimately go to the printer. However, it is often convenient to first view the report on-screen rather than on paper. If you do decide to choose the screen as the printout destination, Section 12-2: Printing to the Screen will show you how to move around the screen to view the printout. Chapter 12 also discusses the option of directing the report to a text file rather than the printer or screen.
F) Click on the Rounding Options button if you wish to change the manner in which material weights are rounded. If you change any of these options rather than selecting the defaults, see Section 14-9: Material Weight Rounding Options for more information.
G) Click the Print button when you are ready to obtain the report.
H) If you chose the screen or a text file as the destination, the report is now sent to the appropriate location. If, however, you chose the printer as the destination, the standard Windows Print Dialog now appears. You can use it to select the desired printer, specify the number of copies to print, etc. By clicking the dialog’s Properties button, you can access the Printer Setup Dialog to select printer features such as paper source, portrait or landscape orientation, print quality as well as any other features supported by the printer. Click the Print Dialog’s Ok button when you have finished making changes and are ready to begin printing.
Since this is the first time printout instructions have been presented, extra detail has been included in the steps. All further printout instructions that occur in later chapters will be slightly less specific in regard to printing to the screen, specifying the number of copies, etc. Rather, future printout instructions will concentrate mainly on the features that are unique to that particular type of report.
Section 7-1: Introduction. One of the primary functions of this system is to sort a randomly ordered material list into proper sequence and to combine duplicate items. Some sorts are done by material type and size while others are based on item piece marks.
This chapter discusses the criteria used by the system for both the sorting and combining operations. At the end of the chapter, the sample material list will be printed as a Sorted List. Please note that sorted results can be printed not only in report form, but also as a set of adhesive labels intended to serve as item identification tags.
You’ll probably never have to explicitly sort a job by type and size, as such Sorted Reports are automatically available for each job without having to go through a separate sorting process. See Section 7-5: Sorting Modes for more details.
Section 7-2: Sorting by Type and Size. The most common type of sort is by material type and size. It is this method of sorting that always determines how the Sorted Report will be formatted.
In a sort by type and size, the system bases its sorting decisions on the assumption that each item field has a certain level of "sorting priority" or significance in relation to other fields. The Material Type field has the highest sorting priority, so Plates, for instance, will always appear before Checkered Plates. If two items have the same Material Type field, the system then looks at lower-priority fields. For example, since a Description field has a higher priority than a Length field, two a W Shape 12 x 58 x 20'-0 will appear before a W Shape 10 x 54 x 40'-0 in the sorted listing even though the W 10 x 54 has a longer length.
It is rather obvious that the Description field should have a priority that is exceeded only by that of the Material Type field since the items are to be arranged by size. For other fields, however, it may be helpful to consider two items that have just one different field and are otherwise identical.
As an example, suppose that two Angle entries have the same Description of 4" x 4" x ½”, but the Length fields are different. In this case, the Angle with the larger Length field appears first in the sorted listing. Likewise, two Plates with the same Description and Length fields, but having different Material Grades, appear with the Plate of the higher Material Grade first. The Camber / Mid-Ordinate Rise field must also be taken into consideration when sorting Beams, Channels, Plates and Checkered Plate: two items that are the same in all respects but Camber / Mid-Ordinate Rise are arranged with the item of higher value listed first.
Please note that the Description field which is second only to Material Type in sorting priority can itself be composed of multiple parts that each have their own level of priority. For instance, an Angle's Thickness field has a higher sorting priority than Leg 1; Leg 1 has a higher priority than Leg 2. The exact priorities of course vary from one material type to another, but each allows for logical sorting and grouping of the items.
Miscellaneous Items are sorted alpha-numerically, as they have a free-style description field that can be comprised of any letters, numbers and other characters you choose.
Section 7-3: Sorting by Piece Mark. As discussed in the previous section, material lists can be sorted by type and size, and it is that type of sort that always determines the format of the Sorted Report.
Material lists can also be sorted by piece mark. Sorting by piece mark has no effect on the format of the Sorted Report but, rather, re-arranges the order of the items as they will appear the next time you view the job for material entry / editing. So, if you sort a job by piece mark, the next Sorted Report you print will look no different than if you had not carried out the sort. The next time the job is viewed on the Material Entry Screen, however, the items will appear sorted by piece mark.
Sorting by piece mark is always a “physical” sort since it permanently alters the order of the job such that there is no way to return to the material list’s original, unsorted order. See Section 7-5: Sorting Modes for a discussion of physical sorting.
Two types of piece mark sorts are available: sorting by all piece marks or sorting by major marks only. An understanding of the piece mark concepts presented in Chapter 8: Production-Control will be presupposed for all discussions of these sorts, so please review that chapter if you are not already familiar with the piece mark schemes on which Structural Material Manager bases its shipping functions.
Sorting by all piece marks is quite straightforward. The system simply rearranges the material list such that the items are arranged alpha-numerically by piece mark; any identical items are combined, and their quantities are tallied. If two items contain identical piece marks, the items are sorted by type and size as discussed in the previous section; you thus might think of a sort by all piece marks as being like a regular sort by type and size except with the sorting criteria modified so that the piece mark field has the highest precedence (even above Material Type). The key characteristic to keep in mind concerning a sort by all piece marks is that no distinction is made between major marks such as 1B1 and detail marks such as p1. Thus, the piece mark order of the list is disrupted such that this type of sort is not suitable for any job for which you later wish to obtain shipping reports.
A more complex - but potentially more useful - type of piece mark sort involves sorting only on major marks. In this type of sort, Structural Material Manager physically re-arranges the list so that items containing major piece marks are sorted alpha-numerically. Items with detail marks are not figured into the sort in any way, but such detail items are indeed “carried along” with their respective major marks during the sort so as to not ruin the piece mark sequence that identifies fabricated assemblies.
Consider the following material list fragment presenting the piece marks for (2) fabricated assemblies before sorting by major mark only:
1B1
a1
b2
1A1
p2
f3
After sorting by major mark only, the piece mark sequence becomes:
1A1
p2
f3
1B1
a1
b2
The most important fact to garner from the above example is that detail items p2 and f3 stayed associated with major mark 1A1 even after the sorting process moved 1A1 to the top of the material list. Likewise, detail marks a1 and b2 stayed with 1B1 as it moved in the list. This is the essence of sorting by major marks only: detail items remain subordinate to their original major marks in the exact order they were entered.
Note that no sorting based on detail marks within assemblies is done when sorting by major marks only. In the above example, for instance, the system makes no attempt to re-arrange 1A1's detail items to place detail mark f3 ahead of p2; the detail items retain their original order. It is the detailer’s responsibility to properly order detail items within an assembly, and Structural Material Manager will not alter their order in any way when sorting by major mark only.
Just as no sorting based on detail marks is done when sorting by major marks only, no combining of any duplicate items - whether major marks or detail items - is done in this sorting method. Duplicate major marks will, of course, end up adjacent in the material list after such a sort, but they will not be combined.
Chapter 8 presents two different shipping mark schemes that are supported by Structural Material Manager’s Production-Control Module: the one used by most fabricators, and an alternate one. Sorting only by major mark can be carried out using either one of these schemes, and the scheme used depends on which one you have already chosen under the Production Control menu. There is no need to specify the desired scheme at the Sort Material dialog since Structural Material Manager already “knows” which scheme is in effect for the job.
When sorting by major mark only, the system will verify that the job’s first item does indeed bear a major piece mark under the selected scheme. Sorting by major mark only is based on the assumption that the list has been entered in the proper piece mark sequence, so this is critical. If the job begins with a detail item, you will be informed that the sort has been canceled and that the job has not been altered in any way.
Let’s consider an example of when sorting by major marks only could be quite a time-saver. Suppose a bill of material has been entered in proper piece-mark sequence with major marks as assembly headings and minor marks beneath them as detail items. Further suppose that the optional External Data Interface (see Chapter 18) is then used to import some bills of material that originated in a CAD system. The newly-imported items will appear at the end of the original takeoff. You may now have a job listing that is hundreds or thousands of lines long, and finding a certain major mark within the bill of material could be quite a chore. A quick sort of the list by major mark only, however, would conveniently rearrange the job alpha-numerically by major mark so that mark 1B1, for instance, would be near the top of the list whereas 3G3 would be farther down.
One last word concerning sorting by piece marks. If your goal is simply to produce a shipping report arranged alpha-numerically by piece mark without permanently rearranging the order of the unsorted material list, see Chapter 8: Production-Control. That chapter discusses Master Shippers, Shipping Tickets, Status Reports and Shortage Reports that can all be printed alpha-numerically by piece mark without need for physically sorting the job! Remember: the goal of physically sorting by piece mark is to change the order of the list as it appears on the material entry / edit screen, not the reports.
Section 7-4: Criteria for Combining Items. As the system sorts the material list, it constantly checks to see if any identical items exist. If duplicate members are found, they are combined into a single item and their quantities are totaled.
The manner in which combinable items are determined is very simple: the items must be 100% identical to be combined. This means that not only must the items have the same Description field and Length, but they must also have identical Piece Mark, Mill Mark, Material Grade, Camber / Mid-Ordinate Rise, Remarks, Sequence, Material Price, Shop Labor and Field Labor fields. The Number of Pieces field may, of course, differ between the items as the two figures will be added and the sum used as the Number of Pieces field for the single item that the individuals are combined into.
Duplicate items are combined when sorting by material type and size. They are also combined when you instruct the system to physically sort the list by all piece marks. However, no consolidation of duplicates is performed when you are sorting based on major piece marks only. So, if two identical items with piece mark 1B1 exist in the list - one with quantity 4 and the other with quantity 3 - a single 1B1 entry will exist with a quantity of 7 after you sort either by size or by all piece marks. Both items will remain, however, after sorting by major marks only since no dupe consolidation is done for that sorting method.
Section 7-5: Sorting Modes. The sorting function has two distinct modes of operation: one mode does not affect the order of the original unsorted material list, and the other physically sorts the unsorted list into proper order. Both modes produce exactly the same sorted printout; the only difference is how the unsorted list is treated.
The first sorting mode is employed automatically by Structural Material Manager; it keeps jobs sorted by type and size without the user ever having to tell the system to sort the job! That method simply makes a properly ordered copy of the material list “behind the scenes;” this preserves the original order of the unsorted material list while still allowing a sorted printout to be obtained. This proves useful when changes must be made to the material list after sorting, as the Material Entry Screen still lists the items in their original unsorted, un-combined order. Another benefit of this method is that an unsorted printout, which is often more convenient than the sorted copy in checking for entry errors, is still available after automatic sorting.
The second sorting mode, a “physical” sort, actually sorts the unsorted material list into a different order. One such sort is a physical sort by material type and size; it is generally used only for inventory lists and price lists. If this method is used, the Material Entry Screen will list the items in sorted order by size whenever that job is next loaded for further entry or editing of items. This type of sorting is not automatic; the user must explicitly select it with the Sorting | Sort Material menu options.
Any items belonging to the material type "Main Member" will be eliminated during a physical sort by type and size. "Main Member" in this sense refers to a dedicated class of item headings that are used to denote the start of a fabricated assembly for purposes of producing shipping reports based on the list's piece-mark sequence. Since any list entered in piece-mark sequence will be entirely rearranged by the physical sort by type and size, thus ruining this sequence, it is of little consequence that the Main Members are deleted. See Chapter 8: Production-Control, for more information on Main Members.
Sorting by piece mark always constitutes a physical sort. Unlike a sort by type and size, however, such a sort does not eliminate Main Members from the job.
Physical sorting, whether by type and size or by piece mark, is always non-reversible. Accordingly, the system warns the user of this before carrying out such a sort and requires confirmation before proceeding.
You may wish to make a backup copy of a job with File | Copy before carrying out a physical sort. That will enable you to always return to the original material list (via the safety copy) if the effects of the sort were not as you expected.
When used with an inventory list, accidental physical sorting by type and size would probably cause no harm since there is generally no need to preserve the original order of inventory items. Physical sorting of an actual job by type and size, however, could have disastrous consequences since that type of sort disturbs the list’s piece mark sequence and thus prevents you from obtaining Shipping Lists (see Chapter 8 for a discussion of the piece mark format required for obtaining Shipping Lists.) Likewise, physically sorting a job by all piece marks (as opposed to by major marks only) will almost certainly disrupt the list’s piece mark sequence such that Shipping Lists will no longer be available.
Among the different types of physical sorts, sorting by major marks only probably carries the least risk of later causing Shipping List problems since it automatically keeps fabricated assemblies intact. This assumes that the job was properly entered in the first place with major marks identifying assemblies and minor marks identifying the detail items. Still, you are always advised to consider the non-reversible nature of physical sorting before carrying out a sort by major mark.
Section 7-6: Automatic Re-Sorting of Jobs. Whenever a job that has been previously sorted is altered in any way at the Material Entry Screen, the sorted version of that job is automatically erased. This is done to prevent the possibility of an outdated sorted file not reflecting changes made to the unsorted material list since the time that sorting took place. However, as soon as the user exits the Material Entry Screen, the job will automatically be re-sorted. What this means to the user is that sorted printouts are always available and are sure to be up-to-date without any need for ever manually selecting the Sort | Sort Material menu options.
Section 7-7: Sorted Report Format. This section describes the format of the sorted printout when it is produced as a report. The information presented here does not apply when the sorted output is generated as a set of adhesive labels.
Items on the sorted printout are always listed in order from large to small within their respective material types. Sorting by piece mark - whether by all piece marks or by major marks only - has absolutely no effect on the Sorted Report’s format. Piece Mark sorts are intended for altering the order of the material list as viewed for entry or editing rather than for changing the appearance of the Sorted Report.
The sorted printout places all similar items in a group, which is indicated by the fact that no blank line is left between the items. Similar items, in this context, are basically items that have the same Description, Material Grade and Camber / Mid-Ordinate Rise fields, regardless of the contents of the other fields.
All weight values available on the unsorted printout, as well as the total item count for each material type, are also provided in the sorted listing. In addition to these figures, the sorted printout also lists a group weight for all similar items which are, as noted above, printed with no blank lines between them.
A group lineal total is also supplied with the group weight for all lineal material types; i.e., Beams, Channels, Bars, Angles, Tubes, HSS, Rods, Rebar and Pipes.
Groups of similar Bolts are followed by a group count. This is a tally of each of the item quantities in the group; it provides an exact piece count for each different bolt size.
If the user so desires, each material type presented on a Sorted Report may be started on a new page.
Section 7-8: Sorted Label Format. Whereas the previous section discussed the format of the sorted results when printed as a report, this section focuses on the format when those same results are printed on adhesive labels.
Just as is the case on the normal Sorted Report, items on the sorted labels are listed in order from large to small within their respective material types.
A separate label is generated for each item, and any one label is repeated as many times as necessary in order to represent the full quantity. So, if W 10 X 54 X 19'-3 1/4 has a quantity of (3), then (3) separate labels will be printed. The item weight that appears on each of these (3) labels will be the weight of just (1) W 10 X 54 X 19'-3 1/4 rather than the weight of all (3). This is to be expected since each item is a separate entity represented by its own label.
By default, Bolts and Miscellaneous Items are not printed, as it is assumed that you do not want to generate identification tags for such items. If labels are ever desired for one or both of these types, simply click the “Material Types to Print” button that appears on the Print Sorted Labels dialog, and check the appropriate type(s).
Section 7-9: Printing the Sorted Report or Labels. The same basic instructions used to print the Unsorted List in the previous chapter apply to printing the Sorted List; you’ll notice only minor variations. To print a Sorted List, start by opening any job with File | Open Job, then select the Sorting | Print Sorted | Report option. If you prefer to direct the Sorted List to adhesive item labels, then choose Sorting | Print Sorted | Adhesive Labels. More information on labels can be found in Chapter 19: Adhesive Item Labels.
You do not need to use the Sort Material option that is available in the Sorting menu unless you want to physically sort the job. A Sorted Report is automatically available without explicitly sorting the job, as jobs are automatically sorted by material type and size “behind the scenes.” The Sort Material option is used only for permanently sorting the list. For instance, you might want to physically rearrange the items in an inventory list or price list so that they are permanently sorted into descending order by type and size. You also might want to permanently sort a job by piece mark. After such physical sorts, there is no way to return the list to its original, unsorted order. Thus, if your only goal is to obtain a Sorted List, just click Sorting | Print Sorted Report without bothering with the Sorting | Sort Material function, and you can rely on the harmless non-physical sort that Structural Material Manager automatically carries out for each job. See Chapter altogether, and click simply rely on the harmless, non-physical sort that Structural Material Manager automatically carries out. These issues were discussed in Section 7-5: Sorting Modes.
When you produce the Sorted List as a report (but not as a set of adhesive labels), the system provides a few options that are not available on the Unsorted List. For instance, a check-box exists which lets you indicate whether each material type (W, C, PL, etc.) should begin on a new page. It also provides a check-box for specifying whether a summary-only report should be generated; this is a printout that lists no items, but rather, only final totals.
By checking the “Print an individual summary for each sequence” box, you are telling Structural Material Manager that each unique sequence contained in the job should get its own summary. Regardless of whether this box is checked, a summary for the entire job (i.e., items from all sequences) is also produced. See the next section, Section 7-10: Summarizing Each Sequence on the Sorted List, for more details on sequences.
It is possible to exclude one or more material types from the printout whether you are printing a report or adhesive labels. In the extreme case of excluding every type, you will get a summary-only printout described above, although that would be a clumsy way of obtaining it. Click the “Material Types to Print” button in order to specify which types should be printed; all types are checked by default. Un-check the types you want excluded from the report. Here is how this feature could be used to generate what is commonly called a “Bolt List:”
A) Use File | Open Job to open the job for which you need to print a Bolt List.
B) At the Sorting menu, click Print Sorted | Report.
C) Click the “Material Types to Print” button.
D) Click the “Deselect All” button to quickly remove the check-marks for all material types without having to painstakingly click on each type.
E) Click on the Bolts material type to add back just that one type.
F) Click Ok to close the dialog at which material types are chosen.
G) Click Print to actually produce the report. All material types will appear in the summary on the last page of the report, but the body of the report will list only bolts.
Section 7-10: Summarizing Each Sequence on the Sorted List. This section presents some information regarding jobs sequences and how they affect sorting. This information applies only when the Sorted List is printed as a report; when the list is printed as a set of adhesive labels, the option to summarize by sequence does not appear since labels, by their very nature as item-identification tags, do not contain summaries.
If you are unfamiliar with sequences, it is best to refer to Chapter 17 at this time. It provides detailed information concerning job sequencing.
Items that have different sequences but are otherwise identical will not be combined on the Sorted Report.
Just as items with different sequences are not combined on the Sorted Report, they are not combined in a physical sort operation. After the physical sort, items that are identical except for their sequences will be adjacent in the material list, but they will not actually be combined. Remember, the criterion for combining items is that they must be 100% identical, so having different sequence fields means that the items can’t be combined.
The Sorted Report always ends with a summary of the entire job. However, as you saw in the last section, you can also specify that a summary should also be printed for each job sequence.
The sequenced summary feature is available for jobs that contain up to 15 unique sequences. If more than 15 unique sequences are found in the job, the system simply informs you that your request for summaries by sequence has been canceled, but the Sorted Report and the usual total job summary are both still printed. The 15-sequence limitation is imposed by memory limitations within Structural Material Manager.
If you instruct the system to print summaries for each sequence, but the job contains just one sequence, the summary for that one sequence would of course be identical to the entire job summary. In order to avoid this redundancy, Structural Material Manager automatically cancels your request for sequenced summaries if it does not detect at least two unique job sequences.
Section 8-1: Introduction. The optional Production-Control Module enables the system to print Shipping Lists, Master Shippers and Shipping Tickets. These reports are based on the piece-mark sequence of the material list.
When a Shipping Ticket is printed, the system is able to record which items and quantities were shipped, including the date they were shipped, in a Production-Control history. This enables the user to easily track the job's progress at any time by producing a Status Report or Shortage Report.
Two of the Production-Control Module’s reports, the Master Shipper and the Shipping ticket, can be printed as either normal reports or as sets of adhesive labels. The adhesive labels serve as item-identification tags.
Chapter 18 covers the External Data Interface. As mentioned in that chapter, the Production-Control Module’s Master Shipper can not only be printed, but it can also be exported to an ASCII-delimited file. The exported file can be imported by Excel and other applications.
This chapter covers Production-Control information such as the required piece-mark sequence, printing the reports and labels, etc. You should also refer to Chapter 17: Job Sequencing, for more information; that chapter contains a section devoted exclusively to covering the details of using Production-Control with jobs that have been sequenced.
Section 8-2: Shipping List Format. A Shipping List is available that prints shipping weights based on the list's piece-mark sequence. It reports shipping weights at the end of each main member.
The ability to generate shipping weights relies on having the material list in a certain piece-mark sequence. The scheme described in this section is the one most commonly used. An alternate scheme, used by fewer companies but nonetheless important, is described in Section 8-17.
Main members are assumed to have a major piece mark containing upper-case letters, such as "18B2", without any lower-case letters. Detail items are assumed to have minor piece marks containing lower-case letters, such as "a12." If a mark contains upper-case and lower-case letters, such as "17Ab2", it is considered a detail item.
As Structural Material Manager prints the Shipping List, it keeps track internally of whether the last item printed was a main member or a detail item. If it was a detail item, and the next item to be printed is a main member, the system knows that a new assembly is about to begin. It then generates a shipping weight for the entire previous assembly before printing the main member that begins the next assembly. Perhaps it is best to think in terms of Structural Material Manager’s logic, which can be expressed as “if a detail item was just printed and now a main member needs printed then it is time print the shipping weight for the previous assembly.” If you think in terms of this logical condition, you’ll be able to look at any series of items and instantly determine the points at which Structural Material Manager will generate shipping weights.
As an example of the piece-mark sequencing described above, assume that a material list is as follows:
Piece Mark |
Quantity |
Type |
Description |
Length |
4B1 |
2 |
W |
14 x 30 |
15'-11 |
a4 |
8 |
L |
3 x 3 x 1/4 |
0'-9 |
h4 |
2 |
PL |
3/8 x 9 3/16 |
2'-0 3/4 |
15B5 |
1 |
W |
12 x 26 |
12'-9 1/2 |
d15 |
4 |
L |
4 x 4 x 1/4 |
0'-9 |
f15 |
2 |
PL |
1/4 x 6 |
0'-6 3/8 |
15B6 |
1 |
W |
8 x 24 |
5'-8 1/8 |
b4 |
2 |
L |
3 x 3 x 1/4 |
0'-6 |
e15 |
2 |
L |
4 x 4 x 1/4 |
0'-5 1/2 |
m1 |
8 |
PL |
1/4 x 3 1/8 |
0'-7 |
15B7 |
1 |
W |
12 x 26 |
12'-9 1/2 |
d15 |
4 |
L |
4 x 4 x 1/4 |
0'-9 |
h15 |
1 |
PL |
3/8 x 11 7/16 |
3'-8 1/4 |
16B3 |
2 |
W |
12 x 26 |
9'-11 |
a4 |
8 |
L |
3 x 3 x 1/4 |
0'-9 |
c16 |
4 |
PL |
3/8 x 7 1/4 |
0'-9 |
A shipping weight line would be generated after detail items “h4," “f15," “m1," and “h15" because each is followed by a main member, “15B5," “15B6," and “15B7," respectively. A shipping weight line would also be generated after detail item "c16" because it is the last item in the list.
Each shipping weight line consists of two separate weights. The first weight is the weight of all pieces listed for the member. This figure is the sum of the main member's line weight total plus each detail item's line weight total. The second shipping weight is the weight of just one member. This is the total weight described above divided by the main member's quantity; if the main member has a quantity of 1, the total and single weights will be identical.
It has already been mentioned that marks containing both upper-case and lower-case letters are considered to be detail items rather than major marks. Most major marks don’t contain any lower-case letters anyway, so this does not usually pose a problem. One case in which it might become an issue, however, is if your piece marks contain right and left indicators of “r” and “l.” Be sure to use “R” and “L” instead of their lower-case counterparts, as a major mark “C8-R” will be considered a detail item if you enter it as “C8-r.”
It is important to note that any item with a blank piece mark is considered to be a detail item! This can pose a problem if your bill of material does not include piece marks on bolts; a bolt entry will thus be considered to be detail item of the previous main member, and this is generally not correct. To see why this is a problem, assume the following 16B3 assembly used as an example above was followed by a bolt line representing 500 fields bolts but containing no piece mark:
Piece Mark |
Quantity |
Type |
Description |
Length |
16B3 |
2 |
W |
12 x 26 |
9'-11 |
a4 |
8 |
L |
3 x 3 x 1/4 |
0'-9 |
c16 |
4 |
PL |
3/8 x 7 1/4 |
0'-9 |
|
500 |
BOLT |
1" |
0'-3 |
Since the bolt line contains no piece mark, it would be assumed to be part of the assembly 16B3 even though this is not really intended. The weight of the 500 field bolts which were intended to apply to the job as a whole rather than just the 16B3 assembly would be added to 16B3's weight thus artificially increasing it. If the quantity on the bolts had not been divisible by 16B3's quantity of 2, such as if the bolt quantity had been 503 rather than 500, Structural Material Manager would have reported a bad detail item quantity on mark 16B3 as discussed in Section 8-3: Detail Item Quantities.
The solution to the problem described above is to always include major piece marks on bolt lines that are not intended to be part of any one assembly, i.e., treat them as standalone major items. For field bolts, you may wish to use major marks such as FB-1, FB-2, etc. whereas SB-1, SB-2, etc. make good choices for shop bolt marks.
If you request a Shipping List, but the material list is not actually in piece-mark order, the system will display a screen message to inform you that the shipping weights cannot be produced. Specifically, if the first item in the list does not contain a major piece mark, the system will report an error message stating that a Shipping List cannot be produced.
Section 8-3: Detail Item Quantities. Regardless of whether you use the standard piece mark scheme discussed in Section 8-2, or the alternate one described in the Section 8-17, it is important that detail item quantities be entered properly.
All detail item quantities must be multiplied by the number of main members needed. Consider the example of a main member with piece mark 1B1 and a detail item with piece mark a2. Assume that (2) detail items a2 get attached to each main member 1B1. If only one main member 1B1 is needed, then the corresponding quantities and marks are of course (1) 1B1 and (2) a2. If three main members 1B1 are needed, those quantities change to (3) 1B1 and (6) a2. The point is that you must be careful to increase the detail item quantities in proportion to the main member quantities.
Internally, the system divides every detail item quantity by its respective main member quantity to determine exactly how many detail items are attached to one main member. In the above example, the quantity of (6) for item a2 is divided evenly by the quantity of (3) for main member 1B1. The result of this division is (2), so the system knows that (2) items a2 are attached to every (1) item 1B1. This information is used to determine the weight of one fabricated assembly 1B1, as opposed to the weight of all three fabricated assemblies 1B1.
Every detail item quantity must be evenly divisible by its corresponding main member quantity. Since the quantity of (6) for item a2 can be divided evenly by the quantity of (3) for main member 1B1, the assembly is assumed to have correct quantities. If however, item a2 had a quantity of (5) instead of (6), the system would discover that (2) cannot be evenly divided into (5) and thus conclude that it cannot evenly distribute (5) detail items over (2) main members. Although such an error is not caught during material entry, it is flagged on any of the various shipping lists with a "BAD DETAIL-ITEM QUANTITY!" or “DETAIL-ITEM ERROR!” message (either message may appear). Such errors are often caused by mistakes on the original drawings, but other times are the result of simple entry errors. In either event, the material list must be corrected and re-printed.
For examples of completely valid detail item quantities, please refer to the examples given in Section 8-2: Shipping List Format. Here is an example of incorrect quantities:
Piece Mark |
Quantity |
Type |
Description |
Length |
4B1 |
2 |
W |
14 x 30 |
15'-11 |
a4 |
8 |
L |
3 x 3 x 1/4 |
0'-9 |
h4 |
3 |
PL |
3/8 x 9 3/16 |
2'-0 3/4 |
The second line is correct, as 8 Angles can be evenly distributed over (2) W Shapes by grouping (4) Angles with each W Shape. The third line, however, would cause Structural Material Manager to generate a “BAD DETAIL-ITEM QUANTITY!” or “DETAIL-ITEM ERROR!” message since there is no way to evenly distribute (3) Plates over (2) W Shapes.
It is important to note that there will never be a quantity error if the main member has a quantity of (1). This is because all numbers are, of course, multiples of 1, so any detail item quantity will be valid.
You may occasionally encounter cases in which the system reports “BAD DETAIL-ITEM QUANTITY!” or “DETAIL-ITEM ERROR!” where you feel there is neither an error on the drawings nor in the data entry. In such cases, refer to Section 8-4 for a way to eliminate the error using Structural Material Manager’s “Main Member” designation.
In the event you ever encounter a detail item quantity error that initially does not seem to make sense, try applying these troubleshooting guidelines:
1. First, make sure you thoroughly understand these sections of this Production-Control chapter: Section 8-2: Shipping List Format, Section 8-3: Detail Item Quantities (this section), Section 8-4: Main Members and Section 8-17: Alternate Shipping Mark Scheme.
2. Once you are sure that you understand all relevant sections of program documentation, you can begin to investigate the particular marks that Structural Material Manager has reported as having bad detail item quantities. Start by clicking Production-Control | Specify Piece Mark Scheme, and make sure that the desired scheme - whether Normal or Alternate - is selected. Nearly all users will want to choose Normal, but this check is always the first one to perform since the simple mistake of having the wrong scheme selected can certainly lead to some baffling quantity errors!
3. Printing a regular Shipping List (not a Master Shipper or Shipping Ticket) for the job as discussed in Section 8-6 is the next troubleshooting step. That printout will show you exactly how Structural Material Manager is grouping items into fabricated assemblies, and a "BAD DETAIL-ITEM QUANTITY!" or “DETAIL-ITEM ERROR!” message will appear alongside any assemblies for which a detail item quantity error exists.
4. Armed with the assembly breakdown reported on the regular Shipping List, go to the Material Entry Screen. Locate a major mark for which "BAD DETAIL-ITEM QUANTITY!" or “DETAIL-ITEM ERROR!” was reported on the printout, and adjust a quantity (or quantities) as necessary. Sometimes the quantities are fine, but it is actually a detail mark that needs changed to a major mark or vice-versa to solve the problem; in that event, the incorrect mark will have caused an item to “belong” to the wrong fabricated assembly. Repeat this process for each major mark that is in error.
Once you gain some experience in solving detail item quantity errors, you might want to skip the step of printing a regular Shipping List in the above troubleshooting guidelines. Rather, you could just jot down the major marks that are being questioned by Structural Material Manager, and go straight to the Material Entry Screen to make the required changes to quantities and/or piece marks.
Section 8-4: Main Members. A word is in order concerning the term "main member." In relation to this chapter's discussion of shipping lists and other Production-Control features, this term refers to any item containing a major piece mark. This item can be a Beam, Channel, or any other valid material type.
The possible point of confusion here is that Structural Material Manager also supports a “pseudo” material type known as "Main Member." It is used primarily as a heading for assemblies in which no one component item can be clearly defined as the major piece. In such cases, the Main Member type is selected during entry (it is labeled “MAIN” at the lower right-hand corner of the Material Entry Screen) and is given the quantity and major piece mark for the assembly. Once a valid quantity and major mark are specified, a descriptive heading such as "FRAME ASSEMBLY" is then entered. Any items entered after this Main Member heading are given detail item piece marks and are thus assumed to be a part of this particular "FRAME ASSEMBLY."
The bottom line is that you need to realize that the main member of a fabricated assembly may either be an actual physical item such as a W Shape or Tube, or it may be a heading that has been entered on a Main Member type of item. In either case, the item will carry the major piece mark for the assembly.
We’ll capitalize “Main Member” when referring to Structural Material Manager’s special designation while using lower-case letters in “main member” to indicate an actual item (Beam, Channel, etc.) that happens to contain the assembly’s major piece mark. This convention will hopefully help you to more readily determine the manner in which the term is being used.
Since the Main Member type is used exclusively for specifying shipping marks, the piece mark must contain upper-case letters. This is the only material type for which the piece marks are checked during item entry. So, if you attempt to enter a Main Member at the Material Entry Screen and either omit its piece mark or specify a lower-case piece mark, Structural Material Manager will not accept the entry.
We will now present an actual case of when it would be beneficial to use the Main Member type. Suppose your bill of material contained the following items:
Piece Mark |
Quantity |
Type |
Description |
Length |
2A12 |
2 |
L |
3 x 3 x 1/4 |
8'-11 |
a19 |
1 |
PL |
3/8 x 3 3/4 |
0'-7 |
b19 |
1 |
PL |
3/8 x 7 |
0'-7 1/4 |
In this example, 2A12 is the major piece mark, and a19 and b19 are detail marks. Normally, detail items have quantities that are multiples of the quantity associated with the major mark. So, in this case we would expect Plate a19 and Plate b19 to each have quantities of 2, 4, 6, 8, etc. However, the quantity on each of these items is 1, and Structural Material Manager will thus flag this as a detail item quantity error as discussed in Section 8-3.
There are times when the detail item quantities legitimately are not multiples of the major mark’s quantity, and the group of (2) Angles 2A12 with (1) Plate a19 and (1) Plate b19 attached to it is one such case. The point is that these items really do form a fabricated assembly even though they violate Structural Material Manager’s quantity rules. The reason for this in this particular instance is that a single assembly requires (2) Angles, and the major mark 2A12 is associated with those Angles. This is where Structural Material Manager’s “Main Member” designation comes into play.
By placing major mark 2A12 on a Main Member that has quantity (1), and giving the Angle its original mark but in lower-case letters (i.e., 2a12 rather than 2A12), you can create a perfectly valid fabricated assembly from Structural Material Manager’s viewpoint:
Piece Mark |
Quantity |
Type |
Description |
Length |
2A12 |
1 |
Main Member |
Some Assembly |
|
2a12 |
2 |
L |
3 x 3 x 1/4 |
8'-11 |
a19 |
1 |
PL |
3/8 x 3 3/4 |
0'-7 |
b19 |
1 |
PL |
3/8 x 7 |
0'-7 1/4 |
Why does this work? As mentioned in Section 8-3, any detail item quantity is a multiple of (1), so using a main member quantity of (1) on mark 2A12 solved the problem. Just remember these steps to using the Main Members designation to correct a detail item quantity problem:
A) Insert a Main Member heading above the assembly’s actual item that contains the major mark. The Main Member is to be given the major mark now, as well as a descriptive name to identify it (“SOME ASSEMBLY” in our example). Use a quantity of (1) on this line if the items that follow represent a single fabricated assembly. Quantities other than (1) are indeed valid, but you will then have to be careful that all detail items that follow bear quantities that are multiples of the Main Member’s quantity.
B) Change the actual main member’s piece mark to lower-case. Thus, the item that once carried the assembly’s major mark now has become a detail item subordinate to the new Main Member. In the example above, the actual main member was the Angle entry, and its mark had to be changed from 2A12 to 2a12. Its original quantity does not have to change.
Nearly all detail item quantity errors reported by Structural Material Manager are indeed errors. The information presented in this section is intended only for addressing those cases in which the assembly has no one item that is clearly identifiable as the main component (such as a ladder assembly), and detail item quantity errors thus result.
Section 8-5: Master Shipper Report Format. The normal Shipping List prints every item in the material list, but another type of lists excludes all detail items from the report in order to produce a Master Shipper. Since it only lists the items that have major piece marks, it is a much shorter report than the regular Shipping List.
The Master Shipper can be printed as either a report or as a set of adhesive labels. This section focuses on the report format; see Section 8-8: Shipping Labels for information on the adhesive label format.
Note that the weight totals on both the Shipping List and Master Shipper List are identical. This is because although the Master Shipper does not print detail items, it does include them in all weight calculations.
The Master Shipper does not print the shop hours, field hours, equipment hours, crane hours, material price, line weights, etc. for the main member. These figures are irrelevant on the Master Shipper since they apply only to the main member line itself, and there are almost certainly detail items in the assembly that are not being printed due to the very nature of the Master Shipper's format which omits detail items (but that nonetheless includes their weights in the total assembly weight). Printing values that are specific only to the single line that describes the main member would thus be confusing since you might be led to believe that they apply to the entire assembly. Another report, the Estimating Report does, however, print the item price and price unit for the main member even when it is printed in a Master Shipper format; this is useful in unit-pricing situations.
Two types of Master Shipper are available. One type lists all major marks in the order they were entered in the job, and the other sorts the major marks “alpha-numerically” so they are in order by letter and number. When asking Structural Material Manager to produce a Master Shipper, you choose which format you prefer. Note that the formats of the regular and alpha-numerically sorted versions differ by more than just piece-mark order; the alpha-numerically sorted version of the Master Shipper reports the total number of main members in the job, whereas the regular version does not. Although the alpha-numerically sorted version provides this extra total in comparison to the regular version, it omits the Mill Mark, Remarks and Sequence columns that the regular Master Shipper does indeed provide. The next section shows how to print the Master Shipper; you may wish to experiment with both formats to see which best suits your needs.
Section 8-6: Printing the Shipping List or Master Shipper. Follow these steps to print a Shipping List or Master Shipper:
A) Use File | Open Job to open any job that you know is in the correct piece-mark sequence for use with Structural Material Manager’s Production-Control feature.
B) Select the Production-Control | Print | Shipping List menu item to obtain a regular Shipping List. Select Production-Control | Print | Master Shipper | Report to print a Master Shipper as a report, or Production-Control | Print | Master Shipper | Adhesive Labels to produce that same Master Shipper on labels.
C) Specify all information concerning title-block fields, whether to print to the printer or screen, etc. as you would with any other type of report.
D) Select the alternate shipping mark scheme if you need it. Most users can skip this step and simply use the normal scheme which is the default.
E) If this is a Master Shipper, you can check the “Sort Shipping Marks into Alpha-Numeric Order” box if piece marks should be sorted alpha-numerically. If this box is unchecked, marks will be printed in the order in which they appear in the job. This option applies only if the Master Shipper is being printed as a report; if it is being directed to adhesive labels, the marks will be sorted alpha-numerically by default and this option will thus not appear.
F) Click the Print button.
If this is your first time using the system and you have just entered the sample material list, you will not be able to produce a Shipping List at this time. This is because the sample material items were not entered in the proper piece-mark sequence required to obtain this list. You may wish to go ahead and try to get this report anyway, just to see the message that the system reports to inform you that the list in not in the right format to obtain a Shipping List.
Section 8-7: Shipping Ticket Format. Whereas the Master Shipper lists all major items for the entire job, a Shipping Ticket lists only the items that are part of a particular shipment. It serves as a "loading list".
Shipping Tickets can be printed as reports or as sets of labels; this section focuses on the format of the report version. Information on the format of the corresponding adhesive labels can be found in Section 8-8: Shipping Labels.
Shipping Tickets include additional title-block information that is not found on other reports. Here is a summary of these additional fields:
• Customer Purchase Order Number
• Ship Via
• Shipment Tracking Number
• Ship-to Company Information (name, address, job-site phone, contact person, etc.)
• Bill-to Company Information (name and address)
• Complete Shipment (yes or no checkbox)
The additional title-block information is presented in the form of a cover sheet that is printed before any of the actual items are listed. The presence of this cover sheet usually allows the Shipping Ticket to be used directly as a shipping document without need for an additional cover sheet to be produced separately.
When specifying the items for shipping, it is only necessary to specify a major piece mark and the quantity being shipped.
Just as is the case for the Master Shipper, detail items are not printed, but they are included in all weight calculations.
A total weight figure for the items being shipped is presented at the bottom of the Shipping Ticket, as is the total number of main members being shipped.
You cannot have duplicate major marks in a job for which you wish to print Sipping Tickets. The Production-Control history which tracks the Shipping Ticket’s output in terms of which marks shipped, how many shipped, when they shipped, etc. is not designed to deal with duplicate major marks. Thus, if the major mark 1B1 appears in multiple places in the job, the system will report that these duplicate marks need corrected before a Shipping Ticket can be printed. Section 17-4: Shipping Considerations When Using Sequences elaborates on this issue as it relates to having duplicate major marks in the different sequences.
The above discussion concerning duplicate major marks does not apply to detail marks. Duplicate detail marks are indeed permitted.
Section 8-8: Shipping Labels. By directing either a Master Shipper or a Shipping Ticket to adhesive labels rather than using the usual report format, you can generate item-identification tags. Such tags are very useful for shipping purposes as well as general production-control use.
You may be familiar with labels that are based on the Sorted Report or the Nested Report. Shipping labels differ from these other labels in that they represent only the main members of the job, i.e., the items that contain major piece marks. No labels are printed for the job’s detail items.
The weight printed on a shipping label represents the weight of the entire fabricated assembly; it includes the weight of not only the main member itself, but all attached detail items as well.
When printed as a report, the Master Shipper can present the piece marks in the order in which they appear in the job or sorted alpha-numerically. These options are not available when the Master Shipper is printed as a set of labels, as the labels corresponding to the Master Shipper are always sorted alpha-numerically by piece mark.
The Shipping Ticket can be printed so that the marks appear either in the order that they were specified for shipping or sorted alpha-numerically by piece mark. This option is available both when the Shipping Ticket is printed as a report and when the output is sent to a set of adhesive labels.
Suppose you specify certain major marks and quantities for shipping, and these items are printed on a Shipping Ticket in the usual report form. If you’d then like to generate a set of adhesive labels for those same items, it would be tedious to have to re-specify all of the marks and quantities. See Section 8-0: Re-printing a Shipping Ticket for a time-saving alternative.
Section 8-9: Printing the Shipping Ticket. Printing a Shipping Ticket is as simple as specifying a series of major piece marks and quantities that are to ship. As each mark is entered, the system displays the current truck weight to assist you in determining when a full load has been reached.
Here are the steps needed to print a Shipping Ticket:
A) Use File | Open Job to open any job that you know is in the correct piece-mark sequence for use with Structural Material Manager’s Production-Control feature.
B) Select the Production-Control | Print | Shipping Ticket menu options. Click either the Report menu item or the Adhesive Labels item depending on the intended destination of the Shipping Ticket output.
C) If the job is not in the proper piece-mark sequence expected by the Production-Control feature, you will be informed that the Shipping Ticket cannot be printed. Similarly, if detail-item quantity errors are present in the job, a list of major marks containing such errors will be presented so you can adjust the quantities before trying again to print the Shipping Ticket.
D) If any Shipping Tickets have already been stored in this job’s Production-Control history, a dialog will pop up and prompt you to either choose an existing ticket or create a new one. No such dialog will appear if the job’s Production-Control history is empty. For purposes of this discussion, we’ll assume that the dialog did not appear or - if it did appear - that you chose to create a new ticket. See Section 8-10: Re-printing a Shipping Ticket for details of how to retrieve a previous ticket.
E) The “Build Shipping Ticket” dialog will now appear. It is here that you will enter piece marks and quantities that are to ship. As you do so, the right side of the screen under the heading “Ticket in Progress” will be updated to show not only each mark and quantity on the ticket, but also the total truck weight and a count of assemblies shipping.
Non-typists will probably want to specify a major mark for shipping by double-clicking the desired mark under the heading “Piece Mark Status” on the left side of the screen. That causes the mark to be selected in the “Piece Mark to Ship” drop-down list in the upper center portion of the screen.
Skilled typists will save time by avoiding the mouse and typing the desired mark directly into the “Piece Mark to Ship” drop-down list. That list has been designed with a feature commonly referred to as “type-ahead” or “auto-complete” in which your keystrokes cause the list to automatically move to the next major mark that matches what you’ve typed so far. Once the proper mark has been found, just hit Enter to select it.
No matter whether you selected a mark by double-clicking it at the “Piece Mark Status” list or typing it directly into the “Piece Mark to Ship” drop-down list, the system now expects a quantity to be specified. Type any number up the maximum that remain available for shipping for this mark. You can then click the “Add Mark and Quantity to Ticket” button, but simply hitting Enter is faster and achieves the same goal.
Note that you cannot specify more items for shipping than the total that remain available to ship for that mark. Suppose a job has a quantity of (9) on mark 2D3, and (4) of these items were shipped on one day and (3) on another. The Production-Control history stored with this job lets Structural Material Manager know that only (2) more 2D3 items can be shipped, so the system simply will not allow you to specify a quantity greater than this.
Once the a mark is fully-shipped, it will no longer be listed in the “Piece Mark to Ship” drop-down list, as there is no sense including a mark in that list if that mark has no further items to ship.
Whether a fully-shipped mark it is still listed under the “Piece Mark Status” heading depends on whether you have checked the “Hide fully shipped marks above” box. If you check the box, all marks showing zero items left to ship will be hidden from view. This lets you whittle the display down to just the marks that actually have items remaining to ship.
Note that marks must be added to the ticket one at a time. The process described above is thus an iterative one in which you specify a mark, specify the quantity shipping, and repeat the process for the next mark. The reason that you cannot simply select a series of marks to be added to the ticket at once is that a shipping quantity needs specified for each mark. That mandates the repetitive nature of building the ticket one mark at a time. If, however, if you ever need to ship all or most of a job's major marks at one time, this can quickly be done without entering each and every mark and quantity; see Section 8-11: Shipping the Balance of a Job for details.
There is no way to change the quantity of a piece mark that you have listed for shipping under the “Ticket in Progress” heading, but entries there can easily be deleted. So, if you ever enter the correct mark but the wrong quantity, you can delete that entry, and try again. For instance, if you specified that (3) 1B1 items were to be shipped but then noticed that the truck weight became too high, you could delete the entry for (3) 1B1 items. Then perhaps you could again specify 1B1 for shipping, this time with a quantity of (2) to see if this many 1B1 items can be shipped without exceeding the maximum truck weight.
In general, deletions are done by selecting one or more lines under the “Ticket in Progress” heading and either clicking the “Delete Selected Item(s)” button or simply hitting the Delete key. Multiple selections involving Shift-clicking or Ctrl-clicking are fully supported. You will, of course, be asked for confirmation before any deletion actually occurs. If you approve the deletion, the selected marks and quantities are removed under the “Ticket in Progress” heading and get added back both under the “Piece Mark Status” heading and to the “Piece Mark to Ship” drop-down list.
The order of marks under “Ticket in Progress” is the order in which they will appear on the Shipping Ticket (unless you later decide to have the Shipping Ticket list marks in alpha-numerically sorted order). If you want to re-arrange the order in which marks will appear on the ticket, just select a certain line with a click of the mouse, and click the “One Up” or “One Down” buttons until the line moves to the desired location. Repeat this process until marks are in the desired order.
F) The process of specifying marks and quantities is iterated over and over as outlined in the previous step. Once the truck weight reaches the desired figure, or you simply have no further marks to add to the Shipping Ticket, click the Done button.
G) The system now asks whether the Production-Control history should be updated based on this Shipping Ticket. Click Yes or No, depending on your preference.
If you responded with Yes to the previous question, you will prompted to verify that the displayed date is correct. This is, of course, very important, as this date will be stored in the shipping history. The default date displayed is today's date if you are creating a new ticket, but it is sometimes useful to select a different date (perhaps tomorrow's date if preparing a ticket Tuesday afternoon for a shipment actually scheduled to leave Wednesday morning). If you chose to re-print an old ticket, note that the default date is automatically set to the date on which the ticket was originally printed, not today's date. Whether creating a new ticket or re-printing an old one, verify that the date is the one you want stored in the history, change the date if necessary, and finally click the “Update Production-Control History” button.
H) The dialog for actually printing the Shipping Ticket now appears. Specify all title-block information as you would with any other type of report, and also enter the extra title-block fields that appear only on Shipping Tickets (ship-to address, bill-to address, etc.)
I) A date-selection control for specifying the Shipping Ticket date might appear at this dialog. If you are updating the Production-Control history for this job, then whatever date you specified for recording in the history is going to appear on the Shipping Ticket, and there is no provision for changing it now; no date-selection control appears in such cases. However, in cases in which you are not updating the Production-Control history, a date-selection control appears on this dialog. If the date-selector does appear, carefully check that it shows the date that should appear on the Shipping Ticket, and change it if necessary.
J) Check the “Complete Shipment” box if you intend to ship all items for the job or if this is the final shipment for the job. Checking this box does not cause any special processing to occur, but it does change the Shipping Ticket’s heading in order to reflect the fact that this is a complete shipment or a partial shipment.
K) As its name implies, the check-box labeled “Sort Shipping Marks into Alpha-Numeric Order” determines whether or not piece marks on the ticket will be sorted.
If this box is unchecked, the piece marks on the Shipping Ticket will appear in the exact order that you entered them at the “Build Shipping Ticket” dialog (i.e., the order they were listed under the “Ticket in Progress” heading at that dialog). This is desirable in cases when you wish to enter marks in the order that the trucks should be loaded. Structural Material Manager will even allow you to repeat a mark multiple times at the “Build Shipping Ticket” dialog, as the loading sequence may call for mark 1B1, for instance, in various places. So, be sure to not select the “Sort Shipping Marks into Alpha-Numeric Order” if you entered marks and quantities in the order in which you intend the truck to be loaded.
If you do choose the alpha-numerically sorted option, it will override the order that was presented under “Ticket in Progress.” Marks will appear in sorted order on the printed Shipping Ticket regardless of the order in which they were entered at the “Build Shipping Ticket” dialog.
L) Click the Print button when you are ready to produce the Shipping Ticket.
Section 8-10: Re-printing a Shipping Ticket. Sometimes it is necessary to re-print a Shipping Ticket. Structural Material Manager allows you to conveniently do so without having to re-enter all the piece marks and quantities. Supposing a printer jams while printing a Shipping Ticket, or you just want another copy, you’ll just re-print the ticket in its original form. If, however, you’re re-printing in order to correct a mistake on the original ticket (perhaps because an item was listed on the ticket but wasn’t yet ready to ship), you are free to make changes to the ticket’s marks and quantities before re-printing it.
The key to being able to re-print a Shipping Ticket is to store it in the Production-Control history. If this is not done, the ticket’s information is lost forever after printing. Section 8-9: Printing the Shipping Ticket, describes the option of saving the data in the history.
Structural Material Manager automatically detects whether a job has Shipping Tickets recorded in the Production-Control history. If such tickets are found, you are asked when requesting a Shipping Ticket whether one of those should be revised and/or reprinted or if a new ticket is to be created. The existing tickets are listed by the dates on which they were printed. If an existing ticket is retrieved, its piece marks and their respective quantities are automatically loaded into the “Ticket in Progress” control on the right side of the “Build Shipping Ticket” dialog.
You have the opportunity to update the Production-Control history after re-printing a Shipping Ticket. If you respond with “Yes” when Structural Material Manager asks whether the history should be updated, the ticket’s original history will be replaced with the information contained on the ticket in its re-printed form. If you just re-printed the ticket without changes, it is of no consequence whether you update the history or not; the ticket is in its original form, so responding “No” to the update hurts nothing; likewise, responding “Yes” just causes the old information to be replaced with identical new information, thus causing no net change. Whether you update the history is important if you changed any of the marks and quantities before re-printing, and you’ll usually want to let this update occur so the most recent (and presumably most accurate) information replaces this ticket’s old Production-Control data.
When creating a new shipping ticket rather than pulling up a historical one for changes, header fields such as the Customer Purchase Order Number, Ship Via, Ship-to Company Information, etc. default to whatever appeared on the ticket last printed for the same job. Exceptions are the Shipment Tracking Number and the Complete Shipment indicator which have such ticket-specific meanings that no last-used values from a previous ticket should ever become defaults for a new one. The situation is different when you retrieve an existing ticket for editing, as all headers - including the Shipment Tracking Number and the Complete Shipment indicator - automatically take on the exact values they had on that particular ticket. No matter whether you create a new ticket or retrieve an existing one, of course you always have the freedom to change header fields as needed before the ticket is printed.
Shipping Ticket output can be sent to either a normal report or to a set of adhesive labels. Suppose you specify a group of piece marks and quantities that are to be printed on a Shipping Ticket as a report, and you later wish to print a set of labels for those same items. Assuming that the original ticket was saved in the job’s Production-Control history, you can simply pull up the original ticket for printing as a set of labels. There is thus no need to retype the piece marks and quantities in order to generate labels if you have already printed a normal Shipping Ticket for those items!
Section 8-11: Shipping the Balance of a Job. In order to print a Shipping Ticket, you must specify the marks and quantities for shipping as discussed in Section 8-9: Printing the Shipping Ticket. If, however, you’d like to ship all or most of a job’s major marks, there is an easier way.
At the “Build Shipping Ticket” dialog at which you enter marks and quantities, the “Ship Balance of Job" button is displayed at the center of the screen. Clicking this button instantly loads the “Ticket in Progress” list with all marks and quantities that have not already shipped according to the job’s Production-Control history. This can be a tremendous time-saver!
The "Ship Balance of Job Function" ships the entire job if there is no Production-Control history on file, i.e., if this is the first shipment for this job. If some shipments were already made, then only the remaining items are shipped. The “Ticket in Progress” list gets populated with all remaining marks and quantities just as if you had typed them.
Obviously, the “Ship Balance of Job” function is able to instantly add a tremendous number of piece marks and quantities to the Shipping Ticket. For this reason, the system will pause to ask for Yes/No confirmation if carrying out this powerful function would add (6) or more lines to the Shipping Ticket. For cases in which only (1) to (5) lines would be added, Structural Material Manager does not bother displaying a confirmation message since you could easily delete that small number of lines if an accidental click on the “Ship Balance of Job” button added them to the ticket.
If most, but not necessarily all, of the items for a job need shipped, it is convenient to select the “Ship Balance of Job” function and then selectively delete only the marks that are not to be shipped.
Section 8-12: Status Report. When the user prints a Shipping Ticket, Structural Material Manager asks whether the information should be stored in the Production-Control history for the job. If the user permits this, the major marks and quantities shipped, as well as the shipment date, will be stored in a special shipment history file. By not allowing the update to be performed, it is possible to obtain a Shipping Ticket without affecting the Production-Control history in any way.
The Status Report allows the user to view the Production-Control history for the job. It lists each major mark with quantities and dates for each previous shipment. The final figure on each line is the number of items remaining to ship for that mark; this is of course zero if all items have already shipped. In order to print this report, choose the Production-Control | Print | Status Report menu option.
Please note that the shipment dates listed across the width of the status report refer to shipments per item, not per job. Shipment #1 for one item may have a different date than is listed under Shipment #1 for another item. So, don’t be confused by the fact that the Shipment #2 column heading, for instance, has many different dates listed beneath it.
A word is in order concerning the dates that you see printed on Status Reports. Although dates are tracked using four digits within Structural Material Manager’s Production-Control Module, only two of those digits are reported on Status Reports. For instance, 1999 is stored internally in its entirety, but just 99 is printed. Likewise, 2021 is stored in its full 4-digit form within the system, but this year is reported in the 2-digit format of 21 on the Status Reports. The software assumes that all 2-digit years from 80 through 99 are in the previous century (the 20th century), whereas years 00 through 79 are in this one (the 21st century).
If a major mark is shipped on two or more tickets that have the same shipping date, the shipments will be consolidated into one entry on the Status Report. For instance, suppose (2) 1B1 items were shipped 3/21/18, (3) more 1B1's on another 3/21/18 ticket, and finally (2) more 1B1's on 3/22/18. The Status Report would report that (5) 1B1 shipped on 3/21/18 and (2) on 3/22/18 without regard for the fact that these shipments actually occurred over three shipping tickets rather than two.
The summary of the Status Report shows the total weight of the job, the weight already shipped and the percentage of the job's weight shipped. Similar information is provided concerning the number of pieces in the job, how many pieces have been shipped and the percentage of all pieces shipped.
Section 8-13: Shortage Report. A Shortage Report is simply an abbreviated form of the Status Report. Instead of listing all major marks in the job, it only lists those marks that have at least one item that has not yet shipped. This allows the user to focus on only the items that remain to be shipped without being distracted by marks that have completely shipped.
This function is available by selecting the Production-Control | Print | Shortage Report menu option.
Section 8-14: Editing Jobs with Shipment Histories. The Material Entry Module must perform special checks when the user is entering or editing items for any job that contains a Production-Control history. One such check involves inserting a new item into the list with the same piece mark as an item that was already shipped. This would corrupt the history file and is thus not permitted.
When editing items, the system will not allow a piece mark to be changed if that mark was already shipped.
Editing of quantities is also restricted; the Material Entry Module will not permit the quantity to be reduced below the number of items with that piece mark that have already been shipped.
The "Delete Item" function imposes the restriction that it is not possible to delete an item that has already been shipped.
Section 8-15: Copying Jobs with Shipment Histories. When using the Copy Job function, which is described fully in Chapter 13, the system will examine the existing job to see whether it has a Production-Control history on file. If it does, you will simply be asked whether or not to copy that history to the new job.
If an existing job's history is copied to a new, the two jobs will be absolutely identical, with each having the same history. If the user decides not to copy the history to the new job, the original job will retain its history, but the new one will have an empty history as if none of its items have ever been shipped.
Section 8-16: Merging Jobs with Shipment Histories. The Merge Jobs function allows two jobs to be combined. It is discussed in Chapter 13, but some restrictions concerning its use with jobs that have Production-Control histories will presented now. If you are not familiar with the Merge Jobs function, this section will not be very meaningful until you have read through the appropriate material in Chapter 13.
In reading the following material, keep in mind that Merge Job function causes the currently-open job to have items from another job appended to it.
In cases where the currently-open job has a shipping history but the job to be merged into it does not, the user may choose to retain the currently-open job’s history or clear it.
Sometimes the currently-open job does not have a history, but the job to merged into it does. Your options in this case are to copy the other job’s history to the currently-open job, or to leave the currently-open job’s history blank. In either case, the other job’s history will not be altered in any way.
Assuming that both jobs have histories, you may retain the currently-open job’s history or clear it completely. Either way, the other job's history will remain unchanged. Note that it is not possible in this case to replace the currently-open job’s history with the other job’s history, nor can the two histories be combined.
If one of the two jobs involved in the merge operation has a Production-Control history that is being retained, the system does error-checking during the merge to prevent that history from being corrupted by duplicate major marks that may exist between the two jobs. This is best explained by example. Suppose the Production-Control history for one job indicates that (3) major marks 1B1 have previously shipped. Furthermore, assume that the job being merged into the first one also contains an item with piece mark 1B1. If these two jobs were allowed to be merged, the resulting job would contain multiple 1B1 entries; this cannot be permitted since Structural Material Manager does not allow multiple occurrences of the same major mark. If the system detects that this error would be caused by the merge, an error message listing the duplicate marks appears. Note that the currently-open job is not harmed in any way when the error is detected, as the system performs this check before the merge has begun so the merge can be automatically aborted prior to any job damage.
Suppose Job A is open and has no shipping history. Suppose Job B is to be merged into Job A, and Job B does have a history which you have indicated should be inherited by Job A. As long as Job A contains none of the major piece marks that were already shipped for Job B, the two jobs will be allowed to be merged. Now, assuming that the jobs are allowed to merged based on the check for duplicate major marks, Job B will automatically be merged into Job A only once; you will not be asked the usual question of how many times the merge should be performed. To see why this restriction exists, suppose that you could tell Structural Material Manager to merge Job B into Job A (3) times. Since Job B’s Production-Control history was being retained, Job A would now contain (3) instances of every major mark that appeared in Job B’s shipping history. Duplicate major marks are not permitted whenever a job has a shipping history, so Structural Material Manager avoids the problem by always merging the job just once in such cases.
Section 8-17: Alternate Shipping Mark Scheme. While the piece-mark scheme described in Section 8-2 is very commonly used, there is a different format that is used by some companies. Here is a summary of how the piece marks are treated in this alternate scheme:
A1 SHIPPING MARK (not really an item, just a description; the piece mark starts with a letter instead of a number and is thus considered a major mark)
1A1 MAIN ITEM OF PIECE A1 (the piece mark starts with a number instead of a letter, so it is considered a minor mark belonging to A1)
2A1 DETAIL ITEM OF PIECE A1 (minor piece mark starts with a number instead of a letter)
3A1, 4A1, 5A1, etc. (further examples of detail items belonging to A1)
As you can see from the above examples, any item with a piece mark starting with a letter is considered a main member, and any item with a piece mark starting with a number is a detail item. Since the major mark is usually just a description of the assembly rather than an actual item, you will generally use a Main Member designation for that mark.
Here is an example of an assembly that employs the alternate piece mark scheme; mark “A1" uses the Main Member type, and “1A1,” “2A1" and “3A1" are actual items:
Piece Mark |
Quantity |
Type |
Description |
Length |
A1 |
1 |
Main Member |
Some Assembly |
|
1A1 |
1 |
W |
12 x 26 |
12'-9 1/2 |
2A1 |
4 |
L |
4 x 4 x 1/4 |
0'-9 |
3A1 |
1 |
PL |
3/8 x 11 7/16 |
3'-8 1/4 |
Here is the above modified to use lower-case letters on the detail items’ piece marks:
Piece Mark |
Quantity |
Type |
Description |
Length |
A1 |
1 |
Main Member |
Some Assembly |
|
1a1 |
1 |
W |
12 x 26 |
12'-9 1/2 |
2a1 |
4 |
L |
4 x 4 x 1/4 |
0'-9 |
3a1 |
1 |
PL |
3/8 x 11 7/16 |
3'-8 1/4 |
The above two examples illustrate an interesting point. Unlike the more common format described in Section 8-2, the alternate scheme does not rely in any way on whether piece marks contain upper-case or lower-case letters. The first example uses capital letters for all marks, and the second one uses lower-case letters except for “A1" on the Main Member. In fact, the only reason the “A1" mark has to be capitalized in the second example is that each item of the Main Member type must have all capital letters in its piece mark; this is discussed in Section 8-4: Main Members.
If you have need for the alternate piece mark scheme, click Structural Material Manager’s Production-Control | Specify Piece Mark Scheme menu options. A dialog appears at which either the more common format described in Section 8-2 or the alternate scheme described in this section can be chosen. Make your selection, and click Ok; the selected piece mark scheme will then always be applied to this particular job unless you later decide to change it.
After changing the piece mark scheme for a particular job as mentioned above, you are given the opportunity to specify the selected piece mark scheme as the system-wide default. That means it would then automatically apply to any new job that is created, and it would also apply to existing jobs for which you have not explicitly specified that the other scheme should be used. Click Yes or No depending on whether you would like for the selected piece mark scheme to become the system-wide default.
Suppose you ask Structural Material Manager to print a Shipping Ticket, and it reports “The first material item does not contain a major piece mark. Your request to print this Shipping Ticket has been canceled.” At the material entry screen, look at job’s very first material item to see whether it truly contains a major mark. If it is not a major mark, of course the error message makes sense, and you can easily correct the situation. If, however, that first mark is indeed a major one, then the problem is most likely that the wrong piece mark scheme was chosen (change to either Normal or Alternate as needed).
Section 8-18: Identical Piece Marks on Main Member Headings and Actual Items. Some detailing systems such as Design Data's SDS/2 can be configured to use identical major marks for the Main Member and the first "real" item below it. For instance, the following items might occur:
1 A5 BEAM
1 A5 W 12 x 14 x 20'-0
2 p1 PL 1/2 x 36 x 4'-0
The first A5 line is a Main Member; it is nothing more than a textual heading. The second A5 line represents an actual W Shape beam. Both marks are identical, and both are major marks. That causes a problem for systems such as Structural Material Manager which expect only detail marks to follow a Main Member.
Structural Material Manager's optional External Data Interface (described in Chapter 18) works around this situation by watching for it as material lists are imported. If identical major piece marks occur one line after another, and the first line is Main Member textual heading whereas the second line is not, the system pops up a dialog asking your preference as to how handle the situation:
• Delete the Main Member heading line while retaining the actual item beneath it as long as both lines have the exact same quantity.
• Keep both the Main Member heading line and the actual item beneath it, but change the second piece mark to lower case.
• Make no adjustments; import the material list as-is.
Most fabricating companies will probably opt for the first choice since it allows shop personnel to see the major piece mark as belonging to an actual item. In keeping with the example above, that first choice reduces the material list to the following:
1 A5 W 12 x 14 x 20'-0
2 p1 PL 1/2 x 36 x 4'-0
Although probably a less common choice, some users might want the second option so as to not jettison the Main Member heading line. That second choice changes the example material list to this:
1 A5 BEAM
1 a5 W 12 x 14 x 20'-0
2 p1 PL 1/2 x 36 x 4'-0
Regardless of whether the first or second option is selected, the material list is automatically put into a Structural Material Manager-compatible format as the items are imported. No further intervention will be required during the rest of the import, as your choice will apply to all such cases encountered as the rest of the file is imported.
Only if the last choice is selected will the imported material list retain identical major marks on both a Main Member and an actual item beneath it. That prevents Structural Material Manager’s Production-Control Module from being able to produce Shipping Lists, Shipping Tickets, etc.
In the unlikely event that a user is manually retyping a Design Data SDS/2 material list rather than importing it via the optional External Data Interface, the typist should manually make the necessary changes during data re-entry.
Section 8-19: Minor Mark on the Main Assembly Item. Normal structural detailing practices call for the main item of an assembly to carry a major piece mark. However, jobs detailed in Tekla sometimes use a minor mark for that main item. Under this non-standard detailing system, consider this example assembly named 1B1:
1 m5 W 12 x 45 x 21'-4
2 a22 L 3 x 3 x 3/8 x 2'-2 3/4
2 p19 PL 3/8 x 3-13/16 x 1'-7 1/2
Note that although the assembly is named 1B1, that major mark never appears on any of the actual items. Most fabricators would expect the W 12 x 45 x 21'-4 item to carry mark 1B1, but it instead has minor mark m5. That 1B1 assembly mark is used by Tekla "behind the scenes" but unfortunately does not appear on an actual assembly item.
Structural Material Manager's External Data Interface is able to import KISS files produced by Tekla and, of course, other systems (see Chapter 18 for details). During such KISS-file imports, Structural Material Manager is able to detect the non-standard detailing situation described above. If that occurs, it pops up a prompt asking whether you'd like to automatically adjust the marks for this modified result:
1 1B1 W 12 x 45 x 21'-4
2 a22 L 3 x 3 x 3/8 x 2'-2 3/4
2 p19 PL 3/8 x 3-13/16 x 1'-7 1/2
Note that if you decide to allow Structural Material Manager to automatically adjust the marks, the original m5 piece mark is lost completely since it is replaced by 1B1. Discarding that m5 mark should be of little consequence since the W 12 x 45 x 21'-4 item itself is retained but now has the 1B1 mark that most fabricators would prefer.
The example presented at the start of this section involves an undesirable detail mark of m5 being replaced by the preferred major mark 1B1. In a similar case of a non-standard detailing scheme, the first item of an assembly might carry no piece mark whatsoever. In keeping with that original example, the W 12 x 45 x 21'-4 item would have a blank piece mark. Fabricators would much rather have it carry its underlying assembly mark such as 1B1, 1B2, etc. rather than a blank mark. In this situation, too, Structural Material Manager is able to detect the issue while importing a KISS file and offer an automatic workaround of replacing that blank piece mark with the proper assembly mark.
Chapter 9: The Estimating Module
Section 9-1: Introduction. For each material item, it is possible to enter the optional Material Price, Shop Hours, Field Hours, Equipment Hours and Crane Hours fields. Up to this point, all example items have been entered without any of these optional fields. This chapter presents the entry method for these fields and discusses the basic operation of the estimating feature.
Estimating reports are available in unsorted, sorted and shipping forms. These reports are similar to their regular, non-estimating counterparts, but they also provide total material prices as well as shop hours, field hours, equipment hours and crane hours tallies for each material type. This information is then totaled for the entire job.
Some advanced estimating functions presented here include printing the extended estimating summary, using the "Unit Pricing" feature and using a Master Price List to quickly apply prices after a job's items have already been entered.
We’ll be entering some additional sample items in this chapter. It is thus important that you have Structural Material Manager up and running, have re-opened the sample job as discussed in Section 4-3: Opening and Closing Jobs.
Section 9-2: Shifting the Entry Screen to Reveal Estimating Fields. The Material Entry Screen shows as many item fields as it possibly can at your computer’s particular screen resolution. At high resolutions, all fields from the Piece Mark at the left all the way through the Sequence on the far right will be in view; none will be hidden. At lower resolutions, however, fields used for estimating (Price Unit, Shop Hours, Field Hours, Equipment Hours and Crane Hours) - will be partially or completely out of view. The same is also true of the Sequence field which, although not specifically an estimating field, is grouped with the estimating fields at the right edge of the display. To view any “missing” estimating fields or the Sequence field, simply use the mouse to slide the horizontal scrollbar that exists at the bottom of the material list.
Section 9-3: The Material Price Field. Enter an example item of 2 W Shapes, 12 x 27 x 18'-0. Do this by hitting Enter with the highlighted window over the "W." Skip the Piece Mark field with Enter or the right-arrow key and type 2 [Enter], 12 [Enter], 27 [Enter] and 18 [Enter].
Hit Enter or the right-arrow key until you come to the Material Price field. The system prompts you for a material price for this item and informs you of the unit of measurement used for that price, such as per "CWT" or "FOOT." You may then enter a decimal price up to 999.99. No dollar sign is required, so a price of $45.32 is entered as simply 45.32.
Type a price of your choice at the prompt, and hit Enter.
Later sections of this chapter explain short-cut methods that allow you to delay entering prices into the job for now so they can later be entered very quickly. For now, please be content with the fact that the material price can be specified while the material list is being entered; more efficient techniques will be revealed shortly.
Section 9-4: The Shop and Field Hours Fields. After the Material Price field is entered, the system prompts you to enter the number of shop labor hours for the item. This value may range from 0 to 99.99. Next, the system prompts you to enter the number of field labor hours; this value may also range from 0 to 99.99.
Hours should be entered as the value for one item, as this number will later be multiplied by item's Quantity field.
Type a Shop Labor field of your choice, and hit Enter. After this is done, enter a Field Labor value of your choice, and hit INSERT to save the item.
Section 9-5: Changing the Estimating Feature Defaults. Each material type can have a price unit assigned to it. Here are the available price units:
• EACH
• 100 UNITS
• CWT
• LB.
• FOOT
• SQUARE FOOT
When Structural Material Manager is used for the first time, the price unit that applies to most material prices is "CWT", the standard abbreviation for "PER 100 POUNDS", commonly referred to as “Hundred Weight.”
Miscellaneous Items have a default price unit assigned, but this unit can be changed for each item when entering material. This variable price unit is useful because there is no way to determine in advance what types of material might be entered as Miscellaneous Items. Some items may be best priced per pound, while perhaps others should be priced per foot, per 100 units, etc.
As is the case with Miscellaneous Items, Main Members also employ a variable price unit that can be changed with each entry. This price unit applies only to the detail items attached to the major piece, as Main Members themselves never actually receive a price entry. The details of this are described later in the Unit Pricing section.
Even though you may over-ride the default units for Miscellaneous Items and Main Members with each entry, it is a good idea to set the default for these types to the unit you use most often. This will speed entry by reducing the number of times the price unit needs changed.
Pricing based on square footage is available only for Bars, Plates, Checkered Plates and Bar Grating. These are the only types that contain a Width field, so of course they are the only ones for which a "Length x Width" multiplication can be carried out in applying the "per square foot" unit. Specifically, the user should note that there is no way to apply this price unit to Miscellaneous Items. Although these items do possess a dedicated Length field, the system has no way to determine which part of the free-style description might represent a Width field.
If any of the default values don't meet your individual needs, they may be changed as follows:
A) Select the Estimating | Set Up Price Units option. The system now all possible material types in the left-hand column and the corresponding price units in the right-hand column.
B) To change the price unit for a particular material type, click the drop-down box that appears to the right of that type.
C) You are now shown a drop-down list of available price units. Simply use the mouse to select the price unit that you would like to apply to the material type. For example, if you are selecting a price unit for Bolts, you might click on the “100 Units" item in the drop-down list.
D) Repeat steps C and D until each material type's price unit has been set to meet your requirements.
E) When finished, click Ok to return to Structural Material Manager’s main window.
F) Assuming you have made changes to one or more of the original price units, you’ll be asked whether those changes should be saved. Simply choose Yes, No or Cancel.
Any changes you have made to the price units will apply to all jobs stored in Structural Material Manager, including jobs that were previously entered. Suppose a job contains W Shape material prices based on CWT which is the “hundred weight” price unit. Further suppose that you later change the price units for W Shapes from CWT to “per pound.” That change would cause an estimating report for the previously-entered job to now show the total cost of the W Shapes to be 100 times higher than it should be! For this reason, it is best to set up the price units to meet your needs very soon after installing Structural Material Manager, and leave them set at those values unless a change later proves absolutely necessary.
Section 9-6: Estimating Calculations. The specific formula used to determine an entry's total material price depends on the price unit of measurement that has been set for that type. The following calculations are used to determine the total item price for each price unit:
Price Unit |
Corresponding Calculation |
EACH |
Quantity x Price |
100 UNITS |
(Quantity / 100) x Price |
LB. |
Quantity x Weight of One Item x Price |
CWT |
Quantity x (Weight of One Item / 100) x Price |
FOOT |
Quantity x Length x Price |
SQ. FOOT |
Quantity x Length x Width x Price |
The price unit for the material type does not affect the Shop Hours, Field Hours, Equipment Hours and Crane Hours calculations. These item totals are always found as Quantity x Hours.
Most price subtotals are reported on the estimating printout with two decimal places, i.e., in dollars and cents. The total price for each material type is rounded up to the next higher dollar if there are any cents at all; this figure, as well as the total job price, is always a whole-dollar amount.
As with the total price for a material type, the Shop Hours, Field Hours, Equipment Hours and Crane Hours totals for a material type are always whole numbers, as they are rounded up to the next higher whole number if there is any decimal part. The job total for each of these fields is also always a whole number.
Section 9-7: Extended Summary. In addition to the normal estimating summary, each form of the estimating list can also provide an extended summary. It contains such information as cleaning costs, paint and primer gallons and costs, welding electrode weights and costs, shipping costs to the job site and dollar-figure totals on shop and field labor hours.
Whether the extended report should be produced is determined by the user when printing an estimating report.
Section 9-8: Building a Master Price List. Earlier in this chapter, you learned that material prices can be specified with other item fields while the list is being entered. Although this is effective in that it provides access to dollar figures on the estimating reports, entry of prices can be quite time-consuming. Fortunately, the process of applying material prices to a job can be automated.
The Estimating | Apply Prices option applies the prices from a Master Price List to any other job. The idea is simple: enter various section sizes and corresponding prices once in the Master Price List, and the prices can be applied to as many jobs as necessary without duplication of effort. The prices will of course change periodically, but these changes only need to be made once to the Master Price List in order to apply to all future jobs that are priced against it.
This section focuses on constructing a Master Price List, whereas the next section concentrates on actually using the file once it has been built.
You typically create the "Master Price List" in the Inventory / Prices folder. This special folder is described in Section 11-4. You may wish to refer to Section 11-4 at this time if you want all the details concerning this folder, but for now it suffices for you to simply know that the Master Price List is usually located in the Inventory / Prices folder. Use of the special “Inventory / Prices” folder is not mandatory; you might prefer to keep a job-specific price list in the same folder as the job itself.
The Master Price List lists various steel sizes and corresponding prices. Any job within the special Inventory / Prices folder or even within other folders can be chosen for use as the Master Price List, but be sure to give it some name that will remind you of its special purpose. "Price List," "Johnson Steel Prices," etc. are such names. More than one Master Price List can be constructed if you wish to maintain prices for different suppliers, but only one can be accessed during any particular pricing session.
Let's discuss the general contents of a Master Price List before building one. The first important fact to note is that following item fields must match exactly between a job item and a Master Price List item if the job item is to receive the price from the price list item:
• Description (varies between material types)
• Grade
• Camber / Mid-Ordinate Rise (Beams, Channels, Plates and Checkered Plates only)
• Price unit
The fact that the item fields listed above must match exactly should intuitively make sense. Obviously, in the case of differing description fields, you would never expect a price from a C 10 x 30 x 40'-0 A36 channel to be applied to a C 9 x 20 x 40'-0 A36 channel, as the descriptions don't match. As another example, it would certainly be an error to apply a price from a W 10 x 54 x 20'-0 A36 beam in the Master Price List to a W 10 x 54 x 20'-0 A572 beam in a job, as the material grades are different. Likewise, matches between items with different Camber / Mid-Ordinate Rise fields, or different Price Units (per CWT, per FOOT, etc.) will never be attempted.
Whereas a match is established between a job item and a price list item only if the Description, Grade, Camber / Mid-Ordinate Rise and Price Unit are absolutely identical, the matching criteria for item widths and lengths are much more flexible as they are treated as "ranges." This means that more than one price can be entered per section, as long as the width and length are not the same. This varies among different material types, and the specific criteria for each type are covered in separate sections below.
For lineal items, namely all Beams, Channels, Bars, Angles, Tubes, HSS, Rods, Rebar and Pipes, the system uses the price of the shortest matching Master Price List item length that is greater than or equal to the actual item length. For example, assume the job being priced contains a W 10 x 54 x 19'-0 A36. Also assume that the Master Price List contains two W 10 x 54 W Shapes: 10 x 54 x 20'-0 A36 and 10 x 54 x 40'-0 A36, each of which may have different prices. In this case, the price of the W 10 x 54 x 20'-0 would be used since this item has the shortest W 10 x 54 length that is least 19'-0.
The whole purpose of utilizing the length-range feature that allows multiple entries for each section size is of course to permit different prices for items of the same description but different lengths. User's that are content with just having one price that will be applied to all items of a certain description, regardless of length, can make the task of building a Master Price List much easier by listing only one entry per section size in the Master Price List. This one entry must of course have a very long length field so it can be used as a match for any items of that description that are encountered in other jobs. One suggestion is to give the item a length such as 150'-0, which is of course guaranteed to be longer than the actual item lengths that will be compared against the Master Price List item. Another suggestion is to give the one item that represents this section the length of the longest stock you can actually buy for that section. Let's assume a particular Channel C 9 x 20 A36 is available in stocks up to 60'-0 long. You would then enter C 9 x 20 x 60'-0 A36, perhaps with a price such as $48.65 per CWT, into the Master Price List. Then, as a job is being priced against the Master Price List, all the job's C 9 x 20 A36 items with lengths not exceeding 60'-0 will receive a price of $48.65.
In the case of plates and checkered plates, a two-fold comparison is used. This involves using the Master Price List item that has the shortest width greater than or equal to the job item's actual width and the shortest length greater than or equal to the job item's actual length. To determine the smallest overall plate size that will work, the closest width match is chosen first. The length is a secondary criterion in this comparison; it is used only to break ties. For example, consider a job with PL 3/4" x 34" x 20'-0. Assume the Master Price List contains PL 3/4" x 35" x 40'-0 and PL 3/4" x 36" x 20'-0. The PL 3/4" x 35" x 40'-0 would be chosen since the 35" width is closer to 34" than 36" is to 34".
Note that plate dimensions will not be flipped if they are reversed such that the width is greater than the length. For instance, if a 48" x 3-0 plate is in the job, and the Master Price List contains a 36" x 4-0 stock, it could theoretically be used, but the system will not assume this. It is left to the user to make sure that plates are entered in the proper width and length orientations.
If the user is not concerned with the plate's length being matched, then he or she should enter a length longer than that which would really ever be required for a particular thickness and width combination. For instance, PL 3/4" x 36" x 150'-0 may be a good choice as a Master Price List entry that will cover all 3/4" x 36" plates regardless of length. This technique of using an extremely long length in the Master Price List essentially eliminates the length from the comparison process thus reducing the check to a width-only comparison. Such a simplification obviously means that much less effort will be required in building and maintaining the Master Price List.
For a Bolt or Miscellaneous item in the Master Price List to be used as a price source, it must exactly match a corresponding job item. Even the length must match in such cases, as no ranges apply to Bolts and Miscellaneous Items.
Main Members are intended to be used as shipping headings rather than actual items. Accordingly, Main Members are completely ignored by this pricing facility.
Chapter 11 describes how both In-House Inventory and Supplier Stock Lists can be built for use with the Nesting Module. In case you are not yet familiar with this topic, you need to be aware that the Supplier Stock List includes every section size and length, along with available quantities, that a particular vendor can supply. Its purpose is to guide the Nesting Module so that items are nested only into stock sizes that your supplier has available for sale. You may already be noticing the similarities between the Supplier Stock List and the Master Price List in that each lists large numbers of different section sizes. This brings us to the point that you may wish to create just one list and let it do double-duty as both your Supplier Stock List and Master Price List for a particular vendor.
You may be wondering what sort of quantity field should be entered with each Master Price List item. Actually, the quantity field is not at all critical for this feature; a quantity of 1 will work as well as a quantity as 1000. The general recommendation is to simply use a quantity of 1 if you are using a dedicated Master Price List, i.e., a file that is not also serving as a Supplier Stock List. If, however, the Master Price List and Supplier Stock List are one in the same, the exact quantities you wish to use for your Supplier Stock List will of course prevail.
Now that you are familiar with the criteria used in matching a Master Price List item to an item in a regular job, you are ready to build a Master Price List. Follow these steps:
A) Use File | Open Job to open a job. By default, the folder drop-down starts off with the Inventory / Prices folder selected, but you are free to create the job in a different folder if you wish. This job will serve as the Master Price List. If you are creating a new job here, be sure to specify a dimension system of feet and inches or inches-only, as the metric dimension system cannot be used for a Master Price List. Also be sure to give the job a name that will indicate to you in the future that it is the Master Price List.
B) Enter each and every section size that you commonly encounter in day-to-day pricing activities, and be sure to include a recent price with each one.
C) After all section sizes and prices have been entered, hit F1 to exit back to Structural Material Manager’s main window
Remember while entering the Master Price List that the Material Entry Screen might not initially have the estimating fields - Price, Price Unit, Shop Hours, Field Hours, Equipment Hours and Crane Hours - in view. At low screen resolutions, these fields as well as the Sequence Field may be partially or completely hidden. If that is the case, the horizontal scrollbar beneath the material list can be slid with your mouse to bring the fields into view. If your computer has a high enough screen resolution, this won’t be necessary since all item fields from Piece Mark on the far left to the estimating fields (and Sequence) on the right will be in view at all times.
Now that the Master Price List is built, you may be considering the method in which it might be updated in the future. The Edit Item function available at the Material Entry Screen can of course be used at any time if you ever wish to manually update a price in this Master Price List as prices change. Another method, which may be preferred by many users, allows you to automatically update Master Price List prices as a job is being priced against it; the next section provides the necessary details.
If you ever need to make temporary changes to a Master Price List, perhaps one-time changes that apply only to a certain project, then you may wish to use the File | Copy Job function to copy the normal Master Price List to another job for use as a temporary Master Price List. Changes can thus be made to the temporary Master Price List rather than disturbing the normal one, and the temporary one will of course be used as the source of prices when applying prices to the particular job that mandated the changes.
Section 9-9: Applying Prices from a Master Price List. Assuming a Master Price List has been built in the special Inventory / Prices folder or even some other folder, it is a simple matter to add prices even to jobs that had no material prices whatsoever specified during entry. Once the prices have been applied from the Master Price List, they will be part of the job just as if they had been entered manually.
In order to apply Master Price List prices to a job, you open the job that is to be priced, select the Estimating | Apply Prices option, and choose a Master Price List from which item prices should be fetched. The system inspects each and every item in the job being priced, and it looks for corresponding Master Price List items at each step of the way. Such comparisons are carried out until the every item in the job has received a price. What an incredible time-saver compared to entering prices into every job!
If you need to create such a Master Price List, please see the previous section for details before proceeding in this section. That section also provides important information concerning the criteria that are applied when comparing Master Price List items to items in a job that is being priced.
During the pricing process, the user has the opportunity to review each Master Price List price before it is used. If the price is correct, then the user simply hits Enter to accept it. A new price, however, can also be entered. If a new price is entered, it is not only used for the rest of the current pricing session, but actually replaces the old price within the Master Price List. So, not only are your changes affecting the job being priced, but they are also simultaneously updating your price list. You could, of course, have used the Material Entry Screen to manually update the prices in the Master Price List before beginning the pricing session, but this automatic method is much simpler in that you are only prompted to verify prices that are actually required for the job being priced.
As an example of the above discussion, assume a Master Price List item of WT 5 x 27 x 20'-0 A36 has a current price of $43.25 per CWT, and this price is displayed on the screen for approval or modification by the user. If the user enters a new price of $43.75, the new price will be applied to the job item and saved for future reference. This new price will actually replace the old one stored in the Master Price List. If the user just hits Enter to accept the old price instead of entering a new one, then the original $43.25 figure will be applied to the job item, and the corresponding Master Price List entry will be left unchanged.
During job pricing, the system will ask for an item price if none was found in the Master Price List. When you specify the missing price, it is applied to the item and stored in memory for use with any other occurrences of that exact item description and length that may arise during the same pricing session. The new price, however, is not added to the Master Price List.
Let's illustrate the above discussion with an example. Assume a W 12 x 58 x 45'-0 A572 exists in the job being priced. Also assume that the longest W 12 x 58 contained in the Master Price List is a W 12 x 58 x 40'-0 A572. Since the Master Price List does not contain a W 12 x 58 of at least 45'-0 in length, the system reports that no corresponding Master Price List item was found and prompts the user to enter a price. Assuming $25.50 is entered as price per CWT, then $25.50 will automatically be applied to all further W 12 x 58 x 45'-0 items found in the job without bothering the user for any input. However, no W 12 x 58 x 45'-0 A572 at $25.50 per CWT will be added to the Master Price List for future reference. It is also important to note that the $25.50 price will be applied only to W 12 x 58 items that are exactly 45'-0 long; if a W 12 x 58 x 47'-0 item is later encountered in the job, the system will ask for a price to apply specifically to that item.
Miscellaneous Items are able to be priced by using a Master Price List. The matching criteria are fairly restrictive though in that the Miscellaneous Item in the job must be an exact match for the Miscellaneous Item in the Master Price file in order for the two items to be considered a match for pricing. Quantities, piece marks, etc. are of course allowed to vary, but keep in mind that the Description fields and even the Length fields between a job item and a Master Price File item must be the same when dealing with Miscellaneous Items.
A word is in order concerning $0.00 prices in a Master Price List. If the Master Price List contains an item with a $0.00 price, the $0.00 price will indeed be assumed to be the item price. This is not a problem since it is assumed that you will be entering a price with any item in the Master Price List. Also, if you instruct the system to allow you to review prices before they are used, the $0.00 figure will be plainly displayed such that you can instantly see that the price needs updated.
Let's put a Master Price List to use with these steps:
A) Open the job to which you wish to apply prices.
B) Click the Estimating | Apply Prices | Automatically menu selection.
C) Choose a job which is to serve as the Master Price List for this pricing session. By default, the folder drop-down starts off with the Inventory / Prices folder selected, but you are free to select a price list that you have created in some other folder if you wish.
D) Choose whether you want to review each price before it is used for the first time or if all prices should be automatically applied without any opportunity for review. Generally, you'll want to use the default choice of the first option in order to have the security of knowing that every price used has been reviewed first and updated if necessary. Alternatively, you may choose the second option if you are absolutely confident that the Master Price List's prices are current.
E) Click the Apply Prices button to begin the pricing session. The “Apply Prices to Job Items” dialog will now be displayed.
F) The system now applies prices to each item in the job. The amount of input required from you as the user during pricing of course depends on which price review mode you selected in Step D above. After reviewing an existing price or typing a new one, just hit the Enter key since that has the same effect as clicking the Accept Price / Move to Next Item button but is much faster than reaching for the mouse.
Once all items have been priced, Structural Material Manager’s main window automatically returns and displays a message to tell you that the pricing operation is complete.
If you wish to terminate the pricing process before it is complete, simply click Cancel to force a premature exit. Note that any prices applied to the job (and Master Price List, if applicable) before Cancel was clicked will be retained.
Section 9-10: Applying Prices Manually. The previous section presented information on how to apply prices to a job automatically; this required the use of a Master Price File. Some users may appreciate the power of this feature in that there is no need to specify prices during material entry, but perhaps they don’t want to be bothered with maintaining a Master Price File.
Fortunately, a pricing option exists that is a happy medium between the two extremes of laboriously specifying material prices during entry or using the powerful Master Price File option. This “middle-ground” feature is available under the Estimating menu by selecting Apply Prices | Manually.
You are asked to enter a price just one time for each unique section size that is encountered in the job, and that price is automatically applied to all other items of that same section size. Just as when using the automatic Master Price File style of pricing, figures entered with the manual version of this feature are stored in the job just as if you had typed them during material entry.
In keeping with the idea that users choosing this option are looking for a more basic alternative to the Master Price File type of pricing, the manual pricing mode makes the following simplifications:
• No length ranges are considered for lineal types. Suppose a price has been entered for a W 12 x 58 x 39'- 11, Grade A572. All other Grade A572 W 12 x 58 beams will automatically receive that same price whether they are shorter (perhaps 19'-3) or longer (maybe 60'-0) than the 39'-11 item for which the price was originally entered. Length is not a criterion in determining whether to apply the price. The only time you’ll be asked for any other W 12 x 58 beam prices in this session is if any W 12 x 58 items are encountered of a different grade, camber, etc.
• Neither width nor length ranges are considered for plate types. If you enter a price for a 1/4" x 36" x 4'-0 Checkered Plate of Grade A36, then that same price will automatically be used for all other 1/4" Grade A36 Checkered Plates regardless of their width and length.
The following steps will allow you to price a job by entering a price once per each unique section size:
A) Open a job; it is this job which will receive the prices.
B) Click the menu item corresponding to Estimating | Apply Prices | Manually. This causes the “Apply Prices to Job Items” dialog to appear.
C) The system now applies prices to each item in the job. You’ll be asked for a price each time a new section size is encountered. Although you can click the Accept Price / Move to Next Item button after accepting the current price or typing a new one, it is much faster to simply hit the Enter key which accomplishes the same thing without reaching for the mouse.
Once all items have been priced, Structural Material Manager’s main window automatically returns, and a confirmation message is displayed indicating that the pricing operation is complete.
D) Click the Cancel button at any time if you’d like to abort the pricing session before it is finished. It is important to realize that if you do cancel, any prices applied to the job before Cancel was clicked will be retained.
Section 9-11: Printing the Unsorted-Estimating or Sorted-Estimating List. Since they include pricing information that does not appear on other reports, the Unsorted-Estimating and Sorted-Estimating Lists are extremely wide reports. They thus can only be printed in their entirety if you have a dot-matrix printer loaded with wide paper or if you are using a printer that has landscape capabilities (see Chapter 12 for a discussion of portrait and landscape modes). If, however, your equipment does not meet either of these criteria, don’t fret: Structural Material Manager will simply omit the Mill Mark and Remarks fields from the report in order to compensate. Omitting these fields should not usually be much of a problem.
Print either report as follows:
A) Use File | Open Job to open the job for which you’d like to print an estimating report.
B) Choose Estimating | Print Estimating report followed by either of the Unsorted List or Sorted List choices.
C) A dialog box now appears, and all but one of its prompts are the same as those used when printing a regular (i.e., non-estimating) version of the Unsorted List or Sorted List. The different item is the “Print Extended Estimating Summary” box. As the box’s name implies, checking it causes the additional summary information discussed in Section 9-7 to be printed.
D) Click the Print button to begin printing.
Section 9-12: The Unit Pricing Feature. The Shipping-Estimating report can optionally price detail items at the price specified for the main member (the item with the major piece mark) if the detail item has no price already assigned, thus implementing "Unit Pricing." This can save a lot of entry time, as no prices ever need to be entered for detail items.
Unit Pricing is useful when categories of light/medium/heavy/extra heavy are used based on the main member, and all detail items under that main member are to be priced at the same rate. For instance, consider a job with the following example unit price schedule:
Example Category |
Example Weight Range |
Example Price |
LIGHT |
0 TO 24 LBS. PER FOOT |
$0.75 PER LB. FABRICATED |
MEDIUM |
21 TO 40 LBS. PER FOOT |
$0.15 PER LB. FABRICATED |
HEAVY |
41 TO 70 LBS. PER FOOT |
$0.05 PER LB. FABRICATED |
EXTRA HEAVY |
71 LBS. AND UP |
$0.03 PER LB. FABRICATED |
If a fabricated member is considered "heavy", you would enter a price on the main member that corresponds to your particular "heavy" price ($0.05 in this example). That price will then be applied automatically to all detail items that belong to that member, without ever having to enter a price for those items. Note that you enter a price, not the word "HEAVY".
The main member's price unit will be applied to the detail item as well as the actual price value, so if the main member has a unit of CWT, all detail items will be priced with that unit.
It is important to note that if a detail item has a price that was given during entry, its own price and price unit will be applied instead of the main member's unit price. The main member's price unit and price will over-ride a detail item's price unit and price only when the detail item has a price of $0.00.
You should be aware of the fact that the unit price will be $0.00 if no price was entered for the main member. It is thus critical when employing the unit pricing feature that the user check that correct non-zero prices have been entered for all main members.
The only exception to this rule of a $0.00 price resulting for every detail item when the main member has a $0.00 price occurs when a non-zero price was entered for a particular detail item. The discussion in the previous paragraph applies here: the detail item's price will over-ride the main-member's price.
When obtaining a Shipping-Estimating report, you have the opportunity to check a box that indicates whether unit pricing should be applied.
Section 9-13: Printing the Shipping-Estimating List. The Shipping-Estimating List requires the list to be in proper piece mark sequence, just as is required for the normal Shipping List. Refer to Chapter 8: Production-Control, if you are not sure if your list is in the proper order for printing a Shipping List.
Due to the width of the Shipping-Estimating List, it will not fit in its entirety on 8 1/2" x 11" paper unless your printer has landscape capability (see Chapter 12 for details on landscape mode versus the normal portrait mode). It does fit completely on such paper in landscape mode, and it also fits properly if you are using a wide paper in a dot-matrix printer. Just as is the case with the Unsorted-Estimating List and Sorted-Estimating List described in Section 9-11, the only drawback to not using such equipment is that Structural Material Manager will have to omit the Mill Mark and Remarks fields from the report; it detects and handles that situation automatically.
If the system detects that the report cannot be printed with your particular printer and paper combination, you will simply be notified that report is not available.
If your printer is indeed equipped to produce this wide report, you can obtain the Shipping-Estimating List by following basically the same directions presented in Section 8-6: Printing the Shipping List or Master Shipper. However, be sure select the Estimating | Print Estimating Report | Shipping List function rather than using the Production-Control menu options indicated in that section.
Because you are printing a Shipping-Estimating List rather than a regular Shipping List, an extra check-box appears in the dialog box that you use to specify printout information. This check-box, labeled “Apply Unit Pricing,” should be checked if you’d like detail items to automatically receive prices from their corresponding main members as described in the previous section.
Section 9-14: Building a Buy List. Although building a Buy List is an estimating feature and is thus covered in this chapter, it also involves concepts presented in Chapter 10: Material Nesting. If you are not already familiar with Structural Material Manager’s nesting features, some of the Buy List information in this section might not be clear until you review Chapter 10.
Suppose you do a material take-off for a job and then print a Sorted Estimating Report. You’ll then obtain pricing based on a net material list rather than a gross one since the Sorted Estimating Report prints cut sizes rather than stock sizes. That is, the Sorted Estimating Report does not account for “dropped” or wasted material. The Nested Report is of course a gross list by default since it does indeed print stock sizes including drop, but no prices appear on the Nested Report.
So, how can a material price list be generated in which the pricing is based on gross requirements? It might seem at first that adding prices to a Nested Report (a hypothetical “Nested Estimating Report,” if you will) would be the way to accomplish this, but rather than cluttering the Nested Report with dollar figures, the system implements gross pricing in a much more flexible manner. It does this by allowing a job’s nested summary to be sent to a separate job file. That new job file can then be used for purchasing, and it will of course have access to all of the system’s existing pricing features. Think of that new job file as a "Buy List." If you print a Sorted Estimating Report for the Buy List rather than for the job itself, that Sorted Estimating Report will effectively show gross pricing rather than net.
Either the optional Length-Nesting Module or the optional Plate-Nesting Module must be installed in order to build a Buy List. Since a Buy List is generated from a job’s nested summary, it makes sense that owning one or both of these options is a prerequisite to building a Buy List.
There is no need to have the optional Estimating Module installed in order to build a Buy List. Owning that option does, however, enable you to later apply Structural Material Manager's estimating features to the Buy List and to include prices on the printout. Users without the Estimating Module should print the Buy List as a Sorted Report (which lacks prices), but those who own that option will want to take advantage of it by printing the Buy List as a Sorted Estimating Report.
Many options can be specified before the Buy List is built. These options allow you to determine exactly which items get transferred to the Buy List so you can tailor the list for your exact needs. For instance, you can independently specify whether stock sizes from suppliers and/or those from in-house inventory should become part of the Buy List. You might instruct the system to transfer only supplier stocks but not in-house stocks with the rationale being that you want the Buy List to contain only stocks that need to be purchased rather than those that are already in inventory. Conversely, you would want in-house stocks included if you are building the Buy List not to see what material needs purchased but, rather, what the job’s material is worth; to arrive at a true cost, you of course need to include even stocks that are already in inventory.
In addition to specifying whether supplier stocks and/or in-house stocks appear in the Buy List, you can also determine whether such stocks will have remarks fields such as “Source: Supplier Stock” and “Source: In-House Inventory” automatically assigned. Those remarks are especially useful when both supplier and in-house stocks have been transferred to the Buy List.
Some items are non-nestable and do not appear in the nested summary. You can, however, still transfer those items to the Buy List. Structural Material Manager allows you to specify whether each possible type of non-nestable item is transferred. If you do allow a certain category of non-nestable item to be transferred, you can further guide Buy List generation by indicating whether non-nestable items’ marks (Piece Mark, Mill Mark and Remarks) and Sequence field should be transferred. Note that Shop Labor and Field Labor values of non-nestable items are never transferred, as labor hours have no bearing on a material Buy List.
As an example of a non-nestable item category, consider how Plates, Checkered Plates and Bar Grating are handled for customers who own the optional Length-Nesting Module but not the optional Plate-Nesting Module (not all customers own both modules). When the Plate-Nesting option is not installed, Plates, Checkered Plates and Bar Grating will always be non-nestable, but items of those types can still be transferred to the Buy List. They won’t be nested, of course, but at least they get carried to the Buy List.
Bolts and Miscellaneous Items are never nested by either the Length-Nesting Module or the Plate-Nesting Module. Items of these types are always non-nestable and will be transferred to the Buy List at your discretion.
Although Bolts and Miscellaneous Items can be transferred to the Buy List as non-nestable items, this is never done for items of the type Main Member. Such items are simply textual headings serving only to carry an assembly’s major piece mark. Since Main Members are not actual items, having them appear in the Buy List would serve no purpose.
Buy Lists automatically undergo a physical sort by material type and size. This is done behind the scenes without you having to request it. Physical sorting is covered in Section 7-5: Sorting Modes. Please review that section if you are not familiar with the concept of Structural Material Manager’s physical sort. The automatic physical sort is another reason that items of type Main Member are never transferred to the Buy List: as per the information in Section 7-5: Sorting Modes, the automatic physical sort would strip them from the Buy List anyway.
The dimension system of the Buy List will always be feet, inches and sixteenths. That happens regardless of the original job's dimension system. So, even if the original job is inches-only or metric, the Buy List will be in feet, inches and sixteenths. If the original job was indeed inches-only or metric, conversions will occur when non-nestable items are transferred to the Buy List. Conversions from inches-only to feet, inches and sixteenths are exact; only the appearance changes (24 ½" becomes 2'-0 ½). Conversions from metric values, however, involve rounding as per Chapter 16: Inches and Metric Dimension Formats.
You are free to modify the Buy List at the material entry screen just as you would any other Structural Material Manager job file. As stated previously, the newly-generated Buy List undergoes an automatic physical sort behind the scenes; the Buy List will thus appear in sorted order on the material entry screen. If you later edit the Buy List and/or add items, you may want to physically sort it again as per Section 7-5: Sorting Modes.
There is never reason to nest the Buy List. Technically speaking, you can perform the nest. The results simply won’t be meaningful though. Remember: since the Buy List was built from nested summary results and represents your gross list of material to purchase, nesting the Buy List accomplishes nothing of value.
If you accidentally try to print the Buy List as a Nested Report, you’ll be told that the job is not nested and asked whether you want to nest it. Stop right there and think of this in terms of what was explained in the preceding paragraph. You do not want to nest the job. The Buy List is already comprised of stocks that resulted from a nest; there is no need to nest it. It should always be printed as a Sorted Report or a Sorted Estimating Report rather than a Nested Report.
Now that the necessary background information concerning Buy Lists has been presented, here are the steps for producing one:
A) Use File | Open to open the job for which you wish to build a Buy List.
B) If the job is not already nested, click the Nesting | Nest Material menu options. The Build Buy List function is expecting a nested job as its input.
C) Since Buy Lists are related to both nesting and estimating, you’ll find the "Build Buy List from Nested Summary" menu option both under the Nesting menu and the Estimating menu. Click it in either of these two menus to bring up the function.
D) You can type the name of a new job if you want to create a brand new job as the Buy List. You can also select an existing job to receive the Buy List items, and if you do so, the system will ask whether you want to append that Buy List or create it anew. Note that the Buy List can be in any folder you wish, as you are not restricted to working within the same folder that contains the job for which you are building the Buy List.
E) The dialog at which Buy List options are specified now appears. Make any changes you wish, and click the Generate Buy List button when done.
F) Note that the Build Buy List function does not automatically open the new job that just received the Buy List. For instance, if the job "10-1273" is open, and you generated "10-1273 Buy List," perhaps you would still want the original "10-1273" job to be open. On the other hand, you might want to open the new "10-1273 Buy List" job file. Since it has no way of knowing what is best for a particular situation, Structural Material Manager asks whether you would like to open the Buy List. You can click Yes to do so, or click No to leave the original job open.
Suppose that you need to transfer Structural Material Manager’s summary of nested results to Excel. The first step to doing so is to generate a Buy List for the job at hand. Once that Buy List exists, it is an easy matter to export it to an ASCII-delimited file that Excel can import. Various sections of Chapter 18 discuss ASCII-delimited files and how Structural Material Manager and Excel work with them.
Section 10-1: Introduction. Material nesting is one of the most powerful capabilities of Structural Material Manager. It compares a list of items that are needed for a particular job and compares it to the list of available stock sizes from which those items may be cut. After performing large numbers of combinations of item layouts into the stocks, the system arrives at a cutting pattern that yields optimum material usage. Such work is so time-consuming to do by hand that this feature alone is reason enough for many firms to abandon their old manual methods!
Nested results can be printed in two forms: a report to be used as a cutting pattern by shop personnel, and as a set of adhesive labels that can be attached to the items as they are cut. So, the two forms of the Nested List work hand-in-hand: the report shows how to cut the items, and the labels serve to identify the items after they are cut.
The nesting feature is comprised of two optional modules. The first of these is the Length-Nesting Module which processes lineal items, such as angles. It is a one-dimensional system. The second part of the nesting system, the Plate-Nesting Module, is two-dimensional in nature; it handles square and rectangular items.
The Length-Nesting Module is capable of nesting (sometimes referred to as "multing") all lineal material types, namely, all Beams, Channels, Bars, Angles, Tubes, HSS, Rods, Rebar and Pipes. The result of this processing is a listing of which items are to be cut from each stock length; this listing yields optimum steel usage when the material items are cut as specified.
Lengths can be nested into your in-house inventory, your supplier's stock, or the best combination of both. If you are using in-house inventory, the system can automatically remove stock lengths that were used and add back drops that are over a certain length that you specify. In addition to nesting into exact lengths and quantities available in-house or from your supplier, it can also nest into unlimited quantities of standard stock lengths.
The Plate-Nesting Module picks up where the Length-Nesting Module leaves off and nests all Plates, Checkered Plates and Bar Grating into square and rectangular stock items. Whereas the one-dimensional Length-Nesting module simply provides a listing of the items that are to be cut from each stock, the Plate-Nesting system represents two-dimensional items and thus provides an actual pictorial layout showing the item placement within each stock.
While Length-Nesting is performed into different stock sources such as in-house inventory, supplier stock, or combinations of both, Plate-Nesting always accesses supplier stock.
As discussed in Section 10-26: Free-Form vs. Shear-Cut Patterns, Structural Material Manager’s Plate-Nesting Module can produce one type of pattern when the equipment cutting the stock sheet uses a saw blade, water jet, flame, laser, plasma, etc. or a completely different type of pattern when a shear will be used.
Nesting is by far the most involved operation for the user to learn about. While it will require an investment of time on your part to do this, the rewards of having material lists automatically nested should far outweigh the learning curve. This chapter covers all basic information concerning the Nesting Module and its operation.
Both Length-Nesting and Plate-Nesting will be covered in this chapter; any information that applies only to one or the other rather than both is noted as such.
The sample material list presented in Chapter 4 is nested at the end of this chapter. Information on using the Nesting Module's inventory features will be presented in the next chapter.
The nested summary of stock sizes can be transferred to a separate job file called a “Buy List” representing the gross list of stock material required for the job. You may wish to work with the Buy List directly within Structural Material Manager, or you may prefer to export it to an ASCII-delimited file that Excel can import. See Section 9-14: Building a Buy List for more information.
Section 10-2: Summary of Length-Nesting Values. The Length-Nesting Module bases its processing completely on values supplied by the user. The available values, as well as their default values when the system is first used, are listed below:
∙ Up to nine stock lengths to nest items into; defaults vary by material type.
∙ One preferred stock length of the nine specified; defaults are usually 40'-0, but vary by material type.
∙ Cutting clearance to provide between adjacent items; default is 0".
∙ Milling clearance to provide for each milled end; default is 0".
∙ Squaring clearance to provide for each squared end; default is 0".
∙ Safety Buffer value to subtract from each specified stock length; default is 0."
∙ Indicator for whether cambered items are to be nested; default value excludes cambered items from the nest.
∙ Maximum length that shop can handle; default is 65'-0.
∙ Maximum length that shop prefers to handle; default is 60'-0.
The default values are completely arbitrary and, in some cases, unrealistic. They are intended to be changed by the user the first time the system is operated.
Most length-nesting values may be specified separately for each nestable material type. One exception is the camber indicator, which is valid only for Beams and Channels in the context of the Length-Nesting Module (the Plate-Nesting module’s values are discussed in the next section which mentions Camber / Mid-Ordinate Rise for Plates and Checkered Plates). The other exception involves the shop capacities, as their values apply to all material types without need for entering them individually for each type.
The stock lengths and shop capacities are entered in whole feet, the camber indicator is either "Y" or "N", and all other values are entered in the standard inches and sixteenths format used in entering Width, Thickness and Diameter fields.
Section 10-3: Summary of Plate-Nesting Values. Just as the Length-Nesting Module bases its decisions on parameters specified by the user, the Plate-Nesting Module also provides a set of controls that determine stock size, cut width, etc. Here are the values that guide this module:
∙ Up to 20 stock plate sizes per unique plate description.
∙ Cutting clearance to provide between adjacent items; default is 0".
∙ Whether or not rectangular items can be rotated 90 degrees within stock.
∙ Maximum stock plate length that shop can handle; default is 60'-0.
∙ Maximum stock length that shop prefers to handle; default is 40'-0.
Each of the values that control the will now be described separately.
Section 10-4: Stock Size Values. The stock size values are simply the stocks that the user is purchasing and wishes to nest items into.
In the Length-Nesting Module, up to nine stock lengths may be specified, with each assumed to have unlimited quantities available. These lengths are commonly referred to as "standard stocks" as opposed to stocks that are stored in inventory. Whole-feet values of up to 85'-0 are accepted; no inches or fractional inches may be entered.
The standard stock lengths are meaningless if you are nesting into in-house inventory, your supplier's stock or the best combination of both. This is because the inventory lists specify the exact lengths and quantities available for each section size; there is no need for a list of standard stocks in such cases.
The Plate-Nesting Module accepts up to 20 stock plate sizes, each with a corresponding available quantity, for each item description. This means that 20 different sizes can be specified for 1/4" plate, 20 different sizes for 1/2" plate, etc. These sizes are restricted to a maximum width of 10'-0 and a maximum length of 120'-0. The minimum stock width supported is 4", and the minimum stock length is 1'-0. Of course actual job items smaller than the stated minimums can be nested; these restrictions refer specifically to stock plates rather than plates that may be entered as part of a job. One further restriction exists concerning stock plates: the width may never exceed the length.
Note that entering a very large stock quantity such as 999 can be very useful in cases where the exact number of items available for a particular stock size is unknown, but it is certain to be more than enough for the job being nested. For instance, suppose a shop wishes to utilize (10) 1/4" x 48" x 8'-0 stock plates that are known to be available; a quantity of 10 should be specified with this stock plate size. However, if the 1/4 x 48" x 8'-0 stocks are coming from a supplier, and that supplier is known to have large quantities available, a high value such as 999 should be specified to give the effect of an infinite quantity.
Each stock Plate and Checkered Plate can have a Camber / Mid-Ordinate Rise value assigned. Only if that value matches exactly between a job item and a stock sheet will the item be cut from that stock. A ½” Grade A36 plate with a 4" Camber / Mid-Ordinate Rise will thus never be cut from a ½" Grade A36 stock with a 0" Camber / Mid-Ordinate Rise.
Section 10-5: Preferred Stock Length. One of the nine specified stock lengths for each material type in the Length-Nesting Module may be assigned a special "preferred" status. This allows the user to specify a certain stock length that should be used as often as possible.
Note that although the system makes a special effort to fulfill the request for a certain stock length to appear more often than other stocks, it will never choose the preferred stock at the expense of overall nest efficiency. Using the preferred stock can thus be thought of as one of the Nesting Module's secondary goals.
A common misconception is that the system uses only the stock that the user assigns as the preferred stock; this is not the case. If you don't want a certain stock length to ever be considered for use, then it must be completely removed as shown in Section 10-22: Changing the Length-Nesting Values.
The preferred stock length does not apply when nesting into in-house or supplier inventories. Also note that there is no preferred stock plate size for the Plate-Nesting Module; this value applies strictly to the Length-Nesting module.
Section 10-6: Cutting Clearance Value. The cutting clearance value allows the user to specify the amount of clearance that must be left to account for the width of the cutting device, such as saw blade width, flame cut waste, etc. Such a value is commonly referred to as a "kerf."
The cut can be left at 0" if the user does not wish to compensate for cutting waste.
The cut is added to items only when they are adjacent to another item in a stock length or plate; there is no need to add the cut to item edges that are touching the stock edges. For instance, assuming a 1/4" has been specified, a 40'-0 beam can be taken out of a 40'-0 stock length with no need to adjust for a cut, but (2) 20'-0 beams could not be nested into that very same 40'-0 stock due to the cut adjustment that must be made where the two items meet.
Values from 0" to 15 15/16" are accepted by the Length-Nesting Module, and the Plate-Nesting Module allows values of up to 3".
Section 10-7: Milling Clearance Value. The milling clearance value specifies the amount of extra material that should be left on each milled end. This value applies only to the Length-Nesting Module rather than the Plate-Nesting Module.
Clearances ranging from 0" to 15 15/16" are accepted.
The system will automatically adjust for this if any of the following are present in the item's Remarks field:
• M1E
• Mill 1 End
• Mill One End
• M2E
• Mill 2 Ends
• Mill Two Ends
Generally, anything similar to the Remarks fields shown above will yield proper results, as spaces, punctuation, capitalization, slight misspellings and other parts of the Remarks field are ignored.
Note that the specified clearance will be doubled for an item if the system finds that it has two milled ends.
Section 10-8: Squaring Clearance Value. The squaring clearance value operates in very much the same manner as the milling clearance value, except that it recognizes the following Remarks fields:
• SQ1E
• Square 1 End
• SQ2E
• Square 2 Ends
As with the milling clearance value, the squaring clearance is limited to a maximum value of 15 15/16" and does not apply to the Plate-Nesting Module.
Section 10-9: Safety Buffer Value. A value ranging from 0" to 15 15/16" may be specified as the safety buffer. This amount is simply subtracted from each of the specified stock lengths, and it thus has the net effect of specifying slightly shorter stock lengths.
One common use of the safety buffer value is to compensate for mill tolerances and the material lost when removing the stock length's mill edge. As an example of how the safety buffer is used in this scenario, suppose one of the stock lengths entered by the user is 20'-0, but the actual items received from the supplier are as short as 19'-10 (especially after cleaning up the mill edges). This is a case in which a safety buffer of 2" should be specified in order to ensure that the nested items will actually fit into the stocks.
If the actual lengths of the stock items are known to be at least their nominal lengths, even after accounting for mill tolerances, the safety buffer value might be left at its default value of 0." However, there may be another reason to specify a non-zero safety buffer. Some CNC equipment has a clamping area that must be treated as an unreachable “dead zone.” After processing an item, such equipment might even make an end-cut and remove that entire clamping region which is unfortunately wasted. Here you may need to specify a safety buffer of 14" or more depending on the actual size of the CNC equipment’s clamping area.
Each lineal material type (W Shapes, C Shapes, Angles, Rods, etc.) can have a separate safety buffer value.
The safety buffer value does not apply to stock plates, as it is used strictly by the Length-Nesting Module.
Section 10-10: Camber / Mid-Ordinate Rise. In the context of the Length-Nesting Module, an indicator allows the user to specify whether cambered items are to be nested. If a Y is specified, the items will be treated the same as others of the same description and will be nested with them. If N is specified, the items will be excluded from the nesting operation. A separate indicator is available for each Beam and Channel type (one for W Shapes, another for M Shapes, etc.), but no such indicators exist for other lineal types such as Angles, Bars, etc. to which the concept of camber does not apply.
Whereas camber is handled as a Yes/No indicator under the guises of the Length-Nesting Module, in the Plate-Nesting Module it is a Camber / Mid-Ordinate Rise dimension that exists for each stock Plate and Checkered Plate. The vast majority of stocks will have this value at its default of 0", but values as high as 15 15/16" can be specified when necessary (such as in bridge fabrication projects).
Section 10-11: Flipping Indicator. When the Plate-Nesting Module places a square cut-list item inside a stock plate, no decisions need to be made concerning the orientation. Square items can only be placed in a width-to-width, length-to-length orientation in relation to the stock. Rectangular items, however, could also be rotated 90 degrees so that they are in a width-to-length, length-to-width position in relation to the stock.
The flipping indicator that is specified with each stock plate lets the user determine whether the system will attempt to rotate rectangular items within that stock. The list of all stock plates displays the flipping indicator in a column labeled “Allow Flips?” that is comprised of Yes and No values. As you enter a specific stock plate, the dialog provides a pair of radio buttons in a “Flipping of Rectangular Plates within Stock” group, and your choices there are “Allow rectangles to be flipped within stock” or “Do not flip rectangles (always maintain original orientation).” Of course Yes corresponds to “Allow” whereas No corresponds to “Do not flip.” For the purposes of this section, we’ll discuss the flipping indicator in terms of Yes and No rather than “Allow” and “Do not flip.”
In most cases, the flipping indicator should be set to Yes so that rectangles can be rotated. Permitting rotations can often help the system find a more efficient nest.
One instance in which the flipping indicator should be set to No is when grain orientation of items must be matched to the grain orientation of the stock. In such cases, the rectangular items will never be flipped, and proper grain orientation will be maintained. This usually the case when nesting Checkered Plates and almost always the case when nesting Bar Grating, and this is why Structural Material Manager leaves the flipping indicator for Checkered Plates and Bar Grating at No by default (you can specifically change it to Yes in the unlikely event that is necessary). By contrast, the default value is Yes for regular Plates.
In addition to maintaining grain orientation, at least one other reason exists for wanting a stock plate’s flipping indicator to be set to No. That is when a stock's Camber / M.O. is non-zero. Given a hypothetical value of say 2", cut-list plates with that same 2" Camber / M.O. will be nested into that stock assuming, of course, they are also of the same thickness and grade. Allowing cambered cut-list plates to be rotated 90 degrees so that they are in a width-to-length, length-to-width position in relation to that cambered stock might be nonsensical. You’ll thus most likely use a flipping indicator of No when entering cambered stocks. As mentioned in the previous paragraph, the default flipping indicator is Yes for Plates and No for Checkered Plates and Bar Grating. If you enter a stock Plate with a non-zero Camber / M.O. value and forget to switch the flipping indicator from Yes to No, Structural Material Manager automatically detects the potential problem and pops up a confirmation dialog asking whether you really mean to enter it that way. You are free to allow flips within the cambered stock if that is actually what you intended.
Section 10-12: Maximum Shop Capacity. The user may specify the shop's absolute maximum capacity. This informs the system that any length longer than this value is simply too long for your shop to handle and that it should use lengths longer than this only if extremely long items in the material list necessitate it.
If the system is ever forced to use a stock longer than your maximum shop capacity, it will sacrifice nest efficiency in order to use the least number of these stocks possible. This is the only time that the system will ever sacrifice nest efficiency in favor of stock selection; it considers your maximum shop capacity to be the most significant value specified.
Since accuracy can possibly be diminished by reducing this value, almost all shops should leave this value set to the default length of 65'-0 in the Length-Nesting portion of the system and 60'-0 in the Plate-Nesting Module. For a "milder" method of specifying your shop capacity, see the next section, which discusses the preferred shop capacity value.
Once your maximum shop capacity has been set, there will usually be no need to alter its value.
Section 10-13: Preferred Shop Capacity. In addition to a maximum shop capacity, preferred shop capacity may also be specified for both stock lengths and stock plates. The system will attempt to use stocks longer than the preferred limit only when doing so is crucial to maintaining nest efficiency.
Since efficiency will never be sacrificed in order to meet this goal, this value is much less critical to system operation than the absolute capacity limit discussed in the last section. Accordingly, it is suggested that this preferred limit be altered in lieu of ever changing the absolute limit, if possible.
As is the case for the maximum shop capacity, the preferred capacity is generally set once and not changed again.
Section 10-14: Overview of Nesting Speed and Accuracy. Please note that while the output of the Nesting Module is extremely accurate, it is possible that a person could sometimes find a slightly more efficient grouping of the items. This is because the human mind has the power to analyze the nesting situation as a whole and then, through ingenuity and reasoning, arrive at a result. Computers can do none of this; they possess no intelligence and cannot view the "big picture"; they are only capable of carrying out repetitive logical decisions. In short, people think and computers do not.
Despite their lack of intelligence, computers can be practical for solving problems because of the speed at which they can carry out their logical decisions. If enough of these simple decisions can be performed in a short period of time, the machine can produce correct results without ever actually thinking. A problem occurs, however, when the number of decisions required to solve a problem becomes so great that the computer cannot complete them in a reasonable amount of time. Material nesting is one such case, due to its inherent combinatorical nature that causes the number of required calculations to pyramid as more and more items must be nested. As the number of calculations pyramids, so does the processing time required.
The Nesting Module minimizes the problem described above by making a trade-off between speed and accuracy, if necessary. If computing time were unlimited, or computers were infinitely fast, the Nesting Module could easily produce 100% efficient nests with each and every material list. Such is not the case, so compromises must occasionally be made.
In general, the Length-Nesting Module can be expected to run more quickly than the Plate-Nesting Module since it only has to deal with items in one dimension: lengths. The Plate-Nesting Module has a much higher workload mathematically-speaking, as it must consider two dimensions (width and length), and it also has to account for the possibility of rotating each any rectangular plates 90 degrees.
As discussed in Section 10-26: Free-Form vs. Shear-Cut Patterns, the Plate-Nesting Module can generate two very different types of patterns. The free-form pattern is likely to be generated with less time and effort than its shearable counterpart. When formulating a free-form pattern, the system can keep any intermediate solutions it has considered along the way, as they are all guaranteed to be workable. When finding shearable patterns, however, the nesting engine needs to reject any of the intermediate solutions that prove to be non-shearable; it may have to work longer to find acceptable solutions that honor the shearing constraint.
As you have probably deduced from this discussion, the processing time required by the Nesting Module can sometimes be quite long. Unfortunately, it is difficult to give any firm estimates concerning the processing time, as each material list poses a unique set of combinations for the Nesting Module to carry out.
For extremely long lists, it may be most feasible to postpone the nesting operation until the host computer is ensured to be free from other tasks for a long period of time. However, the next section provides some information on running other programs during the nesting process, as “multi-tasking” allows the computer to still be useful while nesting is in progress.
Also be sure to see Section 10-16 which provides some hints on reducing the nesting time.
Section 10-15: Running Other Programs While Nesting. Although nesting can take quite some time, note that you can work with other programs such as e-mail, word processor, spreadsheet, etc. while Structural Material Manager is nesting in the background. Your computer should remain fairly responsive despite the fact that the nesting engine is simultaneously running large numbers of mathematical calculations. This is because Structural Material Manager’s nesting engine is designed to automatically yield clock cycles from the computer’s “brain” - the CPU - to other running programs in an effort to avoid sluggish response from the other applications.
The standard Windows key combination of Alt-Tab (hold Alt down, then strike and release Tab) causes Windows to bring another program to the foreground. This assumes that the other program is already running. For instance, Alt-Tab would be useful for switching to your word processor if that program was already running before Structural Material Manager was launched. Alt-Tab would thus move Structural Material Manager to the background, thus allowing you to work with the word processor in foreground during nesting.
Of course, other applications in which you’d like to work during nesting won’t always already be running “behind” Structural Material Manager when the nest begins. Such programs will have to be launched since they are not already running; Alt-Tab does not help in this situation. You can start such programs by simply clicking the Windows Start button without need for minimizing Structural Material Manager. A better alternative, however, is to click the “Minimize Until Nest Finishes” button that appears at Structural Material Manager’s nesting screen. That tells Structural Material Manager to run in a minimized state in which an icon will be displayed on the Windows Task Bar, but none of the Structural Material Manager screens will be visible. That gives you full access even to desktop shortcuts since no nesting screens are present to cover them. When the nest is finished, Structural Material Manager will automatically restore itself as the topmost Windows program thus eliminating any need for you to have to keep checking on the nesting progress to see if it has completed.
A word of caution concerning the nesting program’s multi-tasking capability: the more programs you have open simultaneously, the less CPU time gets allocated to the nesting engine. This is just the nature of how Windows handles multi-tasking; programs all take turns getting “time slices” from the CPU, so the more programs you have open, the less CPU time each will have available. The end result of placing a heavy burden on the computer by multi-tasking too many programs while nesting is that the nest may not be as accurate as it would have been if Structural Material Manager had been given more of the computer’s attention. For the ultimate in accuracy, multi-task the nesting engine with at two or, at most three, other applications.
Not only can you multi-task Structural Material Manager with other applications during nesting, but you can even multi-task it with itself. This is possible because Structural Material Manager permits the program to be launched more than once. In Windows parlance, it supports “multiple instances.” Suppose the system is busy nesting a job. You can then minimize the running Structural Material Manager, and launch another instance of the program by clicking the very same desktop icon or Start Menu shortcut that you used to start the first one. While working in the second instance of the system, you’ll of course have to open a different job than the one that’s already nesting, as the system is designed to not allow you to select an already-open job. Nesting of the first job will continue in the background while you enter material, print reports, etc. for a second job. Flipping back and forth between the two instances is simply a matter of clicking the appropriate icon on the Windows task bar, and Structural Material Manager’s title bar will quickly allow you to see the name of the job that’s open in that particular instance. Due to the processing power required by the nesting engine, nesting two jobs simultaneously is probably unwise, but carrying out non-nesting tasks in a second job poses no problems and could lead to great productivity gains.
Section 10-16: Reducing Nesting Time. Other than reducing the intensity level, which is described in the next section, some suggestions may help you to reduce nesting time. The first and foremost recommendation is to remove any stock sizes that are not actually available to you, or those that you do not really wish to utilize. By reducing the number of available stock sizes, the number of mathematical combinations required to nest the list is greatly reduced, thus reducing overall nest time.
Along the same lines of eliminating unnecessary stocks to reduce the combinatorical load, you can also shorten the nesting time by reducing the quantity associated with each stock size. This is possible when utilizing an inventory list for the Length-Nesting Module, and it is always possible for the Plate-Nesting Module. This of course cannot be done when using unlimited quantities of standard stocks for the Length-Nesting Module, as each stock is assumed to have infinite quantities available.
Another suggestion is not immediately obvious in nature, but it is indeed effective. By specifying your preferred maximum stock length as a value very close to, and preferably equal to, your absolute maximum stock length, the system can run faster due to a decreased number of combinations. If the preferred value is very much less than the absolute maximum, the system simply has to work harder to try to find combinations that use fewer stocks that exceed the preferred value. Recall that there are actually are two pairs of absolute and preferred maximum stock length values: one pair for the Length-Nesting Module and another pair for the Plate-Nesting Module.
Finally, use the fastest computer you have access to. It is important to keep in mind that a computer that is twice as fast as another will finish before the slower one, but it will probably not finish in half the time. This is because the Nesting Module almost always has more combinations to consider than it can ever really perform. It eventually has to yield to the real-world limitations of elapsed time and quit with the best results it has found thus far. So, by doubling the speed of the computer, you may actually be enabling the system to do more work in a given frame rather than actually reducing the overall processing time. The rewards of a more powerful machine are thus often manifested more in terms of accuracy than speed. A simple analogy: Assume a fast runner and a slow runner both sprint at full speed for one minute; although they both finish at the same time, the fast runner has covered much more distance than the slow counterpart.
Modern CPUs have multiple "cores." Each core effectively represents a separate CPU so that in terms of processing power, it's like having simultaneous access to multiple computers. When running multiple applications at the same time (say Microsoft Word, Excel and Outlook are all open at once), the Windows operating system is able to better handle the load and remain responsive if it has access to multiple cores. Whereas Windows’ use of multiple cores represents an efficient way of multitasking applications by running them on separate cores, Structural Material Manager's nesting engine has been designed to access multiple cores in a different manner: within the application itself. The nesting engine can simultaneously utilize up to (3) CPU cores. At the Nest Material dialog, simply specify the maximum cores you allow to be used, and the system will utilize up to that many cores if it determines that doing so will speed the process. If Structural Material Manager determines that the added overhead of "juggling" the interaction of multiple cores will actually hurt performance of a particular nest, it will automatically throttle back to fewer than the maximum cores you allowed. Where the greatest gains in speed are found is when both the Length-Nesting and Plate-Nesting Modules need run, as the system will run them concurrently on separate CPU cores! Supposing the Length-Nesting Module takes (2) minutes and the Plate-Nesting Module takes (3) minutes in a single-core environment, the total processing time is of course (5) minutes. In a multi-core environment, however, the 2-minute Length-Nesting run and 3-minute Plate-Nesting run take only (3) minutes total because they are able to process simultaneously. Overall run-time in the situation of Length-Nesting and Plate-Nesting running concurrently on separate CPU cores will always be whichever time was longer between them, but that will be significantly faster than the sum of those two times as applies when Length-Nesting is first run on a single core and Plate-Nesting is later run on that same core.
Section 10-17: Levels of Nesting Intensity. The system allows the user to specify a level of intensity with which it attempts to find the "perfect" nest. This input is provided to help give the user some measure of control in relation to the speed and accuracy considerations discussed in the previous section.
A level number from 1 to 10 may be specified. As the level number increases, so does the highest number of combinations that the program will analyze. Performing more combinations has these effects:
• Nest efficiency may increase. This is simply because performing more combinations increases the likelihood of finding a more accurate nest.
• Fewer stocks above your shop's preferred capacity may appear in the nest. Just as it aids efficiency, generating more combinations gives the system more opportunities to find a nest that closely fits your shop limits.
• Your preferred stock may appear in the nest more often. Once again, performing more combinations provides a higher probability of finding a desirable nest.
• Processing time will be longer. There is no way to avoid this, as generating and testing thousands of stock combinations pushes even the fastest of micro-processors to their limits.
Even relatively low levels such as the default of level 3 generally yield very efficient nests. Higher levels may yield slightly more efficient nests, but a definite "diminishing returns" relationship exists as levels are increased.
The same level of nesting intensity will be applied to both the Length-Nesting and Plate-Nesting modules.
Section 10-18: Quantity Restrictions within One Stock. Both the Length-Nesting and Plate-Nesting Modules impose limits as to how many items can be cut from one stock item.
The Length-Nesting Module can place up to 500 items within one stock length. Once 500 items have been placed inside a stock, the rest of the stock is considered unusable. For example (720) 1" bars can actually be obtained from a 60'-0 stock (which is 720" long) without any waste. However, the system can only place (500) 1" bars into a 60'-0 stock, thus resulting in 220" of unusable stock. This simple example of course assumes a 0" cutting clearance between items.
Stock plates may contain up to 500 components each. Just as in the length-nesting example above, the rest of the stock is considered waste once the maximum number of components within the stock has been reached.
These quantity restrictions are of course not much of an issue with most jobs, but they can become significant when large numbers of extremely small items are being cut from relatively large stock lengths or stock plates. In such cases, it is recommended that smaller stock sizes be chosen in order to avoid these limits.
Section 10-19: Non-Nestable Items. Three possible groups of non-nestable items exist:
• Material types not supported by the Nesting Module.
• Items that are of a supported material type, but cannot be nested within the specified nesting values.
• Plates that are too small to nest.
The first group includes all Bolts and Miscellaneous Items. These types are not processed by either the Length-Nesting Module or the Plate-Nesting Module and will not appear on the nested printout.
The second group of non-nestable items is rather broad. It includes items that cannot be nested because they are bigger than the largest stock, or are cambered when the user has specified that cambered items are not to be nested. This group also includes items that cannot be nested because of insufficient in-house inventory or supplier stock if you are nesting into these sources rather than using unlimited quantities of standard stocks.
A final group of non-nestable items is comprised of plates that are too small to be nested by the Plate-Nesting Module. That module is internally capable of nesting a hypothetical plate as small as 1/16" x 1/16", but such plates would be too small to represent on the scaled pictorial layout. Accordingly, the system considers any plate with one or both dimensions smaller than 3" to be non-nestable.
All non-nestable items appear in the printout's nested summary with a reason why they are considered non-nestable.
Section 10-20: Automatic Erasure of Nested Files. It was stated in Section 7-6: Automatic Re-Sorting of Jobs, that the sorted version of a job is erased if that job is changed in any way at the Material Entry Screen; the job is then automatically re-sorted upon exiting the Material Entry function.
A similar action applies to nested jobs: if a nested job’s items are modified in any way, the nested files associated with that job are automatically deleted. This eliminates a potentially confusing situation in which changes made to an unsorted job are not reflected in that job’s nested printout. An important distinction between sorting and nesting should be noted however: whereas a job is automatically re-sorted upon exiting the Material Entry Screen, it is not automatically re-nested. Thus, a nested printout is not available after a nested job is altered in any way at the Material Entry Screen. Such a printout will become available after re-nesting the job.
Section 10-21: Activating the Nesting Module. In this section, we’ll activate the Nesting Module and change some of its settings without actually beginning the nesting process (the actual “number-crunching” process will be started in Section 10-28).
The Nesting Module will be put to use here by nesting the sample material list. Unlimited quantities of standard stocks will be used for the Length-Nesting Module in this example, but the methods of nesting lengths into in-house inventory, supplier inventory or the best combination of both will be covered later.
Proceed as follows to activate the Nesting Module:
A) Use File | Open Job to open any Structural Material Manager job that contains nestable items. For purposes of this example, we’ll assume you are choosing the sample material list which we began entering in Chapter 4.
B) Activate the Nesting Module by choosing the Nesting | Nest Material item.
C) You can specify whether lineal types, plate types, or both should be nested by clicking on the appropriate selection. This option is provided so processing time will not be wasted nesting lengths when only nested plates are needed, and vice-versa. One or more of the options are disabled in cases where either the Length-Nesting or Plate-Nesting option has not been purchased, as well as those in which a job contains only lineal items or only plates.
D) Select the source of stock lengths for use by the Length-Nesting Module. Since we’ll not be working with inventory until the next chapter, just use the default “Use unlimited quantities of standard stocks” selection for now. These modes do not apply to the Plate-Nesting Module; they are length-nesting specific. See Chapter 11 for more information.
E) Choose an intensity level, or simply use the default.
F) You may change the length-nesting parameters and/or the plate-nesting parameters by clicking the appropriate buttons. Instructions on changing these values are covered in the following sections.
Section 10-22: Changing the Length-Nesting Values. We will now change the nesting values that inform the nesting module as to the stock lengths available, your preferred stock length, and extra clearances such as cutting and milling to allow for each material type.
The nesting values to be changed in this section are described separately in earlier sections of this chapter, and specific information concerning the nature of each of these values will not be repeated here. If you have not already read the sections discussing cut-width, milling clearances, etc., please do so before proceeding as follows:
A) To get to the screen of nesting values that apply to the Length-Nesting Module, simply click the Length-Nesting Parameters button at the Nest Material screen. The Length-Nesting Values dialog appears.
B) Values are changed for one material type at a time. One way to do so is to find the grid line for the material type in which you are interested, and double-click that line. Alternatively, you can select the appropriate line with a single click and then click the button labeled “Edit parameters for selected type.” A third choice also exists: right-click the line for the desired material type, and choose “Edit parameters for selected type” from the pop-up menu that appears. Regardless of which technique you use, the Edit Length-Nesting Values dialog appears for that particular material type.
C) Stock lengths appear in drop-down boxes at the left side of the dialog. Although you can specify up to nine stocks, you probably will not always want to do so. Unwanted stock lengths are most easily removed by choosing the “Not used” item; it is the first entry in each of the stock length drop-down boxes.
Note that duplicate stock lengths are completely valid. Although these are not necessary, they could be used for material types for which you do not have nine unique stock lengths available. For example, if 35'-0 W Shapes are not available, but 40'-0 stocks are, simply replace the 35'-0 with a 40'-0. Although the 40'-0 value may be listed more than once, the system recognizes that it is really only one unique stock length. As an extreme example, you could actually fill all nine stock length positions with the same length, and the nesting module would still treat those nine duplicates as being one unique stock. We are only noting here that this is one possible way of removing stocks; the best method of deleting unwanted stocks is to select “Not used.”
The stock lengths are initially listed in ascending order from top to bottom. If you enter a 40'-0 stock between a 30'-0 and 35'-0, which would ruin the proper order, no harm is actually done. When you exit the Edit Length-Nesting Values dialog, the system will automatically re-sort the list so that it is in proper order.
D) One stock length can be designated as the Preferred Stock simply by checking the button to the right of the stock.
E) Clearances for cutting, milling, squaring and safety buffer appear at the right side of the dialog. Each can range from 0" to 15 15/16". Specify your desired value for each one by selecting the appropriate drop-down box value. To eliminate a clearance so that it is not a factor during nesting, simply select 0".
F) If the material type for which you are editing nesting values is a beam or channel, the area labeled “Nesting of Cambered Items” will be active; it is disabled for all other material types. When active, this area allows you to check or clear a box to indicate whether cambered items should be nested.
G) Clicking Ok closes the Edit Length-Nesting Values dialog for a specific material type, and the main Length-Nesting Values dialog re-appears.
H) Repeat steps B through G for each material type to which changes need made.
I) When you are done, click Ok. If changes were made, you will be asked whether to make those changes the new defaults; see Section 10-27 for more information on saving changes.
Section 10-23: Changing the Length-Nesting Shop Limits. The Length-Nesting Module's shop limit parameters will now be changed to meet your individual needs.
The instructions assume you are at the Length-Nesting Values dialog; that is the screen that displays length-nesting values for each material type. Click the Length-Nesting Parameters button at the Nest Material dialog in order to get to that dialog. This will be required if you exited from the Length-Nesting Values dialog at the end of the last section. Once the Length-Nesting Values dialog is displayed, the shop limits can be changed as follows:
A) Click the Edit Shop Limits button, and the Edit Length-Nesting Shop Limits dialog will be displayed.
B) The dialog’s top area is labeled “Absolute longest stock that shop can handle.” Using the drop-down box, specify your shop's maximum capacity. A value of 65'-0 is a good choice for most shops, but definitely increase it beyond that if your shop has sufficient size.
C) “Longest stock length that shop prefers to handle” is the bottom area of this dialog. The drop-down box is used here to specify your preferred shop capacity. Most shops should leave this value set to 60'-0 for optimum nesting speed, but any value that does not exceed the maximum shop capacity is acceptable.
D) Click Ok. As long as the maximum shop capacity you specified is greater than or equal to the preferred capacity, the Edit Length-Nesting Shop Limits dialog will close, and the Length-Nesting Values dialog will reappear. However, if the absolute capacity is less than the preferred capacity, you’ll be asked to correct that error.
Section 10-24: Changing the Plate-Nesting Values. The values that guide the Plate-Nesting module will now be changed. Before attempting to utilize this information, please be sure you are familiar with earlier sections of this chapter that discuss the flipping indicator, stock size values, etc. Failure to familiarize yourself with these values and their purposes before proceeding could lead to unnecessary frustration.
In order to access the screen of stock sizes for the Plate-Nesting Module, click the Plate-Nesting Parameters button at the Nest Material screen.
As is the case with the Length-Nesting Module, the Plate-Nesting Module has default values the first time the system is used. However, since so many different thickness, width, length and grade combinations are possible when specifying Plate, Checkered Plate or Bar Grating stock sizes, it is unlikely that the default list contains all of the stocks you need. You should thus inspect the default Plate-Nesting values to be sure that stock plate sizes you require are listed there, and add new stock sizes as necessary.
Not much in the way of specific instructions will be presented here on entering stock plate sizes, as the Edit Plate-Nesting Stocks dialog is very similar to the regular Material Entry Screen. Just as you would expect, F2 and F3 are used to edit and delete stock items, respectively. The "F5 = Copy Last Item" key even has the same convenient function as it does on the normal Material Entry Screen.
Just as you can change the colors of the regular Material Entry Screen (see Section 5-22: Changing the Material List's Colors for details), you can also do so at the screen of Plate-Nesting Stocks. Structural Material Manager remembers your color choices separately for the Material Entry Screen and the Plate-Nesting Stocks dialog in case you prefer one foreground/background color combination at one of these screens and a different combination at the other.
The biggest difference between the regular Material Entry Screen and the Plate Nesting Stocks dialog is that the latter only accepts entry for three material types, namely, Plate, Checkered Plate and Bar Grating. It of course has no need to accept entries for W Shapes, Angles, etc. that are processed by the Length-Nesting Module.
Since the screen at which Plate-Nesting values are entered greatly resembles the normal Material Entry Screen, some users mistakenly believe that this screen is prompting them to enter the same list of items they have already entered into the job that needs nested. This is not the case; you are entering stock sizes at this screen, not job items. Job items are the Plates, Checkered Plates or Bar Grating items you have already entered into a job, whereas stock sizes are the items you specify here as the sheets from which job items will be cut. There is absolutely no need to re-enter the job items!
Note that the system does not prompt for many item fields such as Piece Mark, Remarks, etc. that are simply not required here.
Please see Section 10-4 for information concerning the quantity that should be entered with each stock plate.
Two additional fields are entered here for which the normal Material Entry Screen never prompts. The first of these fields is the cutting clearance or "kerf" to leave between adjacent items; it is simply entered as a dimension from 0 to 3 inches, and fractions are of course supported so that say 1/8" is a valid kerf. The other value is the indicator for whether rectangular items may be flipped within a particular stock; simply check the radio button corresponding to your choice. The cutting clearance value is discussed in Section 10-6, and the flipping indicator is covered in Section 10-11.
As you begin entering stock plates, the default material grades are initially the same ones that you have set as defaults for entry of Plates, Checkered Plates and Bar Grating at the regular Material Entry Screen. For instance, if A36 is the default Checkered Plate grade that you specified for entry of regular Checkered Plates (as per Section 5-12: Changing Default Material Grades), A36 will also be the default grade when entering stock Checkered Plates at the Edit Plate-Nesting Stocks dialog. Of course you can override a default grade by typing another value, but when entering a long list of stock plates requiring a different grade it makes more sense to simply change the default. Clicking the "Set Default Grades" button brings up a dialog very similar to the general one described in Section 5-12, but this Plate-Nesting-specific version only lists Plates, Checkered Plates and Bar Grating. Any default grade changes you make here apply only to the current stock-plate entry session; the new default grades are deliberately forgotten after you exit the Edit Plate-Nesting Stocks dialog, and they have no effect on items later typed at the regular Material Entry Screen.
The Edit Plate-Nesting Stocks dialog has its own clipboard to which you can cut or copy stock plates for later pasting. The copy-and-paste capability this clipboard provides can be a real time-saver when you have already entered a group of stock plates in one material grade and now must repeat that group for another grade. For example, suppose half a dozen or so ½" x 36" grade A36 Plates have been entered as stocks, and you need to replicate that same group of ½" x 36" stocks in grade A572. Simply copy the entire group of A36 stocks to the clipboard, and paste the clipboard into the stock list using the “paste one-at-a-time” option that lets you review each item before inserting it into the list. You’ll have to manually change each A36 grade to A572 before hitting Insert to accept each pasted item, but that is much faster than retyping an entire item. See Section 5-6: Cut, Copy and Paste Operations with the Clipboard if you are not familiar with such tasks.
If you’d like to sort the Plate-Nesting values for easier viewing, just click the Sort Stocks button at any time during entry. This function causes the list of stock sizes to instantly be rearranged such that they are listed in descending order. This is simply a convenience feature provided to better organize the manner in which the stocks are listed on the screen.
Click the Done button when you are ready to exit from the screen of stock plate sizes. If you have changed any values, you will be asked whether those changes should be saved as the new defaults. See Section 10-27 for information on saving the changes.
Section 10-25: Changing the Plate-Nesting Shop Limits. The following instructions can be followed as long that you are currently at the Edit Plate-Nesting Values dialog. If necessary, click the Plate-Nesting Parameters button at the Nest Material dialog in order to get to that dialog. Once the Edit Plate-Nesting Values dialog is displayed, the shop limits can be changed as follows:
A) Click the "Edit Shop Limits" button, and the Edit Plate-Nesting Shop Limits dialog will pop up.
B) The dialog's top area is labeled "Absolute longest stock sheet that shop can handle." Using the drop-down box, specify your shop's maximum capacity. A value of 60'-0 is a good choice for most shops, but definitely increase it beyond that if your shop has sufficient size.
C) "Longest stock sheet that shop prefers to handle" is the bottom area of this dialog. The drop-down box is used here to specify your preferred shop capacity. Most shops should leave this value set to 40'-0 for optimum nesting speed, but any value that does not exceed the maximum shop capacity is acceptable.
D) Click Ok. As long as the maximum shop capacity you specified is greater than or equal to the preferred capacity, the Edit Plate-Nesting Shop Limits dialog will close, and the Edit Plate-Nesting Values dialog will reappear. However, if the absolute capacity is less than the preferred capacity, you'll be asked to correct that error.
To exit from the Edit Plate-Nesting Values dialog, click the Done button. If the system detects any changes to the nesting values, including the shop limits, it will now ask whether the changes should be saved as the new defaults.
Section 10-26: Free-Form vs. Shear-Cut Patterns. Structural Material Manager's Plate-Nesting Module can provide either of two different nesting patterns: free-form or shear-cut.
A free-form pattern is ideal when the equipment cutting the stock sheet uses a saw blade, water jet, flame, laser, plasma, etc. Any of those cutting methods, as opposed to shearing, need no restrictions concerning plate placement. No matter how the Plate-Nesting Module arranges the pattern, the equipment will be able to cut it.
A shear-cut pattern is one in which no reentrant cuts occur. That is, all cuts line up through the entire length and/or across the entire width of the stock plate. The reason: once a shear starts, it cannot stop. The shear must pass all the way through the stock plate on each cut. The shear operator may have to rotate the stock plate 90 degrees on the shear many times, but the Plate-Nesting Module guarantees that the pattern will definitely be shearable.
A free-form pattern will often waste less material than a shearable counterpart. That is not intended as a statement regarding Structural Material Manager’s nesting accuracy but, rather, the differences between free-form and shearable patterns in general. Since any placement of plates is valid in a free-form pattern, more possibilities exist for finding a very efficient nest. A shearable pattern imposes an extra constraint barring reentrant cuts, and that means that many would-be possibilities are precluded in order to honor that constraint.
You can specify thickness thresholds that determine the minimum and maximum thicknesses that will be sheared for each alloy (carbon steel, stainless steel, and aluminum). Any items with thicknesses that do not fall within those ranges will be nested with a free-form pattern. The thresholds are inclusive meaning that the minimum and maximum values are both considered as being within the shearable thickness range.
The Plate-Nesting Module nests Plates, Checkered Plates and Bar Grating. The shearing thresholds apply only to Plates and Checkered Plates, as Bar Grating always uses a free-form pattern.
Minimum and maximum shearing thresholds are initially set at 0 when Structural Material Manager is installed. That is, by default, the system will produce a free-form nest. You must change those thresholds in order to activate the shearing feature. To bring up the dialog at which these thresholds are set, simply click the Shearing Thresholds button at the Nest Material dialog.
The thickness thresholds are always specified in millimeters (mm). Users of English/Imperial measure should note some common thresholds: 1/8"=3.175mm, 3/16"=4.7625mm, 1/4"=6.35mm, 5/16"=7.9375mm, 3/8"=9.525mm, 7/16"=11.1125mm, 1/2"=12.7mm, 5/8"=15.875mm, and 3/4"=19.05mm.
Shearing is often assumed to be lossless in that no kerf allowance (the cut width) between items is necessary. When shearing, Structural Material Manager can automatically set the kerf to zero. This can be useful when the user has specified a stock plate as having a kerf larger than zero, but the shearing thresholds are later set so that the stock actually ends up being sheared. A pair of radio buttons labeled “Leave non-zero kerfs as-is when shearing” and “Force zero kerf when shearing” determine whether this automatic override is performed. Choose the former option if you do indeed wish to leave a kerf between sheared items, but the latter option is ideal if you want to assume all shearing operations to be lossless.
When saving the shearing thresholds, you’ll be asked whether the changes should be saved as system-wide defaults. If you are nesting for your company’s own shop at all times, it would indeed be best to always save changes as the new defaults. The reason: your equipment and its parameters will remain the same for a long time.
If you are using Structural Material Manager to do contract estimating for various fabricators or are perhaps brokering jobs to be produced by any number of outside fabricators, different shearing values may be needed for different shops. In such cases, you’ll want shearing thresholds to be job-specific, and you should not permit the changes to become system-wide defaults.
Section 10-27: Saving the Nesting Value Changes. The default length-nesting and plate-nesting values are "system-wide" in that they are initially applied to each job. If you make changes to the nesting values prior to nesting a particular job, those changed values will be used rather than the defaults the next time you nest that job.
Whenever you make such changes, you have the option of making the new, changed values the system-wide defaults so that they will apply to any job for which no nesting value changes have been made. The values should be saved only when you make changes that are intended to become the new system-wide default values. If changes are to apply only to nests for the current job, then they should be made without saving the new nesting values; the changed values will then be used any time that particular job is nested but will not appear as defaults the next time the nesting module is used for a different job.
It is important to note that the changes will be applied to the current nest whether or not the user decides to save them as the automatic defaults. A common misconception is that responding "No" to this question cancels the changes; this is not the case.
Suppose you have made changes to the length-nesting values and/or plate-nesting values for a particular job. As mentioned previously, those changed values will be used the next time the job is nested. If, however, you ever wish to restore the job’s nesting values to those values that are currently in effect as the system-wide defaults, you may do so. At the screen where length-nesting values are changed, simply click the Load Defaults button; at the plate-nesting value screen, hit the F7 key. The current system-wide default values will be loaded.
Section 10-28: Starting the Nest. Once you are satisfied with all parameters that you’ve selected, the actual nesting process may be started by clicking the Begin Nest button.
As material is being nested, a progress gauge is constantly updated to show the user how the nest is progressing. Due to the manner in which the system "thinks" about large groups of items for a long period of time and then finally arrives at nesting pattern for the entire group, the gauge’s progress is not always smooth. The gauge may not be move at all for a seemingly long period time, then suddenly a large amount of progress will be indicated at once; this is completely normal.
If you ever wish to return to Structural Material Manager’s main window without completing the nesting process, you may simply click the Cancel button. Since doing so causes all of the nesting work done thus far to be lost, Structural Material Manager will ask whether you really want to abort the nest.
If allowed to finish without being interrupted with the Cancel button, the program will display the amount of time the nest required and prompt you to click Ok to return to Structural Material Manager’s main window.
Section 10-29: Length-Nesting Report Format. The material in this section and the next applies to the Nested List when printed as a report. See Section 10-32: Nested Labels for information concerning that same list when printed as a set of adhesive labels.
All types except Bolts and Miscellaneous items, which are always considered non-nestable, appear on the Nested Report. This same printout incorporates both nested lengths and nested plates. Although both lineal and two-dimensional items appear on the same report, the formats used to present them differ enough that they will be covered in separate sections. The length-nesting printout format will be covered now, and the plate-nesting printout will be presented in the next section. It should be noted that the information in each of these sections pertains to the nested results when they are printed as a report; the information presented here does not apply when the nest is printed as a set of adhesive labels.
Note that if your system contains the optional Plate-Nesting Module, but the optional Length-Nesting Module is not present, then nested lengths will of course not appear on the Nested Report. Only plates will appear on this list; the next section covers the format used to print nested plates.
The length-nesting report begins by listing the cutting, milling and squaring clearance for the material type begin printed, as well as the safety buffer value for that type. Items for each nested group are then printed with no blank lines between them, which is done to indicate that they are nested together.
Each group of nested items is immediately followed by a summary line; it indicates the length of the stock item that the group is to be cut from, the lineal total of the group items and the drop that will result on the stock item length. Also, the total weight of all items in the group is provided at the end of the summary line.
After all groups of nested items for an entire material type have been printed, a summary of all required stock lengths is generated. Besides the required quantity, the summary also lists the weight of one stock, the gross weight of all stocks including drops, the drop weight, the percentage drop and the net weight of all stocks not including the drop.
The far right side of the summary indicates whether the item came from in-house inventory or your supplier's stock.
It is important to note that the total drop weight is already included in the total gross weight of all stocks; these numbers are not intended to be added together to obtain a total material weight. The drop total is reported simply to inform you as to how much of the total stock weight will not be used. If you want to know the weight of all stocks without the drops, refer to the net weight column.
The summary includes any items that were non-nestable, such as items that are longer than the longest stock length, could not be nested due to insufficient inventory stock, etc. Items with camber are listed here if the user has specified that they should not be nested. A note at the far right of the summary draws your attention to the fact that the items were non-nestable and gives specific reasons as to why this was so.
Section 10-30: Plate-Nesting Report Format. Plates appear on the Nested Report if the optional Plate-Nesting Module is installed. If your particular system contains only the Length-Nesting Module, no plates will be printed on this report. See the previous section concerning the format used to print nested lengths, as only lineal items will be printed in such cases.
Whereas nested lengths are one-dimensional and can simply be presented in a list, nested plates are two-dimensional and are shown in a pictorial layout. Each plate within the stock plate is assigned a number that is printed in the center of the plate; this is done in lieu of actually printing the item dimensions in the layout.
If the size of a particular plate is large enough to allow printing of the item's piece mark, then the piece mark will be printed near the plate number. It is possible that a very long piece mark, an extremely small plate, or a combination of both can result in a case in which the mark simply will not fit on the layout.
The layout is an approximate scale representation. The exact scale used varies with the actual stock size, as the system attempts to find a scale factor for each particular stock that will allow efficient use of the paper while still remaining large enough to read.
Plate layouts sometimes require multiple pages. Although cut-sheet paper is generally more convenient than continuous-form, fan-fold paper, this is one case in which the fan-fold paper may be preferred by some users. The perforated seam between sheets allows the layout to be easily spread out and viewed as a whole without need for taping or stapling cut-sheets.
When a plate layout requires more than one page, no title block or page number is printed at the top of the extra pages. This is done to help maintain the continuity of the picture. All you need to be aware of concerning this issue is that the page count is incremented internally, and the next page number printed will indeed be high enough to account for any extra pages of the layout.
Since each stock is considered individually in terms of determining the scale factor that will be used, it is possible that two stocks of the same length, but having different widths, may occupy a different number of pages. For instance, a 48" x 20'-0 stock may use a rather large scale that requires three pages in order to represent the complete length of 20'-0. A 120" x 20'-0 stock may require only two pages to represent this same 20'-0 length, as the much wider width forces the system to resort to a smaller scale in order to represent the 120" width across the width of the paper. Since the length and width always use approximately the same scale, the length scale shrinks proportionately as the width scale is reduced.
As you can see, the stock plate's width is more important than its length in determining the scale factor. This is because the width of the paper is constant, but the length can be considered as infinite simply by scrolling more paper forward.
In keeping with the above discussions of the approximate scale layout, it is important to note here that cut-widths left between adjacent plates may or may not appear in the picture. Since cutting clearances are generally quite small in relation to the stock size, they are often too small to represent after adjusting them to scale. It is really of little consequence whether or not the cutting clearance can be seen between items; rest assured that it was accounted for, even if it is not visible.
The letter "x" is used to fill any wasted stock area that is depicted on the pictorial layout. While this is useful when wasted area is intermixed with actual plates, it could lead to a lot of wasted paper in cases where a large portion at the bottom of a stock is unused across the entire stock width. In such a case, the system will print the comment "Remainder of Plate is Unused" rather than printing row after row of wasted area.
The layout is followed by a summary of the actual item dimensions contained in the stock, with each one corresponding to a plate number in the layout. If any rectangular plates in the layout were rotated 90 degrees, the summary will indicate this by placing the word "FLIP" adjacent to the actual dimensions. It can sometimes be difficult to determine from the scaled layout whether a nearly-square item has been rotated, so looking for this "FLIP" indicator in the summary quickly removes any question.
In addition to linking plate numbers in the layout to actual plate descriptions, the summary presented after the layout provides some general information concerning the particular stock. The stock size is listed, along with a percentage indicating the nest efficiency. Information is also provided concerning the cut-width left between items and whether rectangular plates were permitted to be rotated 90 degrees within the stock.
A summary of all stock plate sizes is presented after all regular plates are printed and also after all checkered plates are printed. The summary indicates the quantity of each stock plate that is required. The single-item stock weight is presented for each size; it is of course based on a quantity of one. The required quantity is multiplied by the weight of one stock to yield a gross stock weight for each particular size.
Note that the single stock weights and gross stock weights include any wasted plate area. The wasted area is also listed separately as a drop weight total. This drop weight is then divided into the gross weight so the printout can display a percentage drop figure.
The last section concerning the length-nesting report noted that, since the drop weight is included in the gross weight, the figures should thus not be added together. This same caution applies to the plate-nesting report.
The last summary column lists any comments concerning the stock size. This is usually the source of the stock plate, which is always supplier stock since the Plate-Nesting Module does not access in-house inventory.
In addition to stock plate sizes, the plate-nesting summary includes any plates that were non-nestable. The far right summary column displays the reason the item was considered non-nestable.
Section 10-31: Varieties of Nested Reports. Three different styles of Length-Nesting reports are available. The difference between the styles involves the manner in which identical groups of nested items are printed. Please note that these different styles apply only to a normal Nested Report; such options are not relevant to printing a set of adhesive labels and are thus not available when you are directing the nested output to labels.
In the first mode of operation, identical nest groups occurring in the list are each printed individually, regardless of how many times the group is repeated. So, if the nesting module has found that (1) 12'-0, (2) 6'-0 and (1) 5'-3 item are to be taken out of a 30'-0 stock length, and this same pattern occurs 9 times, then these cutting instructions will be printed 9 times. By printing the cutting pattern 9 times instead of printing it just once with instructions stating that it should be cut 9 times, there is no chance of shop personnel missing the fact that the pattern does indeed need cut 9 times. Ideally, shop workers simply cross of each of the 9 cutting patterns one at a time as they are finished. This mode can lead to printouts that are quite long, but some users prefer it.
The second nested printout mode combines all identical groups of nested items into one representative group, which is printed only once with a quantity that indicates how many times the group is to be cut. A phrase such as “3 STOCK LENGTHS, EACH CUTS THE FOLLOWING: (cut this pattern 3 times)” appears above a nesting pattern. In this example, the red text (assuming your printer can produce color) and the underlined 3 stress to shop personnel that the same pattern is to be cut (3) times rather than just once. No Piece Marks, Mill Marks, Remarks or Sequences are printed in this mode. This is because only the item lengths in two groups need to be the same for the groups to be considered identical; the item marks are ignored. This mode can reduce printing time and paper consumption considerably when printing item marks is not a consideration, such as when the system is used for estimating a job. Because no marks or Sequences are printed, it is not intended for use as a shop cutting list.
The third mode is probably the one most users will choose; it’s a cross between the first and second modes. A printout produced in this mode carries all Piece Marks, Mill Marks, Remarks and Sequences as is done in the first mode. It also consolidates identical cutting patterns by printing them once with instructions to cut the pattern a certain number of times as is done in the second mode. So, this mode provides the advantage of printing all marks and Sequences while still saving paper and lessening print time. It is able to carry all marks and Sequences because two or more cutting patterns are considered identical only if all marks and Sequences on corresponding items match. This report is suited to use a shop cut-list as long as shop workers verify that they have actually cut the pattern the specified number of times.
It is important to note that these three modes affect only the Length-Nesting Module's output. Whether a nested plate is printed with a quantity of how many times to cut this nesting pattern is determined as follows: if a 100% identical nest can be produced using the exact same items, the system will indicate the number of times to cut the nesting pattern rather than printing that pattern more than once. Piece Marks, Mill Marks, Remarks and Sequences are always displayed on such a list.
Section 10-32: Nested Labels. The Nested List can be printed as a set of adhesive labels. Such labels are meant to be used in conjunction with the Nested List that has been printed as a report; labels do not replace the report, but rather, they augment it. A common scenario would involve printing the Nested List as a report, reviewing its results, and then immediately printing a set of nested labels.
The idea behind using the Nested List as both a report and as a set of labels is that the report shows personnel how to cut the items, and the identification labels are then applied as the items are cut.
Structural Material Manager prints the nested item labels in the exact order as the items appear on the Nested Report. It is thus important that personnel cut the steel in the same order as shown on the Nested Report; failure to do so will make it difficult to find the labels that are needed at a given moment.
Suppose that a 40'-0 stock is specified for cutting (2) 10'-0 items and (1) 19'-0 item. Three labels would be printed that represent this cutting pattern: a label for the first 10'-0 item, a label for the second 10'-0 item and a label for the 19'-0 item. The point is that an item that has a quantity higher than (1), which is the 10'-0 item in this example, will have multiple labels printed. This is intuitive, as the cut items are individual entities that each need their own separate labels.
To elaborate on the above example, further suppose that the Nested Report specifies that the entire pattern is to be cut (5) times, i.e., that the Nested Report specifies that (5) 40'-0 stocks are each to cut (2) 10'-0 items and (1) 19'-0 item. The corresponding nested labels would then contain (10) labels for the 10'-0 items and (5) for the 19'-0 items. The system would print a label for one 10'-0 item, a label for another 10'-0 item and one for the 19'-0 item as in the original example. This 3-label sequence would then be repeated (4) more times since (5) identical stocks are to be cut.
When job items cannot be nested due to camber, insufficient stock, etc., these non-nestable items appear in the stock summary of the Nested Report. Please note that the label set that corresponds to the report will indeed print labels for each non-nestable item. All of the labels for non-nestable items will appear after the labels for the nested items of that material type. An example will help clarify this. Suppose that after all of the Angles have been cut as per the Nested Report’s specification, and the corresponding labels have been applied to the cut items, a few labels for Angles remain. This is a sign that you should look at the stock Angle summary on the Nested Report; there you will most likely find some non-nestable items listed, and it is these items to which the “extra” labels correspond.
Please note that just as items’ Sequence fields do not appear on the Nested Report, they also do not appear on the corresponding nested labels.
There may be times when you want to generate nested labels only for certain material types. Click the “Material Types to Print” button at the Nested Labels dialog, and select only the type(s) for which you desire labels.
If you only own one of the optional Nesting Modules, you’ll not be able to print nested labels for the material types that would have been nested by the missing module. For example, if you own only the Length-Nesting Module, nested labels for Plates, Checkered Plates and Bar Grating will not be available since these types are nested by the Plate-Nesting Module. You may wish to print sorted labels for such items; see Chapter 7 for details. You may also wish to print sorted labels for Plates, Checkered Plates and Bar Grating if you own the optional Plate-Nesting Module but happened to instruct Structural Material Manager to nest only the lineal material types for a certain job.
Section 10-33: Printing the Nested Report or Labels. The nested material list may be printed as follows:
A) Use the File | Open Job function to open a job that is known to have already been nested, or simply nest the currently-open job with the Nesting | Nest Material option.
B) Select Nesting | Print Nested | Report in order to print a normal Nested Report, or Nesting | Print Nested | Adhesive Labels in order to generate a set of labels that represent the nest.
C) The dialog that appears is very similar to the one presented in Section 7-9: Printing the Sorted Report or Labels, so no specific instructions are presented here concerning the prompts that are identical between the Sorted List and the Nested List. One additional piece of information, however, is needed for the Nested List: you must specify the manner in which identical length-nesting patterns should be combined; this option applies only to a Nested Report, not the nested labels. See the previous section, Section 10-31: Varieties of Nested Printouts, for information that will allow you to make the proper choice.
D) Click the Print button to begin printing.
Chapter 11: Length-Nesting into Inventory
Section 11-1: Introduction. Structural Material Manager contains advanced features that allow the Length-Nesting Module to utilize inventory. These features, which were not covered in the previous chapter on basic nesting, are described in this chapter.
The information in this chapter applies specifically to the Length-Nesting Module rather than the Plate-Nesting Module, as all stock plates are assumed to be entered at the screen of stock plate sizes. No inventory tie-in for the Plate-Nesting Module exists.
Not all users will need to use the inventory features, as nesting into unlimited quantities of standard stocks is more than adequate for many companies.
Section 11-2: Types of Nesting Available. Here are the five possible types of nesting that can be carried out, including the mode of using unlimited stock lengths that was used in the previous chapter:
1. Nest material using up to nine different standard stock lengths, and assume that each stock can be used as many times as necessary.
2. Nest into your in-house inventory only. This mode is generally used by steel warehouses; it accounts for the exact lengths and quantities you have in stock for each material type and description and considers that stock to be the only available source for stock lengths. Fabricators also use this mode for nesting only into their own stock.
3. Use only your supplier's stock. This type of nest is intended for the fabricator who knows what quantities and lengths the supplier has in stock, but does not want to use any in-house stock.
4. Utilize your in-house inventory as best as possible, then resort to using your supplier's stock. This mode is ideal for the fabricator who has some sort of in-house inventory, whether it is a large stock or just a few remnants, and wants to use that stock before nesting into the supplier's stock. It is essentially a combination of mode #2 and mode #3.
5. Nest into your in-house inventory as best as possible before resorting to using unlimited quantities of standard stocks. This is basically mode #4 with the exception that you need not know exactly what the supplier has in stock. You may also think of this type of nest as a mix between mode #1 and mode #2.
Section 11-3: Using Unlimited Quantities of Standard Stocks. When nesting into standard stock lengths, the system obtains available stock lengths simply by reading the list of the stocks you specified on the screen of nesting values. If a stock is listed, the Nesting Module will assume that unlimited quantities of that stock are available.
This is the only mode of nesting that does not require at least one inventory list to be selected.
We won't cover this mode any further, as it was utilized in the previous chapter and requires no special work on the user's part.
Section 11-4: The Inventory / Prices Folder. Structural Material Manager can contain many different folders for holding jobs. All but one of these folders is available to be used as you see fit. The “Inventory / Prices” folder is the exception; it can be neither renamed nor deleted.
This special folder is intended to hold your in-house inventory and suppliers' stock lists. It also has special purposes for use with Master Price Lists; see Chapter 9 for more information on its uses in that context. Keep in mind that these lists are entered in the exact same manner as any other material list (i.e., normal jobs), but they are later accessed in special ways.
Use of the special “Inventory / Prices” folder is customary but not mandated. If you prefer to keep job-specific inventory lists or job-specific price files in the same folder as the job itself, you are certainly free to do so.
Section 11-5: Creating an In-House Inventory List. In order to nest into in-house inventory, it will of course be necessary to enter your available items. Select the File | Open Job item, and create a job with a name such as "IN-HOUSE," "OUR-STOCK," etc. Assuming the inventory is generalized and not reserved for any certain project, you will probably want to create it in the special Inventory / Prices folder. A job-specific inventory list may also be created in the special Inventory / Prices folder, but you might prefer to create it in the same folder as the job itself. Regardless of which folder holds the inventory list, you simply enter all stock items in the same manner as items are entered into other jobs.
It is important that you place all material types in the same in-house inventory list. Don't make the common mistake of entering all beams into a file called "BEAMS", all angles into an "ANGLES" file, etc., as the system expects all inventory items to be in one list.
Section 11-6: Removal of Stocks from In-House Inventory. When nesting into any in-house inventory (modes #2, #4 and #5 above), the system can automatically remove from inventory any stocks that were utilized. If, for instance, two 3 x 3 x 1/4 x 10 angles were utilized and five were originally available, the quantity will be reduced to three. If all five of them were needed, then that item line would be completely removed from in-house inventory, as the available quantity has reached zero.
It is completely optional as to whether stocks will be removed from in-house inventory. The system prompts as to whether this should be done.
Section 11-7: Addition of Drops Back to In-House Inventory. If you instruct the system to remove stocks from in-house inventory, it also gives you the opportunity to specify whether drops should be added back.
To avoid having useless drops (such as a 1" remnant) added back to inventory, you instruct the system as to what the shortest drop is that is to be added back. The default is 5'-0, but the value can range from 0'-0 to 40'-0 in whole feet.
Once you have added drops back to inventory, they are considered as available stock by any future nesting operations. This brings us to an important point concerning the order of nesting and the order of actual production. Let's assume Job A is nested on Tuesday, and any resulting drops are added back to in-house inventory. Also assume that Job A is scheduled to be cut based on the Nested Report on Thursday. Now, if Job B is nested into in-house inventory on Wednesday, it has access to the remnants produced when Job A was nested on the previous day. However, those remnants will not physically exist in in-house inventory until Job A is actually cut on Thursday! This is no problem at all, as long as the shop does not attempt to produce Job B before Job A has been cut. Of course any attempt to produce Job B prior to Job A could cause a situation in which shop personnel are searching for Job A remnants that do not yet exist.
Section 11-8: A Sample Nest into In-House Inventory. We will now present an example list of steps that could be used for nesting into just your in-house inventory (mode #2 as described in Section 11-2). Follow these steps:
A) If you have not already created a job listing your in-house inventory, do so now. It is common practice to create it in the special Inventory / Prices folder, but you might prefer to create it in some other folder. Either way, enter into this job all items that you have in stock that the Nesting Module can treat as available stock lengths. Simply skip this step if you already have created such a list.
B) The job that needs nested, not the in-house inventory list, is the job that must be open when you nest it. Click File | Open Job, and open the job to nest.
C) Launch the Nesting Module by clicking on Nesting | Nest Material.
D) Select the “Pull stocks only from an in-house inventory list” option as the source of length-nesting stocks. A dialog requesting further information automatically opens.
E) Under the “In-House Inventory Source” heading, click the Select button. Choose the appropriate In-House Inventory List. The system starts by showing the contents of the Inventory / Prices folder, but you are free to switch the drop-down selection to some other folder if you have placed the inventory list elsewhere.
F) Check the “Remove Stocks from In-House Inventory” box if stocks used in the nesting process should be removed from the inventory list.
G) If you checked the “Remove Stocks from In-House Inventory” box in the last step, another block of options which was previously disabled becomes active. Those options determine whether drops are added back to inventory; make your choice at this time
H) When adding drops back to inventory, the system allows you to specify the shortest drop length that will be added back. Specify this at this time if the default is not adequate.
I) Click Ok in order to accept these values, and the Nest Material window returns. If you’d later like to review and possibly change any of the information that was just specified, you can do so by clicking the Inventory Settings button at the Nest Material window.
J) Click the Begin Nest button to start the nesting process. The directions in Sections 10-21 through 10-27 should now be followed if you are not familiar with the remainder of the screen prompts.
Note that any standard stock lengths that may exist in the current length-nesting values do not apply to this nest. This is because you have specified that the inventory list will supply the available stock lengths. All other values, such as the cut width, still apply.
As the Nesting Module nests the list, it will use only inventory stocks that match the exact same description and material grade of each particular section being nested. If a camber field exists, as is the case for beams and channels, then the camber must also match between a job item and an inventory stock in order for that inventory stock to be used. One of the most frequent questions that arises when utilizing the Nesting Module to access inventory is that the user wonders why certain inventory items were not utilized despite seeming to be a perfect match description-wise for job items. The answer is almost always that there was a grade mismatch (perhaps A36 in the job but A992 in inventory) or a camber mismatch (perhaps ½" on a job item but no camber at all on the inventory item).
If you specify that the inventory list must be updated, the update will be done before Structural Material Manager’s main window reappears after the nest. The system will display a message that it is updating the file; it is removing stocks and adding back drops at that time. When that is finished, another message will inform you that the inventory list is being sorted. Both the update and sorting operations are completely automatic.
Section 11-9: Creating a Supplier Inventory List. Supplier inventory lists are usually created in the Inventory / Prices folder just like the in-house inventory list that was described in Section 11-5: Creating an In-House Inventory List, but you are actually free to create them in any folder you choose. The files are generally named after a certain supplier, such as "PDM", "CENTRAL", etc., and contain the specific lengths and quantities the supplier has available.
In order to create a supplier file, many users first e-mail or fax a sorted list to the supplier. The supplier determines what sizes (not cut lengths) are needed and then sends back a list of all available lengths and quantities available for those sizes. These lengths and quantities are then entered into the supplier inventory list.
The benefit of using a supplier inventory list is that it allows you to account for the fact that each length is available in finite quantities, so the system will not tell you to buy ten WT 5 x 27 x 40 sections when only eight were available. It also allows you to specify different lengths and quantities for each unique section size, whereas standard stock lengths only apply to an entire type, not just a unique section.
When nesting into unlimited quantities of standard stock lengths, you are restricted to specifying stocks only in whole feet, such as 20, 40, 60, etc. A supplier inventory list, however, has no such limitation. A stock length of 52'-4 3/4 is perfectly valid within a supplier inventory list (or an in-house inventory list, of course).
If your supplier is large enough that almost any stock you need will be available in large quantities, it is probably best to nest into unlimited quantities of standard stocks rather than going to the extra trouble of creating a supplier inventory list.
A word is in order concerning item quantities listed in the Supplier Stock List. If you wish to list all of the different lengths your vendor carries for each section size, but are not interested in keeping track of how many of each length are available, then simply enter a large quantity such as 999 or 9999 with each item.
Note that it is possible to create a supplier inventory list for each of your vendors. Although the system can only access one of these at a time, it would give you the option to nest separately into each supplier's stock to see which one would yield the most efficient cut.
The supplier inventory will always remain the same after nesting. Since it is assumed to be an "outside" inventory, stocks will not be removed, nor will drops be added back.
It is suggested that you occasionally perform a "physical" sort by size on supplier inventory lists. While this is not absolutely necessary, having the items sorted in order will allow the Nesting Module to operate more quickly. Running a normal sort on the supplier file will not hurt anything, but it will not yield any of the performance benefits that can be gained from using a physical sort.
Section 11-10: Nesting into Supplier Inventory. The third of the five modes described in Section 11-2 involves nesting into just your supplier's inventory. Performing such a nest is just a simpler case of the situation discussed in Section 11-8: A Sample Nest into In-House Inventory. It is simpler because you will not be asked whether to remove stocks or add back drops; supplier inventory is never updated in any way, so there is no need to prompt you for this information.
Follow these steps to experiment with nesting into your supplier's inventory:
A) If you have not already created a supplier inventory list as described in the previous section, do so now.
B) Launch the Nesting Module by clicking on Nesting | Nest Material.
C) Select the “Draw stocks only from a supplier stock list” option as the source of length-nesting stocks. A dialog requesting further information automatically opens.
D) Under the “Supplier Stock Source” heading, click the Select button. Choose the appropriate Supplier Stock List. Structural Material Manager starts off showing files present in the special Inventory / Prices folder, but you are free to switch to another folder if the Supplier Stock List is located elsewhere.
E) Click Ok in order to accept this stock source, and the Nest Material window returns. If you’d later like to specify a different job as the Supplier Stock List, you can do so by clicking the Inventory Settings button at the Nest Material window.
F) Click the Begin Nest button to start the nesting process. The directions in Sections 10-21 through 10-27 should now be followed if you are not familiar with the remainder of the screen prompts.
Section 11-11: Nesting into In-House and Supplier Inventories. When using in-house and supplier inventories as the source of stock lengths, the system will first attempt to use the in-house inventory as best as possible. Once this inventory can be used no further, it resorts to accessing your supplier's stock.
The in-house inventory list will be updated if you wish, but the supplier's stock will remain unchanged. Note that although the supplier's stock will never be updated, it is possible to add drops that result from cutting supplier stocks back to your in-house inventory list.
Follow these steps to try this mode:
A) If you have not already created a job listing your in-house inventory, do so now. Creating it in the Inventory / Prices folder is common practice, but feel free to create it in some other folder if you prefer. Enter into this job all items that you have in stock that the Nesting Module can treat as available stock lengths. Simply skip this step if you already have such a list.
B) If you have not already created a supplier inventory list as described in Section 11-9: Creating a Supplier Inventory List, do so now.
C) Launch the Nesting Module by clicking on Nesting | Nest Material.
D) Select the “First use an in-house inventory list, then use a supplier stock list” option as the source of length-nesting stocks. A dialog requesting further information automatically opens.
E) Under the “In-House Inventory Source” heading, click the Select button. Choose the appropriate In-House Inventory List from within the Inventory / Prices folder (which is the default) or some other folder.
F) Under the “Supplier Stock Source” heading, click the Select button. Choose the appropriate Supplier Stock List from the default folder of Inventory / Prices if that is where it is located, or choose it from some other folder.
G) Check the “Remove Stocks from In-House Inventory” box if stocks used in the nesting process should be removed from the inventory list.
H) If you checked the “Remove Stocks from In-House Inventory” box in the last step, another block of options which was previously disabled becomes active. Those options determine whether drops are added back to inventory, and if they are, whether such drops should be limited to just those resulting from cutting in-house stocks or include drops from both in-house and supplier stock.
I) When adding drops back to inventory, the system allows you to specify the shortest drop length that will be added back. Specify this at this time if the default is not adequate.
J) Click Ok in order to accept these values, and the Nest Material window returns. If you’d later like to review and possibly change any of the information that was just specified, you can do so by clicking the Inventory Settings button at the Nest Material window.
K) Click the Begin Nest button to start the nesting process. The directions in Sections 10-21 through 10-27 should now be followed if you are not familiar with the remainder of the screen prompts.
Section 11-12: Nesting into In-House and Standard Stocks. The fifth of the five modes discussed in Section 11-2 operates just like the mode discussed in the last section, except unlimited quantities of the standard stock lengths (the ones listed on the screen of length-nesting values) will be used after the in-house inventory has been utilized as best as possible.
Here are the steps required to use this mode:
A) If you have not already created a job listing your in-house inventory, do so now. Create it in the special Inventory / Prices folder if you wish, but feel free to create it in some other folder if you prefer. Enter into this job all items that you have in stock that the Nesting Module can treat as available stock lengths. Simply skip this step if you already have such a list.
B) Launch the Nesting Module by clicking on Nesting | Nest Material.
C) Select the “First nest into in-house inventory, then into unlimited quantities of standard stocks” option as the source of length-nesting stocks. A dialog requesting further information automatically opens.
D) Under the “In-House Inventory Source” heading, click the Select button. Choose the appropriate In-House Inventory List whether it is in the special Inventory / Prices folder or if it is located elsewhere.
E) Check the “Remove Stocks from In-House Inventory” box if stocks used in the nesting process should be removed from the inventory list.
F) If you checked the “Remove Stocks from In-House Inventory” box in the last step, another block of options which was previously disabled becomes active. Those options determine whether drops are added back to inventory; make your choice at this time
G) When adding drops back to inventory, the system allows you to specify the shortest drop length that will be added back. Specify this at this time if the default is not adequate.
H) Click Ok in order to accept these values, and the Nest Material window returns. If you’d later like to review and possibly change any of the information that was just specified, you can do so by clicking the Inventory Settings button at the Nest Material window.
I) Click the Begin Nest button to start the nesting process. The directions in Sections 10-21 through 10-27 should now be followed if you are not familiar with the remainder of the screen prompts.
Section 11-13: Nesting into Previous Nested Results. If Structural Material Manager is used to nest a job multiple times, it will always produce the exact same results provided that the same input parameters are given. These parameters include the available stock lengths, the nesting intensity level, cut width, etc. Nest the job twice or a hundred times...the results will always be the same if the inputs are the same.
Now consider the case of specifying different stock lengths on two nests of the same job. Changing the stock lengths changes the combinatorical picture, mathematically speaking, and entirely different nest results may be produced. This has great implications when the following sequence of events occurs:
1. A job is nested into unlimited quantities of standard stock lengths.
2. Stock material is purchased based on the nest results.
3. Once the stock material is received, it is entered into in-house inventory.
4. The job is later re-nested but - rather than being nested into unlimited quantities of standard stock - lengths - this time it is nested against in-house inventory.
Beware of the above scenario, as you might be surprised to find that the new nest results indicate that there is not enough stock in in-house inventory and that some extra items need to be purchased. The reason is that the nesting inputs are different on the second nest, and different combinations exist for the nesting engine to process. By entering the previous nest results into in-house inventory and then re-nesting the job using those inventory items as stocks, you are basically “starting with the answer” and asking Structural Material Manager to work backwards to that same result. It is not designed to do this. If the system makes even one different decision given the different inputs and places even one small item differently on the second nest, it is possible that the entire nest will be thrown off so that the job cannot be nested 100% into the original results.
With that said, some customers have reported that they have re-nested jobs into previous results for many years without seeing any trouble. So, it is indeed possible that the same results will be obtained, but this is certainly not guaranteed.
Section 12-1: Introduction. Structural Material Manager allows you to specify various printing options via its own program dialogs as well as the standard Windows Print Dialog and Printer Setup Dialog. These screens control such features as printing to a disk file, specifying the number of copies, orienting the report in “landscape” mode, etc.
Structural Material Manager works well with a wide array of printers. If you are contemplating buying a new printer and need to know which general printer types are supported by Structural Material Manager, please refer to Section 1-9: Hardware Requirements.
Section 12-2: Printing to the Screen. Every printout has the option to be viewed on the screen rather than paper. This can save both paper and printing time when you simply wish to preview a report rather than produce a permanent copy. If you select this option, the printout will automatically appear on the screen after you have responded to all of the system's prompts for information.
Once the printout is on the screen, you may use the left, right, up and down arrow keys to navigate through the printout in small steps. Use the Page-Up and Page-Down keys if you ever wish to jump back and forth by entire pages of information as opposed to the single-line movements that are performed by the arrow keys; the term "page" in this sense refers to a screen of information; this is not equivalent to a complete printed page. The HOME key will bring you to the beginning of the current line, and the END key will move you to the end of it. Simultaneously keying CTRL and HOME jumps to the beginning of the entire document whereas CTRL END moves to the document’s last line.
If a report is too large to fit on the screen - as is almost always the case - horizontal and/or vertical scrollbars will automatically appear. Use the mouse to slide these scrollbars as needed in order to view the entire report.
Even though you are viewing the report on the screen, the printer you chose prior to printing the screen affects the screen preview. For instance, if the printer and paper combination allows for a certain number of lines per page, then that is exactly how many lines that will appear between page breaks on the screen view. This is done so that a certain material item that appeared on Page 23 of the screen preview will also appear on Page 23 of the printed report if you choose to later print a hard-copy.
If “landscape” mode is selected (see Section 12-8: Selecting a Paper Orientation for information on using landscape mode) for the printer, the screen preview will of course not be turned sideways; it is always rendered in “portrait” mode. However, in keeping with the discussion above, the page breaks will occur at exactly the same places be exactly as they would on the hard-copy of the landscape report.
When you are done viewing the report, you may choose to print it without having to go back through the print dialogs. Simply select File | Print, and the report will be sent to whatever printer was selected at the time you chose the “print to screen” option. If you know ahead of time that you’ll probably want to print the report after previewing it, it is wise to verify that the proper printer and printer options are selected before printing to the screen, as the dialogs that allow you to make such changes will no longer be available once the screen preview of the printout appears.
Clicking File | Exit will close the print preview window without generating any paper output. Alternatively, you may simply use the mouse to close the window.
You may also choose to save the contents of the screen report to a file. That capability is discussed in the next section.
Section 12-3: Saving the Screen Preview of the Printout. When a printout is previewed on the screen as described in the previous section, it is possible to save it is as a file that can then be read into other applications.
To save a screen preview, simply click File | Save As at the preview window. Choose the Plain Text option if you simply want an ASCII text file that can be opened in a text editor. Traditionally, the TXT extension is applied to plain text files under Windows, so you should use a filename such as Printout.Txt that includes that extension. All versions of Windows ship with an accessory application known as NotePad that is well-suited to opening and working with plain text files that you save from Structural Material Manager’s screen preview window.
Note that underlines and other text enhancements that appear on the screen preview will not be carried to a plain text file. If you wish to preserve such text attributes, choose the Rich Text option when you save the file. An extension of RTF should be specified in the chosen filename so that other applications recognize the file as containing Rich Text Format data; C:\Eje\Printout.Rtf is an example. You can open RTF files in the WordPad utility that ships with all versions of Windows, or open them in any of the popular word processors such as Word and WordPerfect that support Rich Text. After opening the RTF file in another application, you may have to choose that program’s “No Wrap” option to prevent the report lines from improperly wrapping at the edge of the screen.
Note that you cannot modify the contents of the screen preview in any way. It is a “read-only” preview. If you need to “mark up” a report, you should preview it to the screen, save it to a TXT or RTF file as described above, and open the file in a word processor, text editor or other application. You may then use that other application to alter the report as needed.
This section has provided an overview of how Structural Material Manager’s reports can be accessed in other programs. Please visit http://www.ejeindustries.com/support/editreports.html if you are interested in using this capability, as that Web site document contains step-by-step instructions.
Section 12-4: Printing Directly to a Text File. One method of saving a Structural Material Manager report to a text file is to preview the report on the screen, and choose the File | Save As | Plain Text menu option as described in the previous section. That is fine for occasionally performing this operation, but a more direct method exists for automating this task if it must be done on a more frequent basis.
Each printout dialog contains a box that allows you to select the printer, screen or text file as the report destination by simply clicking the appropriate button. If you select the text file option, a group box titled “Text File Info” becomes active on the dialog (it is disabled when printing to the printer or screen).
Simply click the appropriate button in the Text File Info group box to browse the directory structure; this allows you to select the file to which printing should be done. Type a new filename after clicking the button if you want to create a new file instead of writing to an existing one.
The Text File Info group box contains an indicator labeled “Append Existing Text File.” When this box is cleared, any existing print-file is erased when a new printout is sent to the file. If you would like each new printout to be added to the end of the existing file, simply check this box.
Printing to a text file via the technique described in this section is generally used for exchanging data with other applications. You may wish to think of it as an alternative to the Export to ASCII function provided by the optional External Data Interface. Unlike the optional External Data Interface (see Chapter 18) which outputs a simple bill of material with weights attached, printing to a text file generates an entire, formatted report. Both methods have advantageous and disadvantages; choose whichever works best for a particular data exchange application.
Section 12-5: Printing to PDF. Structural Material Manager features built-in PDF capabilities that let it send reports to PDF (Portable Document Format) just as easily as it can send them to a printer, the screen or a text file. Simply select “PDF” as the output destination (as opposed to “Printer,” “Screen” or “Text File”), and the system will prompt you for the PDF's folder location and filename just before it produces the report.
Of course PDF output makes it easy to send information to colleagues via e-mail attachments. A Nested Report might be e-mailed to a supplier for material quoting purposes, or a Shipping Ticket could be e-mailed to an erector to inform them as to what structural assemblies they can expect to arrive. The possibilities - all of them paperless - are numerous.
It is important to note that you do not need any additional PDF software to make this feature work. Since the system has a built-in PDF printing engine, there is no need to purchase Adobe Acrobat or any other PDF-writing utilities unless you wish to gain finer control over the PDF-creation process. If you want to control PDF page size or resolution or perhaps add a signature, consider a virtual PDF printer driver as discussed in Section 12-12: Printing to Fax or PDF "Printers".
As mentioned in Section 12-12, Structural Material Manager’s own PDF engine is not to be used in conjunction with a virtual PDF printer. That is, if you do choose to print to some PDF creation tool such as Adobe Acrobat or any of the numerous alternatives, select that PDF tool in the drop-down list of printers, and be sure to direct Structural Material Manager’s output to “Printer” rather than “PDF.” The “PDF” choice tells Structural Material Manager to use its own PDF engine instead of the selected printer, and that is not what you want when using a virtual PDF printer driver as your “printer.”
Section 12-6: Printout Font Selection. The font width used on the system's printouts is automatically chosen by Structural Material Manager. There is neither a way nor a reason for the user to be able to choose a font width, as the system selects the largest possible font width - within reason - that will allow the report to fit across the width of the paper.
If you’d like to increase the font width that is automatically selected, see Section 12-8: Selecting a Paper Orientation for information on using “landscape” mode to effectively increase the available paper width.
Although the font width is chosen automatically, the user does have some control over the font height. This is done by clicking File | Printer Font Setup. A “spin edit” control appears at the Printer Font Setup dialog, and you can click it to select a vertical line spacing of either 5 or 6 lines-per-inch. A lines-per-inch setting of 5 means that 5 lines can be printed in one vertical inch of space. If you increase the lines-per-inch setting to 6, you actually decrease the font height, as that setting would allow 6 lines to be printed in one vertical inch of space. Experiment with the two possibilities to see which you prefer.
In addition to allowing you to specify the font height, the Printer Font Setup dialog mentioned above also allows you to choose the font face. A font “face” is basically just a font name such as Letter Gothic, Arial, etc. Structural Material Manager’s reports can only be produced with fixed-pitch font faces as opposed to the variable-pitch (also known as proportionally-spaced) variety. To see the difference between fixed-pitch and variable-pitch fonts, let’s consider the printing of two letters of the alphabet: a capital X and a lower-case f. In a fixed-pitch font such as Courier New, capital X takes up the same amount of space as lower-case f, so data on a columnar report is guaranteed to properly aligned. In a variable-pitch font such as Times New Roman, capital X occupies much more space than lower-case f; this leads to an aesthetically pleasing result for text such as this paragraph, but proper alignment on columnar reports - such as those produced by Structural Material Manager - is difficult to achieve, leading to ragged columns. For this reason, when you click File | Printer Font Setup, the list of font faces in the drop down box is limited only to the fixed-pitch fonts that are installed on your particular PC. Courier New makes a good default font face, but you may also wish to experiment with others such as Lucida Console, Quick Type Mono, etc. if they are installed on your PC.
It should be noted that any changes made to the default font face and/or height at the Printer Font Setup dialog apply only to the user who made them. The system was designed this way so that individual users of a networked system can have separate defaults. Another reason for this behavior is that different users will sometimes have different fonts installed on their computers.
Structural Material Manager comes bundled with some Windows fonts. If you wish to add some fonts to your PC, please see the \EJE directory to which Structural Material Manager has been installed. The \EJE directory contains a Fonts subdirectory with setup files for what are considered Microsoft “core” fonts. They are summarized in the \EJE\Fonts\Fonts.Txt file. Andale Mono, for instance, can be installed by running the \EJE\Fonts\Andale32.Exe setup program. It is unlikely that the Courier New font would be missing from a Windows PC, but if Courier New is not already installed, running the \EJE\Fonts\Courie32.Exe setup program would install it.
Section 12-7: Supported Paper Types. These paper types may be used with Structural Material Manager:
• Standard cut-sheet, 8 1/2" x 11"
• Legal cut-sheet, 8 1/2" x 14"
8 1/2" x 11" paper is normally the easiest to use in terms of paper handling, file cabinet storage, clipboard use, etc. Some may choose legal paper, but 8 1/2” x 11" paper will probably be chosen by most users.
See Section 12-8: Selecting a Paper Orientation for details on combining legal paper with “landscape” mode in order allow for a larger font size. This larger font capability in landscape mode is one of the few reasons that some may prefer legal paper.
Structural Material Manager does not actually impose any limitations in terms of paper types, so you may have success with other paper sizes. Keep in mind, however, that those sizes listed above are the ones with which the system has been exhaustively tested and are thus the types that are officially supported.
Section 12-8: Selecting a Paper Orientation. Text is normally printed across the width of the paper rather than the length. This is known as "portrait" mode.
When printing reports such as the Unsorted-Estimating and Shipping-Estimating lists, which are extremely wide reports, it is desirable to print in "landscape" mode. This causes the text to be printed across the length of the paper rather than the width. Landscape mode effectively increases the available page width (8 ½" wide x 11" long letter-size paper is viewed by the printer driver as 11" wide x 8 ½" long in landscape mode) so that Structural Material Manager can automatically scale up the font size for more readable type.
In portrait mode, letter-size and legal paper both provide approximately 8 ½" (ignoring margins) of paper width, and Structural Material Manager will thus choose the same font size for either paper type. The situation is quite different in landscape mode, however, as 14" legal paper then presents itself as 3" wider than 11" letter-size paper which allows the auto-selected font size to increase.
Because the page length is effectively reduced in landscape mode, the number of pages generated for a given report will increase by about 30%. This is more of a nuisance where nested plate drawings are concerned than with other reports, as the pictorial layout may contain many more page breaks than normal.
To select landscape mode, click the Properties button the standard Windows Print Dialog. This brings up another standard Windows dialog - the Printer Setup Dialog - which allows landscape orientation to be selected.
Suppose that you choose portrait mode, but the system detects that landscape mode would be beneficial in terms of increasing the font size for a particularly wide report. Before printing begins, Structural Material Manager will automatically pop up a dialog to suggest that the mode be switched to landscape. The ultimate decision is yours; the system is merely suggesting that landscape mode might be a better choice.
Section 12-9: Printing of Title-Blocks. By default, the system prints a complete title-block on every page of the printout. The other option is to print the title-block only on the first page with an abbreviated title-block on all pages thereafter; this saves paper and reduces printing time.
Structural Material Manager provides a checkbox on each report’s dialog to allow you to select the desired behavior.
Section 12-10: Multiple Copies. The standard Windows Print Dialog allows you to specify how many copies should be printed.
When printing reports, the Copies value of course refers to how many times the report will be printed. If your printer is sophisticated enough to have collation capabilities, be sure to click the Properties button to access the standard Windows Printer Setup Dialog to verify and/or change the collation setting any time you are generating more than one copy.
In terms of label printing to a thermal-transfer printer, the Copies value on the Windows Print Dialog refers to the number of sets of labels that will be generated. A value of 1 is usually used, but some users have reason to produce 2 sets at a time and can select this accordingly.
Section 12-11: Color Printing. Although the system primarily prints in black, it does make use of “spot” color. For instance, if a Shipping List is printed, and a "BAD DETAIL-ITEM QUANTITY!" or “DETAIL-ITEM ERROR!” message appears on that list, the message is rendered in red in order to draw your attention to it.
Most users appreciate the use of spot color. Some, however, may wish to suppress this in order to reduce ink or toner costs or, more importantly, speed up output on printers than print black jobs significantly faster than color ones. If you do wish to suppress color output, click the Printer Setup button before printing the report, and select the black and white or grayscale option provided by the printer driver.
Color output is of course automatically rendered in black on some monochromatic printers, but other monochromatic printers represents colors in grayscale.
Section 12-12: Printing to Fax or PDF “Printers”. When Windows presents a drop-down list of printers, many of the choices will usually correspond to actual, physical printers on which hardcopies are produced. However, some of them may represent virtual printers. Virtual printers are intended to redirect output to some destination other than paper. Fax and PDF (Portable Document Format) are two common choices and are the only ones considered in this section. Other virtual printer drivers you may encounter - such as Microsoft XPS Document Writer and Send To OneNote - are not discussed.
The manner in which virtual printers are implemented under Windows involves some clever sleight of hand. The virtual printer driver appears to Windows as if represents an actual printer. This is elegant in that it allows programs such as Structural Material Manager to “print” to the fax or PDF printer if the user has selected such a virtual printer at the drop-down list of printers. The program doing the printing never even realizes that the “printer” is not real. As long as the virtual fax or PDF printer was designed to properly emulate a Windows printer driver, you’ll be able to successfully employ it for direct faxing or PDF generation of Structural Material Manager reports.
Faxing directly from Structural Material Manager is more convenient than printing the reports and later faxing them in a separate step. Likewise, printing directly to PDF from within Structural Material Manager is more efficient than printing reports which later need scanned. In addition to the obvious labor savings and reduced paper consumption, better image clarity for the recipient will also be achieved since the printing and scanning steps - both of which reduce final image quality - are eliminated.
Selecting letter-size paper in landscape mode when printing to virtual fax or PDF printers is a good idea. That changes the fax or PDF “paper” dimensions from 8 ½" x 11" to 11" x 8 ½" so that the width has increased by 2 ½". As discussed in Section 12-8: Selecting a Paper Orientation, more pages will result (because the page length has shrunk by 2 ½"), but the font size automatically selected by Structural Material Manager will increase due to the new, larger width. The result: bigger, easier-to-read text.
Faxing is of course not as important as it once was now that e-mail has become ubiquitous. If you do still need to fax reports via a virtual printer driver, many options exist. Here are some common ones:
• Many Windows versions come with built-in fax support. Windows Server editions even allow network-based faxing so that client PCs can fax even though only the server actually has a fax modem installed.
• Even the smallest of offices usually have at least one multifunction machine that handles printing/copying/scanning/faxing in an all-in-one unit. The manufacturer typically provides a virtual fax printer driver along with the normal printer drivers.
• Internet-based fax services are available, and some of them provide a virtual printer driver.
• Standalone faxing programs can be installed under Windows, but this once-popular option is now typically passed over in favor of the aforementioned choices.
A more modern option than faxing Structural Material Manager’s reports is to e-mail them as PDF attachments. Whereas faxing must be done through some sort of virtual fax printer driver as previously discussed, generating PDFs can be done in either of these two ways:
• Allow Structural Material Manager’s built-in PDF engine to redirect printouts to PDF output. No outside software is needed, and this option works well for basic PDF generation.
• Print Structural Material Manager’s reports to a virtual PDF printer driver. This requires additional software such as Adobe Acrobat to be installed, and it is the better choice for those wanting complete control over PDF generation parameters.
For information on the first option, redirecting reports to PDF via Structural Material Manager’s own PDF engine, see Section 12-5: Printing to PDF. That type of basic PDF generation will suffice for most users.
We’ll now focus on the second option: printing to a virtual PDF printer so that the PDF-generation process can be finely tuned in terms page sizes, resolution, signatures, etc.
As of this writing, Windows does not come with any pre-installed components for creating PDFs. Here are some common ways to add such support:
• Invest in Adobe Acrobat or some Adobe suite of applications that includes Acrobat. See www.adobe.com for details. The PDF standard was created by Adobe in 1993, and that company is still foremost among those involved in the PDF field. This is usually the most expensive option. Note that the free Acrobat Reader application that Adobe provides at its Website is just that - a reader of PDFs - and is not capable of writing PDFs; to produce PDFs, a tool such Acrobat is needed.
• Purchase a low-cost Adobe Acrobat alternative from some other vendor. Nitro Pro (see www.gonitro.com) is one such product, and an Internet search will quickly reveal a plethora of others.
• Obtain a free PDF generator. PrimoPDF (see www.primopdf.com) is an example, and many others can be found online. Some of the free tools might be ad-supported. Also, be very careful while installing free PDF tools since their setup programs might try to install other software too.
This point bears repeating: Structural Material Manager has basic PDF-producing capabilities built-in so that no outside software is usually needed. The above list of virtual PDF printer options is intended only for users wanting to gain very fine control over PDF generation.
If you do chose to use a PDF printer driver, don’t try to use it in conjunction with Structural Material Manager’s own built-in PDF capabilities. Select your PDF tool of choice in the drop-down list of printers, and choose “Printer” as the destination. If you were to select “PDF” as the destination, Structural Material Manager’s own PDF engine would be used, and the selected printer (your PDF printer driver in this case) would be ignored.
Section 12-13: Automatic Saving of Printer Driver Settings. Structural Material Manager remembers which printer was last used for a particular type of report. The next time that same report is chosen, the last-used printer automatically becomes the default as long that printer is still available.
If the last-used printer is still available, not only will Structural Material Manager default to it, but it will also restore many of the printer drivers settings that were in effect when that report was last generated. The paper bin, paper size, duplex (double-sided printing) option, orientation, resolution, etc. are all restored. For instance, suppose you printed a certain Structural Material Manager report to an HP LaserJet and indicated that legal paper should be used from Tray 2 in a landscape orientation, and that double-sided printing should be done via the unit’s optional duplexer. As long as Structural Material Manager determines that the LaserJet is still available on your system, it will automatically default to all of those settings the next time you print a report of that same type. Separate configurations are saved for each type of report (Nested list, Sorted Estimating list, Shipping Ticket, etc.); this allows for more flexibility than if the system simply retained only one set of last-used settings.
Printer driver settings are stored not only on a report-specific basis, but also on a user-specific basis. Suppose two Structural Material Manager users are sharing the system across the network, and each prints an Unsorted Report, one to an HP LaserJet, and the other to a Canon Bubble Jet. The one user will see the HP LaserJet automatically appear as the default the next time the Unsorted Report is printed, and the other user’s system will default to the Canon Bubble Jet. So, separate defaults are able to be maintained even though the same Structural Material Manager system is actually being shared on the network. This user-identification is accomplished “behind the scenes” by uniquely identifying the local workstation (i.e., the individual user’s PC) that is being used, so there is no need to log in with any sort of user name.
Whereas printer settings are saved on a user-specific, report-specific basis for Structural Material Manager’s regular printouts, only one label-printing configuration is preserved for each user. For example, one user may have printed the Sorted Report and a Nested Report, and the system would thus remember which settings were in effect when each of those reports was printed. The next time that user printed either the Sorted or Nested Report, the corresponding printer settings would be automatically restored. On the other hand, suppose the user printed a sorted set of labels and a nested set of labels. Only the printer settings for set of labels last printed would be preserved, and those settings would be restored the next time any type (sorted, nested, shipping, etc.) of Structural Material Manager label printout was produced. This is not a limitation of the system but, rather, a convenience since any one user is likely to want the same printer settings applied to all types of label printouts.
Section 12-14: Printing Reports to Dot-Matrix Printers. Structural Material Manager can print reports to dot-matrix printers. As compared to their laser and inkjet counterparts, such units are noisy, and their output is usually not as crisp. Printing to most dot-matrix units is also painfully slow under Windows, as the Windows print drivers map all output - even plain text - as graphic images that must be printed dot-by-dot.
Despite the drawbacks mentioned above, some users still want to print reports to dot-matrix printers. The main reason: carbonless multi-part forms can be utilized since the dot-matrix print head actually impacts the paper; impact is required for printing multiple forms, and since neither laser nor inkjet technology involves impact, laser and inkjet printer users must resort to printing multiple copies. A less important reason for using dot-matrix printers is that printouts stay well organized since they are bound together by the very nature of the perforations that attach the fan-fold sheets of paper.
The decision to use a dot-matrix printer for reports boils down to this: if you need to print multi-part forms or want printouts to be produced on fan-fold paper, then accept the noise, slow print speed and relatively poor print quality as necessary evils, and use a dot-matrix printer. Otherwise, a laser or inkjet printer is your best choice for Structural Material Manager’s reports.
If you have multiple printers, you might want to direct only certain reports to the dot-matrix unit. For instance, among customers who do choose dot-matrix printers due to their multi-part form capability, most are concerned with this only for one particular Structural Material Manager report: the Shipping Ticket. Printing a Shipping Ticket on multi-part forms allows several copies of shipping documents to be handled in one neat package, and only one delivery signature is needed since it penetrates through to all copies. If this is your main need for a dot-matrix printer, it is suggested that other reports such as the Sorted, Nested and Estimating Lists be printed to a laser or inkjet printer.
Structural Material Manager prints through Windows print drivers and relies on those drivers to provide accurate information regarding the target printer. Unfortunately, the Windows drivers for some dot-matrix printers contain errors that cause paging problems with any application that prints via those drivers (not just Structural Material Manager). If you experience such difficulty when printing to a dot-matrix printer, please visit http://www.ejeindustries.com/support/dotmatrix for an easy solution that involves re-installing the printer under Windows using an alternate driver.
Chapter 13: Manipulating Jobs and Folders
Section 13-1: Introduction. Once your Structural Material Manager has a lot of jobs stored in it, you'll need some way to do "housekeeping." This system provides functions to do just that, such as renaming jobs, deleting jobs, etc. Other functions are also provided for such tasks as copying jobs, merging separate jobs together, backing up folders to archive files and restoring folders from backup archives. This chapter discusses all such system features.
Please pay particular attention to the section on backing up folders to archive files, as it could prove to be a real time-saver should a job ever be lost to either human error or a computer failure.
Section 13-2: Renaming Folders and Folders. The File menu contains a Rename item. Use File | Rename | Folder or File | Rename | Job to rename folders or jobs, respectively. The operations required by these functions are so intuitive that no explicit directions are needed.
The Inventory / Prices folder is a reserved folder. Accordingly, it cannot be renamed.
Section 13-3: Deleting Folders and Jobs. Unwanted folders and jobs may be removed using the File | Delete | Folder or File | Delete | Job, respectively.
The previous section mentioned that the Inventory / Prices folder is a reserved folder that cannot be renamed. Likewise, this reserved folder cannot be deleted.
Deleting an empty folder - one that has no jobs - is of course always harmless. Note, however, that when deleting a folder that contains jobs, all jobs within that folder will be deleted. To avoid the possibility of accidentally erasing a large number of jobs, the system asks twice for confirmation before deleting a non-empty folder.
Section 13-4: Copying Jobs. There are instances when a new job that is to be created very closely resembles a previous job for which material items have already been entered. To avoid retyping all of the items into the new job, the Copy Job function can be used to copy the existing material list to the new one.
To copy the currently-open job, simply select File | Copy Job. You must then type the name of a new job which will receive a copy of the currently-open one. It is not possible to copy over an existing job; if you need to copy a job into a job that already contains items, see the description of the Merge facility in the next section.
There is no need for the copy to be in the same folder as the currently-open job. You may select any folder from the list of available ones or even create a new folder.
Note that the Copy Job function does not automatically open the copy. For instance, if the job “06-1273" is open, and you copy it to a new job “Temp 06-1273,” perhaps you would still want the original “06-1273" job to be open. On the other hand, you might want to open “Temp 06-1273.” Since it has no way of knowing what is best for a particular situation, Structural Material Manager asks whether you would like to open the copy. You can click Yes to do so, or click No to leave the original job open.
The copied job does not inherit any nesting that was done for the original job. So, if a nested job is copied, Nested Reports will only be available for the original job. In order to obtain a Nested Report for the copy, the copy will first have to be nested.
As discussed in Section 10-26: Saving the Nesting Value Changes, any changes you make to the nesting values for a given job are applied to the job the next time it is nested. Although the nesting itself is not inherited, any changes made to the length-nesting values or plate-nesting values for the original job will be inherited by the copy.
Please see Section 8-15: Copying Jobs with Shipping Histories if you own the Production-Control module. That section provides information regarding how a job’s history of all piece marks that have been shipped is handled during the copy operation.
This chapter contains information on backing up folders to archive files for protection against human error and hardware failure. That function copies all of the jobs in a folder to a backup archive, but you might want to use the Copy Job function to make a quick backup of just one job while you are entering a large project. For instance, every so often you might want to copy the job to another, and it would probably be best to include the current time in the new job’s name. When you are done entering the project, the main job “06-01" might be accompanied by several copies “06-01 10:20 AM,” “06-01 11:15 AM,” and “06-01 12:00 PM.” The backups could, of course, be deleted once the project was totally entered, but it is best not to do so until after you have saved the entire folder with Structural Material Manager’s “Back up Folder to Archive” function.
Section 13-5: Merging Jobs. This system provides a utility for merging jobs together. This is accomplished by appending a selected job onto the end of the currently-open job.
The Merge Job feature is capable of doing repeated merges of one job into another. This is useful in cases where a sub-assembly of a project has been entered into its own job, separate from the project's main job. Assuming that the sub-assembly is needed four times in the main job, the merging feature can simply merge it into the main job four times without any extra effort on your part.
When merging two very large jobs, it is possible that the system will report an error that the maximum system capacity has been exceeded. This will occur if the total number of entries for any material type exceeds 2,150 lines when the jobs are combined. Note that this is per type, such as 2,150 lines of W Shapes, 2,150 lines of Angles, etc.; the entire job can have approximately 18,000 lines of material. The merge will be aborted, and both the currently-open job and the one that was supposed to be merged into it will be unaffected. Remember, a line of material may have a large quantity such as 9999; this still counts as just one line, so the 2,150 lines-per-type limit is rarely a problem!
It is possible that the currently-open job contains no items, and another job is merged into it. This essentially performs a copy operation. There is no harm in doing this, but it is more intuitive to use the dedicated Copy Job function option that was presented in the last section.
Let's look at the steps necessary to carry out a merge. In one possible situation, “Job B” could be appended onto the end of “Job A”. This is useful in cases where "A" and "B" are sub-parts of the same job, but were entered separately. Here are the steps that would be used to accomplish this:
A) Use File | Open Job to open the job that will receive items from another job. In this example, we’ll call it the hypothetical Job A.
B) Select the File | Merge Job function.
C) This is where we choose the hypothetical Job B that will be merged into the currently-open Job A. Keep in mind that the two jobs might exist in separate folders, so you can choose a different folder from the drop-down list. Whether or not you choose to switch to another folder, you must select a job. You can do this by single-clicking the desired job and then clicking the Select button, or you may prefer to simply double-click the desired job.
D) Use the drop-down list to specify the number of times the merge should be done. The default is once.
E) Click the Merge button.
F) Once the merge has been carried out, the system will list the names of both of the jobs and verify that the merge operation was carried out. Click the Ok button after reading this message.
Let's assume, as in the above example, that Job A was the currently-open job that received items from Job B. It is important to note in such a case that Job B will remain unaffected. Job A has had every one of Job B’s items appended to it, but Job B has not changed.
Suppose a job has been nested, and you merge items from another job into the nested job. All nesting that had been done to the job is lost, as the job has now changed. In order to obtain a Nested Report for the job, you’ll have to re-nest. The job that “sends” the items for merging is not changed in any way, so it always retains any nesting that may have been performed on it.
A merge does not in any way affect the nesting value setups of either of the jobs involved in the operation.
If you own the Production-Control Module, please see Section 8-16: Merging Jobs with Shipping Histories. Jobs sometimes possess histories of which piece marks have shipped, how many shipped, how many still need to ship, etc., and that section describes the different ways these histories can be handled during a merge operation.
Section 13-6: Merging Two Jobs into a Third. The scenario described in the previous section was one in which Job A lost its individual identity as a result of Job B being merged into it. An alternative to that situation is to merge each of two jobs into a third one. For example, Job A and Job B could be merged into a third job, Job C.
The best method to carry this out involves first copying one of the two jobs to a new third job; the other one is then merged into the new job. The following steps should be used:
A) Use File | Open Job to open Job A.
B) The File | Copy Job function should be used to copy Job A to a brand new job, Job C.
C) It is very important that you now open Job C. Just copying Job A to Job C did not automatically open Job C; Job A remained the open job! In most cases, the program’s behavior of not automatically opening the copy is appropriate, but here, we do want the copy to be opened. This is easy to forget! Use File | Open Job to open Job C at this time.
D) Select the File | Merge Job function, and merge Job B into the currently-open job.
The end result of the above example is that the new job, Job C, represents a sum of two other jobs, and the two other jobs are left in their original states.
This example could easily be extended to the case of merging ten different jobs into a new, eleventh one. The steps would all remain the same, except you’d repeat the last step (the merge operation) for many more jobs. Even though you’re merging ten files into an eleventh rather than two files into a third, you still only need to use the Copy Job function once.
Section 13-7: Backing up Folders to Archive Files. Material entered into the system can be preserved by backing it up to an archive file. This is good insurance to protect against human error or hardware failure.
Backups are made by using the Back up Folder to Archive function that exists in Structural Material Manager’s File menu. While individual jobs cannot be backed up by this function, entire folders of jobs can. This means that all jobs within a particular folder are sent to the same backup archive.
The archive file produced during a backup is always named SMM200.EJE. Although you cannot specify a different name for this file, Structural Material Manager does allow you to specify the drive and directory in which it will be created. By default, the system suggests a directory within Structural Material Manager itself, but you are free to select a different one. Suppose you back up a folder named “Samples,” and your Structural Material Manager system runs in a C:\EJE directory; in that case the system will automatically suggest a directory of C:\EJE\Backups\Samples to hold the SMM200.EJE archive. So, a Backups directory is created subordinate to the EJE parent directory, and a directory named after the Structural Material Manager folder you are backing up - Samples in this case - is created subordinate to EJE\Backups, resulting in a complete filename of C:\EJE\Backups\Samples\SMM200.EJE. If you do not want to have the SMM200.EJE archive stored in the default location suggested by the system (C:\EJE\Backups\Samples in this example), you are free to browse to any other location in your PC.
Due to the rules the Windows operating system uses for naming files and directories, Structural Material Manager will sometimes have to modify folder names when creating default directories for backup archives. For example, if you back up the “Inventory / Prices” folder, Structural Material Manager will suggest C:\EJE\Backups\Inventory _ Prices as a default directory for the SMM200.EJE archive rather than C:\EJE\Backups\Inventory / Prices that you might expect. Since Windows does not permit the forward-slash character to be used in file or directory names, Structural Material Manager - which has no such restriction in naming its own folders - accommodates Windows by replacing the illegal forward slash with a legal underscore. Such adjustments will also be made whenever folder names contain backslashes, asterisks, colons and other characters that Windows considers illegal in file and directory names.
Astute readers will notice that there is a potential pitfall to using a directory such as C:\EJE\Backups\Samples to hold a backup archive for a Structural Material Manager system that resides in C:\EJE. In that case, both the system itself and its backups are on the same physical drive, so you receive no protection against hard drive failure. If drive failure is a concern, you might want to select a directory on a different hard drive, network drive or removable media (CD, DVD, USB Flash drive, etc.) so that failure of the drive on which the program resides won’t also cause loss of your backup archives.
Any time you choose to specify an alternate directory rather than accepting the default one of \EJE\Backups\SomeFolderName that the system suggests, be sure to use a meaningful directory name that will later allow you to determine just what group of jobs the SMM200.EJE archive contained therein represents. You wouldn’t want to use a directory name such as C:\SteelJobs\Archives, since you’d later be left wondering just which group of jobs the C:\SteelJobs\Archives\SMM200.EJE archive might contain. A better name would be similar to C:\SteelJobs\Archives\October2024Bids to let you know that the C:\SteelJobs\Archives\October2024Bids\SMM200.EJE archive represents the estimates that were done within Structural Material Manager in October of 2024. As you can see from this example, you can create an entire directory hierarchy as a sort of “tree structure” that allows you to easily determine the meaning of a particular SMM200.EJE archive at any time in the future.
Now that the requisite background concerning Structural Material Manager backups has been covered, here are the exact steps to follow for backing up an entire folder of jobs:
A) Insert a blank, formatted removable media (CD, DVD, USB Flash drive, etc.) only if you intend to back up to such media. Skip this step if you’ll be backing up to a hard drive, network drive or cloud-based storage that requires no such media.
B) Select the File | Back up Folder to Archive menu item.
C) Choose the Structural Material Manager folder you wish to back up.
D) Select the destination of the SMM200.EJE archive. You can skip this step if the default destination automatically suggested by Structural Material Manager is adequate, or you can click the Browse button to locate a different directory on a hard drive, network drive, removable disk, etc. If you do choose to select another destination, remember that you are not supplying an archive name; the SMM200.EJE name is always used, and your task is to select a directory to contain the SMM200.EJE file. After clicking Browse, you are free to click the Make New Folder button if desired to create a new directory.
E) Click the Back up Folder button. All files will be compressed into an archive named SMM200.EJE which is stored at the selected location. Since the Back up Folder to Archive function replaces any Structural Material Manager backups contained in an existing SMM200.EJE archive, you will be warned if you are about to overwrite a SMM200.EJE file that was previously created. Heed such a warning well, as if you back up three folders to the same SMM200.EJE archive file, only the third folder will really be present in that archive! In similar fashion, if you back up the same folder to the same SMM200.EJE archive on more than one occasion (perhaps on consecutive days while a job is in progress), the SMM200.EJE archive will contain only the jobs as they existed when the final backup was made.
F) Once the backup is finished, you are given confirmation that the backup has been carried out. Click Ok to close that dialog.
G) You may backup other job folders to separate SMM200.EJE archives at this time by repeating the above steps, or simply click the Close button in order to return to Structural Material Manager’s main window.
Please see Section 13-12: Backing up and Restoring via External Backup Utilities if you would like information on protecting the system with backup utilities other than Structural Material Manager’s own “Back up Folder to Archive” function.
Section 13-8: Restoring Folders from Archive Files. Backup archives made with the directions in the previous section can be re-installed with the Restore Folder from Archive function in following manner:
A) If the archive to restore exists on removable media (CD, DVD, USB Flash drive, etc.), insert the media now. Skip this step if you’ll be restoring from an archive located on your hard drive, network drive or cloud-based storage.
B) Select the File | Restore Folder from Archive menu item.
C) Choose a Structural Material Manager folder to which the backup should be restored. You may click the Create New Folder button if you’d rather restore the backup to a new, empty folder rather than over top of an existing one.
D) Select the archive to restore. No default is provided here, so it will always be necessary to click the Browse button to locate the archive. If you are restoring data that was made in the current version of the system, the archive will be named SMM200.EJE, but other names are possible if you are restoring data from earlier Structural Material Manager versions (see details in the paragraphs following these step-by-step directions).
E) Once you have selected the archive to restore, click the Restore Folder button.
F) If the Structural Material Manager folder to which you are restoring the archive is empty - that is, it contains no jobs - the restore operation will happen instantly. In most cases, however, the target folder will contain one or more jobs; since all such jobs will be replaced by the contents of the archive, you’ll be warned in these cases and can click Ok to continue or Cancel to abort the restore operation.
G) After all files are restored, a dialog box reports that the operation is done. Just click the Ok button after reading the message.
H) If you were restoring from removable media, remove the media from the PC.
I) Repeat the above steps in order to restore other folders from backup archives, or click the Close button to return to Structural Material Manager’s main window.
When restoring a folder, the entire folder will be brought back to the exact same condition it was in when the safety backup was made. Suppose a job folder is backed up on Tuesday at the end of the day, and you continue to work on jobs in that folder over the next couple of days without making further backups. If on Thursday you then restore the backup made on Tuesday, keep in mind that all changes made to all jobs within that folder on Wednesday and Thursday will be lost when Tuesday’s backup archive is restored. If the job folder to which an archive is being restored contains 20 jobs, and the backup archive has just 12 jobs, the job folder will then have only 12 jobs once it is restored from that backup archive! So, while the system’s Restore Folder from Archive function is very useful for restoring lost data, it obviously has the potential to destroy recent changes made to a job folder, if used improperly. This danger exists, however, only when restoring an archive into an existing job folder. If you choose the Create New Folder option, there is no way existing jobs can be overwritten.
When the Restore Folder from Archive function is being used to restore data to correct some sort of mishap, i.e., hard drive failure, human error, etc., the backup archive will normally be loaded into the very same folder from which it was originally made with the Back up Folder to Archive function. However, it is important to note that the Back up Folder to Archive operation can be done from one folder, such as “Acme Steel”, and the Restore Folder from Archive function can later be used to bring that backup into a different folder, such as “Telco Industries.” The point is that a backup can be restored into any folder, regardless of the folder from which it originated. This leads to a “trick” method for making an exact copy of an entire folder in a matter of seconds: back up the folder with the Back up Folder to Archive function, immediately go to the Restore Folder from Archive function, click the Create New Folder button to specify a new folder name, and restore the archive into that new folder.
Backups made with earlier Structural Material Manager versions can be successfully loaded into the Version 20.0 system with the Restore Folder from Archive function. This is mainly an issue when you have backups made under a previous Structural Material Manager system and need to restore them using a newer, upgraded version. Another way a version mismatch can occur is if you receive a backup archive from a colleague as a way of exchanging Structural Material Manager data, and that colleague is running and older Structural Material Manager version. Regardless of why the version mismatch occurs, rest assured that the system will automatically detect the version of the backup data and upgrade it to the current version as it is restored. Older data archives and current ones will have different names; current-version data - that made by Version 20.0 - is always archived under the name SMM200.EJE, whereas a Version 18.3 archive is named SMM183.EJE, a Version 17.2 archive is named SMM172.EJE, etc.
The flexibility described above is known as “backward compatibility” of the backup data. Backups made under systems as old as Version 10.1 can be restored into the current system; Version 10.0 and older data is not supported. As is generally the case in the software industry, “forward compatibility” of backups is not available since there is no way for a program to predict what data structures might exist is future systems. Accordingly, Structural Material Manager cannot restore data that is from a version newer than the currently installed system.
Section 13-9: Merging Jobs from Separate Computers. It is possible to combine jobs that have been entered on separate computers. This can be done by transferring one computer's jobs to a backup archive and then copying them onto another machine. While this will not be necessary for most users, it does have practical value in cases where a company does not have a networked computer system, but instead has separate computers that need to share data.
The instructions in this section will assume you are completely familiar with the Copy and Merge functions presented earlier in this chapter.
Let's consider an example where a material list is being entered on three different computers. When the sub-parts of this list have all been entered, it would be desirable to merge the parts together on one computer. Some preparation is necessary before doing this type of merge. The following should be done for our example of using three different computers:
A) Determine which computer is to receive the jobs from the other two machines. This will be Computer #1 for purposes of this example; the other two machines will be Computer #2 and Computer #3, respectively.
B) Two Structural Material Manager job folders must be set aside on the receiving machine. Give them names such as "FROM COMPUTER #2" and "FROM COMPUTER #3", if you wish. Regardless of what the folders are named, be sure they contain no jobs.
Assuming the above conditions have been met, material may be entered on each of the three machines. Once this is done, the following procedure may be used to consolidate the separate lists onto one machine:
A) Send the appropriate folder from Computer #2 to a backup archive, as described in Section 13-7: Backing up Folders to Archive Files. You will have to place the backup archive on removable media (CD, DVD, USB Flash drive, etc.) assuming that your separate computers are not networked.
B) Repeat the above step for Computer #3. If you are using removable media to hold the backup archive, use a separate media for the backup made on this computer, as both backup archives will be named SMM200.EJE even though they represent different Structural Material Manager folders from different computers. As an alternative to using a separate media, you could also create subdirectories on a single media that could be used by both computers (perhaps D:\Computer2\SMM200.EJE would hold the backup archive made on Computer #2, and D:\Computer3\SMM200.EJE would hold Computer #3's archive with D:\Computer2 and D:\Computer3 being directories on the very same CD).
C) Use the instructions in Section 13-8: Restoring Folders from Archive Files to copy the backup archive from Computer #2 onto the receiving machine. Remember to load it into the folder that was reserved for receiving information from Computer #2.
D) Repeat Step C for Computer #3. The backup archive should be loaded to the folder that was set aside for receiving jobs from Computer #3.
E) Sections 13-5 and 13-6 describe the method used to merge jobs. Follow these steps on the receiving machine to merge the three jobs together.
Section 13-10: Sharing Data on Office and Home Computers. The last section presented instructions on merging jobs together that were entered on separate, non-networked computers. Assuming you understand the principles covered there, some guidelines will now be presented for a similar situation in which a worker starts entering a material take-off at the office and wishes to finish it at home.
The basic technique used to move data between the office and home begins with using the Back up Folder to Archive function at work to copy the folder to an archive file. The backup archive is later copied onto the home computer with the Restore Folder from Archive function. After all work is complete at home, the Back up Folder to Archive function is used to copy the folder to a new backup archive so Restore Folder from Archive may be used to reload the data at work.
No specific steps are presented here, as Section 13-7: Backing up Folders to Archive Files and Section 13-8: Restoring Folders from Archive Files show how to back up and restore folders, respectively. Use the information in those sections, and keep in mind that the backup archives will probably need to be stored on some sort of removable media such as CDs, DVDs or - better yet - USB Flash drives.
If you have separate e-mail accounts at work and home, you may even wish to e-mail the SMM200.EJE archive from one location to the other as an attachment. See Section 13-11: E-Mailing Folders for details. For some users, this technique provides an attractive alternative to having to transport removable media between work and home whereas others seem to prefer using media.
As Internet connection speeds get faster, it will become increasingly common for an employee’s home PC to have remote access the office’s network via VPN (Virtual Private Networking). The ideas of transporting archives on removable media or e-mailing them between home and work are presented above under the assumption that you don’t have VPN access between home and work.
Keeping in mind the fact that the Restore Folder from Archive function completely replaces the existing folder with that which is stored in the backup archive, care must be taken in organizing Structural Material Manager job folders on both the office and home machines. The ideal folder organization is simply to have every folder that exists on the office machine also exist on the home machine, as there is little chance of ever overwriting data when this technique is employed. In cases where it is not practical to have a one-to-one correspondence between the office machine's folders and those of the home machine, it suggested that a dedicated folder named "LOAD FROM WORK" be kept on the home machine. Similarly, a folder called "LOAD FROM HOME" could be kept on the office machine. All restoration of data done with the Restore Folder from Archive function would then be done into these folders without danger of erasing any critical data. Since both the Copy function and the Merge function have the capability to work with jobs in different folders, any individual job can moved out of the temporary folder with ease, thus allowing you to focus on just one job instead of the entire folder.
Section 13-11: E-Mailing Folders. Many users may have need to e-mail Structural Material Manager data to associates. This is very convenient in cases where two parties at different locations each own Structural Material Manager and need to share data. While there is no way to e-mail an individual job, you can transmit the entire folder that contains the desired job.
Both the sender and the receiver need to be familiar with how to handle attachments within their e-mail programs. Exact procedures vary widely between different e-mail applications, so we’ll not attempt to provide any specific directions along these lines. Assuming both parties have worked with attachments before, the transfer should be very easy to accomplish.
In order to successfully exchange data, note that it is important that the recipient has a Structural Material Manager system of the same version or newer than the sender. If the sender has Version 10.1, and the recipient has Version 20.0, for instance, the recipient’s 20.0 system will recognize the 10.1 data and upgrade it accordingly. The reverse is not true; if the sender has a 20.0 system, a recipient with 10.1 will not be able to restore the 20.0 data. For details, see a discussion of forward- and backward-compatibility in Section 13-8: Restoring Folders from Archive Files.
The sender should follow these steps to initiate an exchange of a job folder via e-mail:
A) Save the appropriate folder to an archive file with the Back up Folder to Archive function. This operation is discussed in Section 13-7 of this User’s Guide and results the creation of a SMM200.EJE archive file under Structural Material Manager Version 20.0.
B) Once the folder is saved, the SMM200.EJE file will exist in whatever directory you choose when backing up the folder. Use your e-mail program to send that SMM200.EJE file as an attachment.
Once the sender has issued the e-mail, the recipient should proceed as follows:
A) Check your e-mail. Once the message has been received, the e-mail program should indicate that the message contains an attachment. Save the attachment in a directory of your choosing. The directory name is not important, but the file name must not be altered. If the archive was sent by someone who owns the current Structural Material Manager system, the archive will be named SMM200.EJE and should be saved under that name. However, if you receive data from someone who owns Structural Material Manager Version 10.1, for instance, the attachment would be named SMM101.EJE and absolutely must be saved under that exact name so that Structural Material Manager 20.0 would know that it is restoring Version 10.1 data that needs automatically upgraded to the current data format.
Not only is it important in this step to not alter the main SMM125, SMM101, etc. portion of the filename, you must also be careful to leave the .EJE extension unchanged. This is particularly important because the .EJE files used by Structural Material Manager’s Backup and Restore functions are actually Zip files behind the scenes. Zip is a common method of compressing files so they can be stored in a more compact form, and such files usually have .Zip extensions. Structural Material Manager deliberately avoids the .Zip extension and uses .EJE instead, as certain compression programs automatically take control of all .Zip file operations and can interfere when Structural Material Manager creates or restores backup files. “Hiding” the Zip nature of the archives by using an .EJE extension works most of the time, but some versions of the popular WinZip program can still detect that the .EJE files are actually Zip-compressed. Fortunately, the extent of WinZip’s interference is minimal: when the recipient of an archive such as SMM200.EJE saves the attachment, WinZip may automatically change the "Save as type:" setting in the Save dialog from "All Files (*.*)" to “Zip Files (.Zip)”. Left unchanged, that inappropriate setting would result in an SMM200.EJE attachment being saved as SMM200.EJE.Zip (note the extra file extension). Just make sure that "Save as type:" is set to "All Files (*.*)", and you can be confident that an SMM.EJE attachment will be saved under that very same name regardless of whether WinZip is running.
B) Use the Restore Folder from Archive function, discussed in Section 13-8 of this User’s Guide, in order to restore the sender’s data. Once the data has been recovered, the entire folder that received the data will contain the exact same jobs that exist in the sender’s corresponding folder.
Section 13-12: Backing up and Restoring via External Backup Utilities. This chapter has already presented information on backing up and restoring Structural Material Manager folders using the system’s own functions for these purposes. Those functions employ archive files that are always named SMM200.EJE for this particular Structural Material Manager version. Many users, however, will prefer to protect their systems by means of some external backup system. At one time, this might have been done using a tape backup drive and, later, optical-disc solutions such as recordable CD and DVD media might have been used. Today, such external backups are more likely to be done using separate high-capacity hard drives, or perhaps the backup data is sent via the Internet to “cloud” storage. Regardless of the storage medium, the point is that such backups are made outside of the guises of the Structural Material Manager software itself. This section presents some tips on effectively backing up and restoring Structural Material Manager via such external solutions.
Assuming that Structural Material Manager is loaded on Drive X:, the X:\EJE directory should be backed up whenever an external backup utility is run. Don’t try to select any individual files within the X:\EJE directory but, rather, make sure that the entire X:\EJE directory is specified for backup. Selecting the entire X:\EJE directory will guarantee that all subordinate directories are also backed up.
Please make sure that a full backup is performed as opposed to an incremental or “new and changed files only” backup. Structural Material Manager’s file system simply does not lend itself to a partial restore operation, so make sure a full backup is made each time. If you do decide to use an incremental backup once a full backup has been made, just bear in mind the warning that partial restores are not effective unless you restore the complete backup first followed by each and every incremental backup.
Backing up is, of course, going to be done much more often than restoring. If, however, you ever do need to restore the system (perhaps following a hardware crash), restore the entire X:\EJE directory, including subordinate directories, from your latest complete backup. On standalone installations, be sure to first exit the Structural Material Manager application so that no files are locked in use under Windows. For the same reason in a network environment, it is important to make sure that no users who have access the shared system are currently running the software.
When restoring the X:\EJE folder manually from an externally-produced backup, you’ll simply be copying the entire contents of the previously backed-up X:\EJE folder. If, however, the restoration is being done through some backup/restore utility that insulates you a bit from the copy operation, it might be necessary to configure that utility to allow unconditional overwrite of the files being restored. Presumably, you’ll be overwriting bad/corrupt files that have date- and time-stamps newer than those of the good files that you are restoring from the backup. By default, many backup/restore utilities prevent newer files from being overwritten by older ones during a restore operation, and this defeats the very purpose of replacing the damaged files with the last known-good versions. So, be sure to check this configuration setting before commencing with the restore operation. This tip is a general one rather than being mandated by any feature specific to Structural Material Manager.
Unfortunately, there is no way to specify that a certain Structural Material Manager folder or particular job is to be restored from an externally-produced backup. When restoring from that type of backup, you’ll always be restoring the entire system.
If a backup was made with Structural Material Manager’s own File | Backup function, data from Versions 10.1 through 20.0 can be read into the Version 20.0 system via the corresponding File | Restore function. This provides flexibility in that Structural Material Manager automatically detects the version of the backup and converts it to the current format during the restore operation. Please be warned that such flexibility is not available when restoring from outside backup utilities. If your external backup was made under some release earlier than Version 20.0 - perhaps Version 12.3, 13.1, 14.0, etc. - restoring it over the installed Version 20.0 system will result in data-format inconsistencies in the resulting “mixed” system. Accordingly, make sure that at least the major version identifiers match between the backup and the installed system. A backup of Version 13.0t, for example, should never be restored over an installed Version 20.0a system. It would be safe to restore the 20.0a backup over an installed 20.0b system since the minor version (the letter) simply identifies the maintenance release and has no effect on data format compatibility as long as the numbers match.
Section 14-1: Introduction. Structural Material Manager calculates approximate material weight values that appear on all printouts. The purpose of this chapter is not to discuss each weight figure supplied on these printouts, but rather to explain the weight calculation methods.
Section 14-2: Beam and Channel Weights. Weight values are calculated for Beams and Channels simply by multiplying the weight per foot for the item by the Length field. These weights are, of course, very accurate, since each item's Weight field provides the exact weight per foot value in the item Description. As an example, if a Channel of size 12 x 30 is entered, it is automatically known that the item weighs 30 pounds per foot; the weight calculation is thus performed by multiplying 30 by the item's Length. The only inaccuracies that occur with such calculations are due to the fact that all weights are rounded to 2 decimal places before printing.
Section 14-3: Volume-Density Weight Approximations. A volume-density method is used to compute weights for Plates, Bars, Angles, Rods, Rebar and Pipes. This entails determining the actual volume of steel contained in an item and then multiplying this volume by the density (weight per volume) of steel. This method yields a close approximation to the actual value and eliminates any need for the system to contain tables of weight values for these material types.
Although occasional differences may be noticed between the system's calculated weights and published "book values", the difference is of a fractional nature and is well within normal tolerances.
Section 14-4: Internal Look-up Tables. The previous section lists the material types for which weights are calculated via volume-density approximations. In contrast, weights for Checkered Plates, Bar Grating, Round Tubes and Round HSS are always obtained via built-in libraries of weight values. Each possible item is listed in a "look-up" table with a corresponding weight. The look-up tables enable the system to provide accurate weights based on the dimensions of the specific item entered with no need for approximations.
Section 14-5: Square and Rectangular Tube and HSS Weights. As per the previous section, weights of Round Tubes and Round HSS are always determined via look-up tables. By contrast, the weights of Square and Rectangular Tubes as well as those of Square and Rectangular HSS are sometimes determined through look-up tables but are usually calculated through the type of volume-density weight approximations covered in Section 14-3. It is most often the thin-wall items (those less than 3/16" thick) that utilize look-up tables whereas most of the items 3/16" or more thick use volume-density calculations.
When the American Institute of Steel Construction (A.I.S.C.) began specifying Square and Rectangular Tubes (type TS) under the newer Square and Rectangular HSS designation, there was no actual change to the physical items. The switch from TS to HSS was in name only. Despite the fact that this was only a nomenclature change, A.I.S.C.’s printed Steel Construction Manual - formerly known as the Manual of Steel Construction - listed lower HSS item weights than were previously published for the very same TS items. For example, TS 4 x 4 x ½ was listed in the 9th edition of the Manual of Steel Construction at 21.63 lbs. per foot, but the 13th edition of the Steel Construction Manual listed HSS 4 x 4 x ½ at a nominal weight of just 21.5 lbs. per foot. Sizes and properties listed in A.I.S.C.’s Steel Construction Manual can also be found in A.I.S.C.’s electronic counterpart, the A.I.S.C. Shapes Database (typically distributed as an Excel spreadsheet), and the 13th edition of that database also listed HSS 4 x 4 x ½ at the lower, nominal weight of 21.5 lbs.
The weight difference described above is trivial only when dealing with low quantities and short lengths. A bill of material with large numbers of Square and Rectangular HSS items and/or fairly long lengths for those items would show a considerably lower than expected weight when calculated using A.I.S.C.’s 13th edition tables.
Fortunately, beginning with the 14th edition of its printed Steel Construction Manual and electronic Shapes Database, A.I.S.C. reverted to the higher Square and Rectangular HSS weights that were in effect when the items were known as TS. Revisiting the example of TS 4 x 4 x ½ listed in the 9th edition of the Manual of Steel Construction at 21.63 lbs. per foot, the 14th edition A.I.S.C.’s tables now list HSS 4 x 4 x ½ at that same weight of 21.63 lbs. per foot. A.I.S.C. described the 14th edition change as having HSS weights “revised based on industry practice.”
Whether Structural Material Manager obtains the weight of a particular Square and Rectangular Tube or Square and Rectangular HSS item though a look-up table or a volume-density approximation, the weight will match that published in the 14th edition of A.I.S.C.’s tables. You can expect Structural Material Manager’s reported weight to be the same whether the TS or HSS designation is used.
Section 14-6: Bolt Weights. All Bolt weights are computed by means of weight tables. The exact table used for a particular Bolt depends on its diameter and grade.
Bolts with diameters of either 1/4" or 3/8" are considered to be hex Bolts with heavy hex nuts. It is assumed that no washer is used for such Bolts. The grade does not come into play in determining the weights of 1/4" and 3/8" Bolts.
For Bolts 1/2" or larger, the grade determines whether they are considered to be high-strength or regular. If the grade is A325 or A490, the units are high-strength, and the high-strength weight tables are employed. High-strength bolts are assumed to be heavy hex structurals containing one heavy hex nut and one flat washer.
If the grade is anything other than A325 or A490, then units with diameters 1/2" or larger are weighed according to regular weight tables. Such units are assumed to be heavy hex Bolts, and the weight of each includes a heavy hex nut and one washer.
Section 14-7: Miscellaneous Item Weights. No weight values are automatically calculated for Miscellaneous Items, as the system does not actually "know" what type of items are to be entered under this category. The user can, however, specify the weight of one item; this value is multiplied by the quantity and used to provide weight totals.
Section 14-8: Stainless Steel and Aluminum Weights. By default, Structural Material Manager assumes that items are comprised of carbon steel. This is adequate for the vast majority of items normally entered into the system, but adjustments must be made when stainless steel or aluminum items are entered.
The system identifies stainless steel items by any of the following material grades:
• 201, 202, 205
• 301, 302, 303, 304, 305, 308, 309, 310, 314, 316, 317, 321, 329, 330, 347, 348, 384
• 403, 405, 409, 410, 414, 416, 420, 422, 429, 430, 431, 434, 436, 440, 442, 446
If the system detects any of the following grades, it assumes the item is comprised of aluminum:
• 1050, 1060, 1100, 1199
• 2011, 2014, 2017, 2024, 2219
• 3003, 3004, 3005, 3102
• 4041, 4043
• 5005, 5052, 5056, 5059, 5083, 5086, 5154, 5356, 5454, 5456, 5754
• 6005, 6060, 6061, 6063, 6066, 6070, 6082, 6100, 6101, 6102, 6103, 6105, 6111, 6162, 6262, 6351, 6463
• 7005, 7022, 7046, 7068, 7072, 7075, 7079, 7116, 7129, 7178
• 8000, 8090
When the above material grades are encountered, the system employs different densities in its volume-density calculations and refers to different internal weight libraries in order to maintain accuracy in the weight estimate.
Section 14-9: Material Weight Rounding Options. By default, Structural Material Manager rounds weights using “4/5" rounding. This method rounds a digit upward if the number to its left is 5 or higher; the digit is left unchanged if the number to its left is 4 or lower. Assuming that rounding is being done to two decimal places, 4.543 yields 4.54 whereas 4.547 produces 4.55. This is the traditional rounding scheme with which most of us are familiar.
An alternate rounding method is sometimes used for steel weights. That rounding method causes a digit to be rounded up to the next higher value if the number on its left is anything other than a 0. So, in the cause of rounding to two decimal places, the numbers 8.121, 8.122, 8.123, 8.124, 8.125, 8.126, 8.127, 8.128 and 8.129 all round to 8.13. Only 8.120 would yield 8.12 when rounding to two decimal places. While this may seem unconventional to many readers, it is indeed useful to some customers, especially when contractually permitted for billing purposes. This rounding method will not be employed unless specifically chosen by the user.
Regardless of which rounding method you employ, you may indicate the number of decimal places that Structural Material Manager should round to. Two places is the default value, and one or zero places can be optionally specified. Note that rounding to zero places always yields a whole number.
Most Structural Material Manager printouts provide two different weights for a given material item: Weight One Item and Weight Line Total. The Weight Line Total is computed as Weight One Item multiplied by the item quantity. When using a rounding method other than Structural Material Manager’s default of “4/5" rounding to two decimal places, only the Weight Line Total figure will be printed; Weight One Item is not shown in such cases. If the Weight One Item figure were shown using the desired non-standard rounding method, there would be a good chance that this figure multiplied by the item quantity would not truly yield the printed value of Weight Line Total. This is because Structural Material Manager does not actually round the Weight One Item value before calculating Weight Line Total, as doing so could result in gross inaccuracies due to mathematical error propagation. No rounding is actually done until the Weight Line Total is computed. The bottom line: omitting the Weight One Item value from the report eliminates a potential source of confusion when using non-standard rounding.
Chapter 8 covers the Production-Control option which provides Shipping Lists, Shipping Tickets, Shipping Status Reports, Shipping Shortage Reports, etc. While we’re on the subject of rounding, it should be noted that shipping weights reported on the Status Report and the Shortage Report are always based on “4/5" rounding to two decimal places regardless of which alternate rounding method the user might have chosen. If this was not done, the report’s summary of what portions of the job have and have not shipped could be slightly “off” in that it might report more or less than 100% of the job as being shipped even after all items have indeed shipped! By always using standard rounding when reporting individual shipping weights on these two Shipping Reports, error propagation is eliminated. See Chapter 8 for more details on Shipping Status and Shipping Shortage Reports.
Weights for individual items, or groups of items, are computed internally using many decimal places, but are rounded to 2 decimal places on the printouts. This involves "4/5" rounding in that a digit of 5 or more will cause the number to be rounded up, and a digit of 4 or less will cause the number to remain the same.
The total material type weights and total job weight are rounded in a different manner than other weights. They are rounded up to the next whole number if ANY decimal value exists, with the intention that it is better to have this value rounded a bit on the high side instead of the low. No decimal digits are reported with these values; they are always whole numbers as a result of this rounding method.
Section 14-10: Welding Electrode Weights. Structural Material Manager is able to determine the total weight of welding electrodes needed if the user specifies how many feet of each size fillet weld are required. In performing this calculation, the following weights per foot are assumed for steel welding electrodes:
Steel or Stainless Electrode Size |
Assumed Weight |
1/8" |
0.048 LBS. PER FOOT |
3/16" |
0.113 LBS. PER FOOT |
1/4" |
0.189 LBS. PER FOOT |
5/16" |
0.296 LBS. PER FOOT |
3/8" |
0.427 LBS. PER FOOT |
1/2" |
0.760 LBS. PER FOOT |
5/8" |
1.185 LBS. PER FOOT |
3/4" |
1.705 LBS. PER FOOT |
1" |
3.030 LBS. PER FOOT |
Steel and stainless steel fillet welds are assumed to have the same weight per foot, but aluminum welds are assumed to have the following weights:
Aluminum Electrode Size |
Assumed Weight |
1/8" |
0.01654 LBS. PER FOOT |
3/16" |
0.03890 LBS. PER FOOT |
1/4" |
0.06511 LBS. PER FOOT |
5/16" |
0.10198 LBS. PER FOOT |
3/8" |
0.14711 LBS. PER FOOT |
1/2" |
0.26184 LBS. PER FOOT |
5/8" |
0.40826 LBS. PER FOOT |
3/4" |
0.58741 LBS. PER FOOT |
1" |
1.000 LBS. PER FOOT |
Chapter 15: Material Surface Areas
Section 15-1: Introduction. Structural Material Manager reports surface area figures on all reports except the Nested List. These figures are supplied to assist you in estimating the cleaning and painting requirements for a job.
The Estimating Module is able to take the surface area figures one step further and actually calculate paint and primer requirements in gallons.
This chapter briefly presents the calculation and rounding methods used in determining these figures.
Section 15-2: Beam and Channel Surface Areas. The surface areas for beams and channels are obtained by means of an internal library. This table simply lists a surface area for each possible section. A full shape perimeter is used, as opposed to the box perimeter or shape perimeter minus one flange.
"Tee" sections, such as WT, ST and MT shapes, are calculated first as one half of the corresponding full section's area. The surface area of the web that is exposed when the full section is cut in half is then added to this initial figure to provide the total surface area.
Section 15-3: Bolt and Miscellaneous Item Surface Areas. No surface areas are calculated for Bolts or Miscellaneous Items. The printout summaries simply list "N/A" for these types to indicate that their areas have not been included in the total job area.
Section 15-4: Geometric Approximations of Surface Areas. The surface areas of Plates, Checkered Plates, Bar Grating, Bars, Angles, Tubes, HSS, Rods, Rebar and Pipes are calculated by geometric formulas.
In most cases, the dimensions entered in the item description are used directly to compute the surface area. Pipes and Rebar vary from this since the nominal diameter is not always the same as the actual diameter. In the interest of maintaining accuracy, the system contains a table of actual diameters for all nominal diameters and uses these values in the area calculations.
The surface area of the raised projections on Checkered Plates and Rebar is not accounted for. Checkered Plates are treated as normal Plates and Rebar is considered to be plain round stock for purposes of the surface area calculations.
Note that both sides of every plate are included in the surface area calculations. Some Structural Material Manager inquire as to why the plate areas appear to be doubled. The answer is that Structural Material Manager is providing a painting area, not a simple “length times width” square footage. Unlike a normal square footage figure, the painting area does indeed account for both sides, as well as the edges, of the plate.
The surface area of Bar Grating is calculated assuming the bearing bars are running perpendicular to the width dimension (parallel to the length), and that the cross rods or cross bars are running perpendicular to the length dimension (parallel to the width). A full perimeter area is calculated based on the total number of bearing bars and cross rods or cross bars present in the item.
Section 15-5: Separate Reporting of Stainless and Aluminum Areas. Structural Material Manager computes surface areas for stainless and aluminum items just as it does for steel items. The system is careful not to combine the surface areas of these different metal types into one total figure; it reports them separately. This is of course a useful feature, as steel, stainless and aluminum all have radically different needs in terms of surface preparation. By having separate totals, the user is able to best interpret the figures as they relate to specific metal types.
Section 15-6: Rounding of Figures. On each report that supplies surface areas, the total area for each material type is printed, as well as the total job area.
Although surface areas are not printed for individual items, they are calculated internally using a large number of decimal places. This same accuracy is maintained as the individual surface areas are tallied into total areas for each material type.
Once the total material type surface areas have been tallied, they are then rounded up to the next higher square foot if there is any decimal part. The rounded value is thus always a whole number.
The total job area is simply a tally of the rounded total material type areas. There is no need for any rounding of this figure.
Chapter 16: Inches and Metric Dimension Formats
Section 16-1: Introduction. While most Structural Material Manager users will deal only with standard feet and inches dimensions, the system does offer two alternative formats: inches and millimeters. This chapter will discuss each of these formats.
Section 16-2: Selecting a Dimension Format. By this time you have already selected a dimension format, as every time you create a new job the system asks you to select one of the following formats:
• Standard Feet/Inches/Fractions.
• Inches and Fractions.
• Metric Millimeters.
You simply choose the format you want to use, and the system always uses that format for that particular job.
Section 16-3: The Inches Format. Some drawings express all item lengths in inches. The system's inches-only format is useful for this situation, as it eliminates the need to convert a number such as 123 1/2" to 10'-3 1/2.
Once you select the inches format for a job, no special steps need to be taken; simply enter the inches-only dimensions just as they appear on the drawings.
Section 16-4: The Metric Format. If a job is in metric mode, the following item fields are specified in millimeters:
• Lengths for all items except Bolts
• Widths for Plates, Checkered Plates, Bar Grating and Bars
Whole millimeters are usually entered for the above fields. If a decimal entry is used, the value will be automatically rounded to the nearest millimeter. For instance, suppose a Width of 34.4 mm is entered; it will round to 34 millimeters. A value of 34.5 mm rounds to 35 millimeters. See Section 5-16: Decimal Lengths and Widths for more information.
When using metric dimensions, note that all item sizes, such as a W 10 x 54 or a 1/4" plate thickness, are still entered in the usual English format. Bolt lengths are also assumed to be English. This is because the metric mode is intended for American or Canadian fabricators buying English-size material for jobs that use metric dimensions.
Section 16-5: Metric Calculations. When using the metric dimension format, all weights and surface areas are internally calculated using the standard conversion factor of 25.4 MM per one inch. Since this conversion is exact, no approximations are needed, and the results will also be exact.
Section 16-6: Nesting with Metric Lengths. Some explanation of the metric Nested Report is in order. All items will be listed in metric form, exactly as they were entered. Stock lengths and drops, however, are reported in English, just as you would expect.
Nesting is the only case where any rounding must be done when dealing with metric lengths. Since the Nesting Module is accurate to 1/16", every metric length and every metric plate width is internally rounded up to the nearest 16th of an inch. This rounding is used strictly for internal processing purposes and is really of no concern to the user, as the lengths are reported on the Nested Report in the same millimeters format in which they were entered.
Section 16-7: Merging Jobs with Different Dimension Formats. Jobs that are merged together with the File | Merge Job menu selection will generally have the same dimension formats. If, however, you do wish to merge two jobs with different formats, note that the format used in the currently-open job (i.e., the job that is having another job’s items appended to the end of it) will be kept.
As an example, let's assume “Job A” is in standard feet and inches and “Job B” is in inches. If Job A is the currently-open job, and you merge Job B into it, the inches-only items that Job A receives from Job B will be converted to feet and inches. The converse is also true: if Job B is the currently-open job, and Job A is merged into it, the feet-and-inches items Job B received from Job A will be converted to the inches-only format.
The only restriction placed on merging jobs with different formats is that English jobs (whether standard feet and inches or just inches) can never be merged with metric jobs. The system will simply inform you that this cannot be done if you should ever accidentally try it.
Section 17-1: Introduction. Many large jobs are fabricated in sequences which are also commonly referred to as “phases” or “zones.” Structural Material Manager has a built-in sequencing feature that makes processing such jobs very convenient.
The basic premise behind the sequencing feature is that a large, multi-phase job can be entered in its entirety with each job item having a certain sequence associated with it. Whenever a certain sequence is ready for fabrication, such as Sequence 3 for instance, items with that sequence can be copied from the main job containing all sequences to a new job that contains just items from Sequence 3. This new job can be used for sorting, nesting, etc. of just Sequence 3 while the main job remains undisturbed.
You may ask why sequencing is needed. After all, couldn’t a large project be managed by entering it as several smaller jobs that can be independently sorted, nested, printed, etc.? These subsets could of course later be merged into one large job if you wish to see weight totals or other figures for the job as a whole. Yes, such a method is indeed a viable way of breaking a large, multi-phase job into manageable sections, but it has one major drawback: the “break” points where the project should be divided into sections are often not known until after the entire job has been entered! It is this drawback that sequencing overcomes by allowing you to first enter the job in its entirety and later pull out only the sequences that are needed at a given time.
The remaining sections in this chapter show you how to effectively use the sequencing feature.
Section 17-2: Entering Job Sequences. Each item contains a sequence field. You may specify up to four - any combination of numbers, letters and other symbols - as the item’s sequence while entering material.
Note that the Sequence field is visible on the Material Entry Screen only if your computer has a screen resolution high enough to display all item fields from Piece Mark at the far left through Sequence all the way on the right. On low- or medium-resolution systems, the Sequence field will be partially or completely out of view at the right side of the screen. If that is the case on your system, you can simply use the horizontal scrollbar to bring the Sequence field into view. That scrollbar is at the bottom of the material list and is easily moved with your mouse.
The Sequence field appears on most of Structural Material Manager’s reports: Unsorted, Sorted, Nested, Estimating, etc. In terms of the Structural Material Manager’s Production-Control Module, the Sequence always appears on the Shipping List, and it also appears on the Master Shipper as long you have not checked the “Sort Shipping Marks into Alpha-Numeric Order option. The Production-Control Module’s Shipping Ticket, Status Report and Shortage Report never show the Sequence.
The sequence breakdown of a job is often not known until after the entire job has been entered. When this is the case, it is best to enter the items without sequences, and then use the “F2 = Edit Item” function at the Material Entry Screen to add the sequences once they are known.
The “F9 = Set Default Sequence” function is available at the Material Entry Screen. Any items you enter will then automatically receive the default sequence without need for typing it! This is a real time-saver that you’ll want to take advantage of when entering a long list of items that all contain the same sequence. This feature is not useful if consecutive item entries are from different sequences.
After using F9 to specify a default sequence, the system asks you to decide whether this sequence will take effect every time material is entered for this particular job or just for this particular entry session. In the first option, the new default sequence will automatically be applied to new items added to this job even if you exit the Material Entry Screen and later come back to it (even if this option is selected, you of course can always change to a different default sequence at a later time). The second option simply causes the default sequence just specified to apply only to this particular entry session; the default will later revert back to a blank sequence.
If you do not enter a sequence on a particular item, the sequence is left blank by default. This is of course only true if the F9 key has not been used to set a default sequence; that default sequence would be applied in that event.
Structural Material Manager automatically converts all sequences to upper-case characters. Thus, if a sequence of “a1" is specified, “A1" will become the actual sequence. This avoids the potential confusion that could result if the software and/or the users had to decide whether “a1" and “A1" represent the same sequence.
Section 17-3: Extracting Job Sequences. This section provides the actual steps necessary to extract a sequence from a job. Follow these steps:
A) Use File | Open to open the job from which you wish to extract sequences.
B) Select the Sequencing | Extract Sequences function.
C) Type the name of a new job; hit Enter or click the Select button when done. If you attempt to select an existing job, the system reports that this cannot be done, as only brand new (i.e., empty) jobs can receive extracted sequences. Note that you can create this new job in the folder of your choice or perhaps even create a new folder for it; you are not restricted to working within the same folder that contains the job from which you are extracting sequences.
D) All sequences in the job are loaded into a box labeled “Sequences NOT to Extract.” If any items in the job do not contain a sequence, then you’ll also see a special designation of “(Blank Sequence)” listed here. If you want to extract a sequence, double-click it to copy it to the “Sequences TO Extract” box. If you change your mind, double-click it again to send it back to the original box. Although the double-click method is fine for selecting one or two sequences, you might want to hold the Shift or CTRL keys while single-clicking more than one sequence; this lets you select more than one sequence, and you can then just click on the left or right arrow to transfer all those sequences from one box to another.
E) Click the Begin Extraction button. All items in the source job that contain the sequence(s) listed in the “Sequences TO Extract” box will be copied to the new job. Remember that items extracted from a job during sequence extraction are not deleted in the source job; extracted items are simply copied to the new job.
F) Note that the Extract Sequences function does not automatically open the new job that just received the extracted sequence(s). For instance, if the job “06-1273" is open, and you extracted sequences to a new job “06-1273 Seqs A/B,” perhaps you would still want the original “06-1273" job to be open. On the other hand, you might want to open the new “06-1273 Seqs A/B” job. Since it has no way of knowing what is best for a particular situation, Structural Material Manager asks whether you would like to open the job that just received the extracted sequence(s). You can click Yes to do so, or click No to leave the original job open.
The instructions above mentioned that you need to select a new job, i.e., one that does not currently exist, to receive the extracted sequence. There is a way to work around this if you do ever need to extract items from one job and send them into an existing job. The key here is to use a two-step process. First, perform a sequence extraction in which the extracted items are sent to a new job; you may wish to name the new one "temp", "hold", or any other name that indicates to you that it is just a temporary holding place. The second step is to merge the newly-created job into the existing job that was originally intended to receive the sequence extraction.
Section 17-4: Shipping Considerations When Using Sequences. This section provides some operating hints concerning job sequencing as it relates to shipping and Production-Control functions.
No Production-Control history information is carried to the new job during a sequence extraction. You should thus either print Shipping Tickets only from the large job containing all sequences, or print Shipping Tickets only from the smaller jobs that are created to hold each sequence. Choose one method or the other, but don’t attempt to use a mix of both. Shipping from the large job provides the advantage of allowing you to obtain a single Production-Control Status Report for the entire job without having to print one for each sequence; however, if you are only concerned with one sequence at a given time, this benefit is not all that important. Shipping from the smaller, sequence-specific jobs provides the advantage that the “F4 = Ship Balance of Job” function can be used much more effectively while creating a Shipping Ticket than if you were shipping from the large job. So, each method has pros and cons, and experimentation will determine the best choice for your particular circumstances.
Remember to enter sequences on detail items as well as items that have major marks. If you enter sequences just on the main members, the detail items will not be extracted with them!
Structural Material Manager’s Production-Control Module does not permit duplicate major piece marks in a job. If a job does contain duplicate marks, and the user requests a Shipping Ticket, the system reports that this is not possible due to the duplicate marks. This poses a problem if the same major mark exists in different sequences. For instance, assume a 1B1 major mark exists in Sequence 1 and Sequence 2. Entering 1B1 first with a sequence field of 1, then later with a sequence field of 2, causes the case of a duplicate mark just discussed. To remedy this, enter the mark as 1B1-1 in Sequence 1, and then enter it as 1B1-2 in Sequence 2. By adding a dash and the sequence number after the major mark, you have essentially treated 1B1 as two unique marks: 1B1-1 and 1B1-2. Please note that this technique of adding a suffix on the piece mark does not eliminate the need for specifying a sequence field with the item; it is still necessary to enter a sequence field of 2 with the item bearing piece mark 1B1-2.
The above suggestion of adding a sequence-suffix to major piece marks is a good solution when you are shipping from the large job that contains all sequences. However, if you ship only from sequence-specific jobs, there is no need to utilize this technique. The reason is simple: while the Production-Control Module imposes the restriction that the same major mark cannot exist more than once in a job and reports this as an error when you attempt to print a Shipping Ticket, the Material Entry module does not check for this error while the job is being keyed in. So, you can enter major mark 1C1 in sequence 1 and another 1C1 in sequence 2 all within the same job, but the system cannot let you produce a Shipping Ticket from that job once it detects the duplicate mark. The solution is to extract the sequence you wish to ship from, thus creating a new job just for that sequence. Print the Shipping Ticket from that job rather than the original, larger job. In accordance with this discussion, it is expected that you will never be shipping from the large, multi-sequence job if duplicate major marks exist; employ the sequence extraction feature and ship from the single-sequence job.
Section 17-5: Nesting Considerations When Using Sequences. The sequence indicator is not referred to at all by the Nesting Module. It will thus nest items of different sequences together if you nest a job containing multiple sequences. So, if you don’t want items of Sequence 3 nested together with Sequence 4 items, simply create separate jobs for each sequence via the sequence-extraction directions in this chapter, and nest the jobs independently.
If you are nesting into inventory, it is of course possible to add useful “drops” back to inventory (see Chapter 11). When the Nesting Module adds drops back to in-house inventory, please note that it leaves the sequence field blank on all drops.
Section 17-6: Using “Dummy” Sequences. Even if you are not interested in breaking jobs into different sequences, applying a “dummy” sequence to items can still be useful. Suppose you want to extract just 50 items from a 1,000-item job for separate nesting, weighing, etc. Without the sequencing feature, you would need to copy the job to a temporary job, and then delete the 950 items that were not wanted; this could be a time-consuming process. Alternatively, you could just re-enter the desired 50 items into a separate job. Neither solution is very efficient.
By employing the sequencing feature, the task described above can be tamed considerably. You could simply apply the “F2 Edit Item” function to each of the 50 items you want to extract, and change each item’s sequence field to a “dummy” value; any non-blank value, perhaps “3”, will do. You could then select the Sequencing | Extract Sequences menu item, and that function could be used to quickly copy all sequence 3 items into their own job.
Chapter 18: The External Data Interface
Section 18-1: Introduction. The optional External Data Interface allows material lists stored in other software systems to be imported into Structural Material Manager via ASCII text files. It also allows Structural Material Manager to export its bills of material to spreadsheet, database and other types of programs that have the capability to import ASCII text files. This eliminates the need for retyping the items and makes this module a great time-saver.
See http://www.ejeindustries.com/video/importcadbills for a video that demonstrates the how easily the External Data Interface can import material lists.
Structural Material Manager can work with two different types of text files: ASCII-delimited files and fixed-field-width files. It is important to read over Section 18-2: Types of ASCII Text Files if you are not familiar with ASCII text files or do not understand the difference between delimited files and fixed-field-width files.
Sections 18-3, 18-6 and 18-7 concentrate on ASCII-delimited operations. They are important for anyone who wants to import and/or export bills of material in a delimited format.
Sections 18-4 and 18-5 are relevant whether you intend to use Structural Material Manager with ASCII-delimited or fixed-field-width data. That is because some of the principles covered in those sections - such as the steps needed for importing a file, or how to import data files sent as e-mail attachments by outside companies - apply equally to delimited and fixed-field-width files.
Sections 18-8, 18-9 and 18-10 are important to read if you plan to import fixed-field-width bills of material. That is the means by which Structural Material Manager reads material lists exported by CAD systems.
Two sections outside of this immediate chapter are also noteworthy with regard to the External Data Interface. When importing outside material lists, items are sometimes specified as Plates that would be better treated as Bars instead. Information in Section 5-18: Conversion from Plates to Bars shows how to easily make the desired change, and Section 5-19: Conversion from Bars to Plates shows how to make the reverse swap.
Section 18-2: Types of ASCII Text Files. Text files are often called ASCII files. ASCII stands for the American Standard Code for Information Interchange, and it is pronounced “ask-ee.” The ASCII standard defines the numeric representation for each alphanumeric character. For instance, 65 is the corresponding code for capital “A”, and 96 is the code for lower-case “a”. These codes are unimportant to you as the user; all that matters is that you know that terms "text file" and "ASCII file" mean roughly the same thing (at least in the PC world).
There are two broad categories of ASCII text files with which Structural Material Manager operates: delimited and fixed-field-width. Structural Material Manager imports bills of material either in an ASCII-delimited format (such as can be exported from Excel) or in E.J.E. Industries’ published fixed-field-width format (the one that is supported by numerous CAD systems). When exporting data, Structural Material Manager always uses an ASCII-delimited format rather than a fixed-field-width format. The differences between delimited and fixed-field-width text files will now be explained.
The term “ASCII-delimited file” simply means that the ASCII text file contains multiple fields with each being separated from the next by a character called a delimiter. For instance, the comma might be the delimiter, and it could separate fields such as Piece Mark, Quantity, Material Type, Description, Length, etc. from one another as shown in these two example lines:
1B1,2,W,10 x 54,20'-3 1/4
p1,4,PL,1/2 x 36,4'-2 9/16
In this example, an application reading the delimited data would know that a new field is about to begin each time a comma is encountered.
Comma is not the only delimiter that is used. The tab character, while not actually visible except for the spacing effect it causes, is a very popular delimiter. Another popular choice is the tilde (“~”). Semicolon - while not often encountered as a delimiter in North America - is often used in Europe and other parts of the world.
You may have heard the term “CSV file.” CSV stands for “Comma Separated Values” which simply means that it is a delimited text file with comma as the delimiter. That particular type of file is often named with a file extension of .Csv such as in the filename Beams.Csv, but it is also common for a CSV file to have the more general .Txt extension such as in the filename Beams.Txt.
Astute readers will notice that a problem will occur in delimited files if a data field happens to actually contain the delimiter character. The character - such as a comma - that was meant to be part of the data would fool the application into thinking that a new field had begun. Two solutions exist. The first is to simply choose a delimiter such as the tab character which will never occur in the data or one such as tilde (“~”) which will probably never occur in English-language data. The other solution is to encapsulate text fields within quote characters; "Doe, John" would then properly function as a comma-delimited field without the comma after Doe accidentally triggering the start of a new field. The quote character is called a “text qualifier” in the context of this second possible solution.
To further complicate matters when using the quote as a text qualifier, most programs expect a pair of consecutive quotes to indicate the special case of a quote that happens to occur in the actual data field. That pair of quotes serves as an indication that the first of the two consecutive quotes is not a text qualifier. For example, the famous Italian-American boxer’s name Ray "Boom Boom" Mancini would appear as "Ray ""Boom Boom"" Mancini" such that the first and last quotes are text qualifiers that encapsulate the entire field, and quotes within the field - those encapsulating the Boom Boom nickname - are doubled.
When exchanging data with other programs, it is important to choose a delimiter format (comma delimited, tilde-delimited, etc.) that is recognized by your external application. It is also important that you know how your application responds to the presence of delimiter and text qualifier characters within a data field as opposed to the action it takes when a delimiter character is being used to terminate a data field or a text qualifier character is being used to encapsulate that field. Many possibilities exist, so Structural Material Manager gives you a wide array of options:
1. Tab delimiter, no text qualifier.
2. Tilde (“~”) delimiter, no text qualifier.
3. CSV, comma delimiter, quote text qualifier. Commas in job data are left intact; quotes in job data get doubled.
4. CSV, comma delimiter, quote text qualifier. Commas and quotes in job data are left intact without doubling quotes.
5. CSV, comma delimiter, quote text qualifier. Commas and quotes in job data are converted to spaces.
6. CSV, comma delimiter, no text qualifier. Commas in job data are converted to spaces.
7. Semicolon delimiter, no text qualifier. Semicolons in job data are converted to spaces.
You should always try to work with options #1, #2 or #3 listed above. Any of those first few options - in no certain order of preference - is likely to work well with modern software applications such as Excel. Options #4, #5 and #6 are provided only for special purposes such as interfacing with older software applications that were written before present-day de facto standards emerged. Option #7 - while useful in Europe and some other parts of the world - will probably never be used in North America.
After that rather exhaustive treatment of ASCII-delimited files, there is relatively little to say about the other major category of text file: the fixed-field-width file. Fixed-field-width files simply have certain data fields at certain column positions, and no delimiters or text qualifiers are necessary. For instance, the Piece Mark field might occupy the first so many columns of a fixed-field-width file, and the Quantity field might occupy the next so many columns. The three fixed-field-width file extensions you are likely to encounter within the guises of Structural Material Manager operations are .Txt, .Dat and .EJE.
Section 18-3: Exporting Structural Material Manager Material Lists to ASCII-Delimited Files. You can export Structural Material Manager jobs to ASCII-delimited files, and it is the optional External Data Interface that makes this possible. The primary purpose of this feature is to allow you to enter a bill of material into Structural Material Manager, take advantage of all the system has to offer in terms of sorting, weighing, etc., and then read that job into a database or spreadsheet program for custom processing without retyping the job.
The process of exporting a Structural Material Manager job is very easy. Just open the job you wish to export, and select Data Exchange | Export to ASCII-Delimited | Entire Material List. Simply follow the prompts from there. Be sure to choose one of the first few delimiter options presented at the Export dialog since those work best in most cases.
Chapter 8 covers Structural Material Manager’s Production-Control Module. The Master Shipper is one of the reports discussed there. Unlike other Production-Control Module reports such as the Shipping List and Shipping Ticket which can only be printed, the Master Shipper is unique in that it can also be exported. You may wish to export the Master Shipper to an ASCII-delimited file so that it can be read into Excel and become the basis for a Q/A-Q/C Traveler spreadsheet. Another reason you might want to export the Master Shipper is to have a bar-coding program import the file and produce bar-coded labels. To export the Master Shipper, begin by clicking either the Production-Control menu or the Data Exchange menu. Either way, you can then click Export to ASCII-Delimited | Master Shipper. Submenus then let you choose between exporting the Master Shipper in the same order the job was entered or in an order sorted by major piece mark. Regardless of which way you export the Master Shipper, the resulting file will contain only main members that have shipping marks (detail items are omitted), but total assembly weights will include the weight of all items.
Suppose you are exporting the Master Shipper as discussed above. Of course some major marks may have quantities greater than (1). The first option is to export just one line representing the entire quantity; e.g., 12 items of a certain major mark would be exported on a single line indicating a quantity of 12. The second option causes Structural Material Manager to export separate lines for each element of the quantity; e.g., 12 individual lines - each showing quantity (1) - would be exported if the quantity is 12. The difference is important when your intent is to use the exported file to create a Q-A/Q-C Traveler in Excel. If the entire quantity is exported on a single line, you’ll have to assign the same fabrication status to all items with the same major mark. Repeatedly exporting the item on separate lines may be preferable since it lets you assign different statuses to individual assemblies even though they have the same major mark. Here is the dialog that Structural Material Manager pops up to ask how you want those quantities exported:
Dialog at which Master Shipper Quantity Export Option is SelectedAlthough Structural Material Manager can work with ASCII-delimited files that have any filename extension, it is best to choose an extension that clearly identifies the file type. That will be either .Csv or .Txt with .Csv being preferred among those two. Sticking with .Csv in filename extensions allows outside programs to make some intelligent decisions about the data file. For instance, when Excel sees the .Txt extension, it makes some good default assumptions about importing the data, but when it sees the .Csv extension, Excel often makes even better default assumptions.
It might seem that since .Csv technically stands for “comma-separated values” you’d specify a .Csv extension only when a comma is the delimiter. In practice, however, the .Csv extension has taken on a more general meaning of a delimited text file regardless of the actual delimiter. Even tab-delimited files thus often have .Csv extensions.
When exporting the entire material list, the export feature always exports the items in the order in which they were entered, i.e., unsorted order. If you ever require the list to be exported in sorted order based on material type, section size, length, etc., copy the job to a “dummy” job, physically sort the dummy rather than using the normal sorting method, and export the dummy job rather than the original.
Whereas the entire material list is always exported in unsorted order, you have two choices regarding export of the Master Shipper:
1. The same order in which the items were entered.
2. A sorted order based on alpha-numeric sorting of the major piece marks.
Once you have exported the file, your database, spreadsheet or other program can read it as an ASCII-delimited file. You’ll need to know the format in which each item is exported, so the following lists the fields in the order they are exported:
1. Piece mark is a text field.
2. Quantity is a numeric field.
3. Material Type is a text field (optionally can be combined with Description; see notes below).
4. Description is a text field (optionally can be combined with Material Type; see notes below).
5. Length is a text field.
6. Mill Mark is a text field.
7. Grade is a text field.
8. Camber / Mid-Ordinate Rise is a text field.
9. Remarks is a text field.
10. Price is a numeric field.
11. Price Unit is a text field.
12. Shop Hours is a numeric field.
13. Field Hours is a numeric field.
14. Equipment Hours is a numeric field.
15. Crane Hours is a numeric field.
16. Sequence is a text field.
17. Price of one item is a numeric field.
18. Line price is a numeric field.
19. Weight of one item is a numeric field.
20. Line weight is a numeric field.
The order above is very important. It not only represents the field order of ASCII-delimited files exported by Structural Material Manager, but it is also the field order expected when importing such files. Keep that in mind when reading other sections of this chapter that mention outside applications such as SolidWorks, Inventor, Revit and Bluebeam as well as those sections that deal with Excel.
Please do not confuse the Material Type and Grade fields. A Material Type in this sense is the general type of item - W, L, PL or TS, etc. - whereas the Grade refers to the metal type such as A36, A572, 6061, 304, etc.
The Description field deserves special mention. This is to be a single, unified field even if the material item contains a multi-part description. For instance, a W Shape has two description parts: Depth and Weight per Foot. Structural Material Manager treats “10 x 54” as a single Description field in the example of a W 10 x 54. It is neither necessary nor desirable to put “10” in one field and “54” in another field.
Structural Material Manager always exports the Material Type and Description fields separately. As shown in the field order above, Material Type is the third field, and Description follows it as the fourth field. However, some other programs and certain Excel spreadsheets are designed such that the Material Type and Description are together in one field. So, instead of a “W” in one field and “10 x 54” in the next, they combine the fields into one as “W 10 x 54” or perhaps compact them further into “W10x54” without so much as a space between adjacent characters. Rest assured that Structural Material Manager can elegantly import such data. Whereas it always exports the Material Type and Description fields separately, it is very flexible when importing and can accept the data either way. You do not even need to inform the system as to whether it should expect separate or combined Material Type and Description fields; each data line is analyzed as it is imported, and the system adjusts accordingly.
Every Structural Material Manager system is bundled with example files showing the two different ways of expressing the Material Type and Description fields. Both of the files are located in the X:\EJE folder where X: represents the letter of the drive on which Structural Material Manager is installed. X:\EJE\DelimitedExampleStandard.Csv corresponds to the normal way of having separate Material Type and Description fields, and DelimitedExampleAlternate.Csv shows that same data except that Material Type and Description are combined into a single field named “Description.”
An exhaustive treatment of Structural Material Manager’s ASCII-delimited field layout is beyond the scope of this book. Many more details concerning the format can be found by visiting the following Web page: http://www.ejeindustries.com/delimitedfieldlayout.html
Section 18-4: Importing Files into Structural Material Manager. Importing data is very straightforward. It just involves opening a job that will receive the imported data and specifying the name of the file to import. Please note that although the steps involved in doing this are not complicated, they do require a little knowledge of filenames, specifically, drive letters and file paths. If you are not familiar with these topics, you may wish to enlist the help of computer-literate personnel the first time you import data.
Although data will sometimes be imported into new jobs that do not contain any items, it is also possible to import into existing ones that already contain items. In this case, any imported items will be added above the currently-selected item(s), below the currently-selected item(s) or at the end of the material list depending on which of those options is already selected at the material entry screen. This gives you a great deal of control over exactly where in the material list the imported lines will be added.
ASCII-delimited files (described in Section 18-3) and fixed-field-width files (covered in Sections 18-18, 18-9 and 18-10) are imported in the exactly the same manner. That is because Structural Material Manager automatically detects the type of file being imported and adjusts accordingly. If the file happens to be of the delimited type, the delimiter and optional text qualifier are automatically determined without you needing to specify them. Header and/or title lines appear before the first actual data line in some data files, and they automatically get skipped without you having to indicate the number of lines to ignore. The bottom line: in order to insulate users from the technical details of importing material, Structural Material Manager goes to great lengths to make everything automatic!
Some example text files have been provided with Structural Material Manager. You may wish to experiment with importing these files in order to get a feel for how the import process works.
Consider the sample X:\EJE\Chapter4SampleListFixedFieldWidthFormatOutdated(LegacyOnly).Eje and X:\EJE\Chapter4SampleCommaDelimitedQuoteAsTextQualifier.Csv files. Those file paths of course assume a Drive X: installation; substitute your actual local or network drive letter. These two text files represent the exact same sample material list in the fixed-field-width and delimited formats, respectively. The former is outdated since the fixed-field-width format is deprecated, but it can still be successfully imported. The latter is in the preferred, modern format: delimited text.
A sample structural project has also been bundled with the system. After it is imported, it is a great project for testing system features such as the Nesting Modules, Shipping Tickets, etc. without having to manually enter any items. The bill of material represents a hotel structure, and it has been provided in (3) files of different formats:
• X:\EJE\StructuralExampleTabDelimitedNoTextQualifier.Txt
• X:\EJE\StructuralExampleCommaDelimitedNoTextQualifier.Csv
• X:\EJE\StructuralExampleCommaDelimitedQuoteAsTextQualifier.Csv
Also see X:\EJE\DelimitedExampleStandard.Csv and X:\EJE\DelimitedExampleAlternate.Csv which were mentioned in Section 18-3.
To import data, start by using File | Open Job to open the job that will receive the items. You should then click the appropriate radio button at the material entry screen to choose whether new items will be added above the currently-selected item(s), below the currently-selected item(s) or at the end of the material list. The Data Exchange | Import External Data menu items can then be clicked to bring up the Import External Data dialog.
Once the Import External Data dialog appears, simply specify the file to import. You may type the name directly, but it is easier to click the Browse Files button in order to bring up a dialog that lets you navigate through the file structure of all available drives.
During import, descriptions of Plates, Checkered Plates and Bars can be automatically checked for standard description order, and that order can be reversed if necessary. Plate and Checkered Plate descriptions are normally expressed as thickness x width such that the thickness is the smaller of the dimensions; that convention is applied nearly universally so that the alternative width x thickness format is rarely encountered except in very few CAD systems that for some reason reverse the order. Standard nomenclature for Bar descriptions places the width before the thickness so that the smaller dimension is to be last in the width x thickness format; although the reverse format of thickness x width is also commonly encountered, width x thickness is the technically-correct Bar format. You can refer to Section 5-20: Standardizing Plate Descriptions and Section 5-21: Standardizing Bar Descriptions for much more in-depth information on this subject. Those sections describe Structural Material Manager’s functions that reverse Plate and Bar descriptions after the items are already in the list. Our concern here is reversing them during import so that they are standardized before they make it into the list. Whether automatic checking and reversal occurs depends on the options you choose at the Standardization of Plate and Bar Descriptions area of the Import External Data dialog.
After selecting the file to import and choosing the desired Plate, Checkered Plate and Bar standardization options, all that is left to do is to click the Import button. Items will then be read one at a time from the external file and will be added to the current material list at whatever position you previously chose at the material entry screen: above the currently-selected item(s), below the currently-selected item(s) or at the end of the material list.
As items are imported into Structural Material Manager, invalid ones are flagged. A line number will be reported, and this number corresponds to a certain line within the text file. Provide your detailer with a list of these line numbers if any such errors are reported.
The job into which you are importing material might contain a default sequence. If so, you are prompted to decide whether to apply this sequence upon importing items that do not explicitly contain a sequence field. The first choice is to have the default sequence automatically applied to each item as it is imported unless the item already contains sequence information; of course, if an item explicitly contains sequence information, that sequence will override the default during the import. The second choice results in the default sequence being ignored during the import session; if an item contains sequence info, it will be imported using that sequence, but an item lacking such info will be imported with a blank sequence.
During the import process, data is read from that file line by line, with each line being checked for errors. If an error is found, the system will respond with a description of the error and the line number where the error occurred. You are presented with two options in the event of an error:
• Skip this line, but continue with the remainder of the import.
• Skip this line, and abort the import without reading any further items.
The first option, to continue after skipping this item, will be used most of the time. You can later find and correct the errors and then manually insert those items into the material list.
Only rarely will the option to abort the rest of the import be chosen. It is useful in cases where a file-format error is causing every data file line to be flagged as erroneous.
With either option, all items successfully imported before the error occurred will be retained in the job.
Once the import is complete, a summary is presented that shows the number of data file lines attempted, successfully read and canceled due to errors. The number of blank lines as well as the number of title/header lines are both provided, as Structural Material Manager automatically skips over both of these harmless types of lines. If there were any errors, the line numbers where the errors appeared will be listed so you can refer to them while correcting the file.
After the items have been imported via the External Data Interface, the Material Entry Module can be used to manually edit the items or insert additional items. Also, all functions such as sorting, nesting, etc. will be available for the job. The bottom line is that the imported job now functions just as if it had been keyed in by hand!
Section 18-5: Importing Files Supplied by Outside Companies. Many times, the files you need to import are bills of material supplied by outside firms. The purpose of this section is to shed some light on the procedures necessary in such cases. This information is applicable whether the data is ASCII-delimited or fixed-field-width.
We’ll assume that you are receiving the data as e-mail attachments. The most important tip to remember is that you should not double-click the attachment in an attempt to cause Windows to automatically handle the file. All that will do is cause the operating system to try to open the file with whatever program that is registered under Windows to handle that file particular extension; this will probably be NotePad for .Txt files, and perhaps no valid program will be found for other extensions such as .Dat and .EJE. The proper strategy is to save the file to some location on your hard drive. The exact steps vary between different e-mail programs, but most e-mail programs will allow you to right-click the attachment with the mouse and then choose the “Save As” option.
When saving the attachment, it is important to take note of the drive and folder in which you placed the file. With that location in mind, you’ll be able to easily browse to the file when selecting it for importing as per the directions in Section 18-4.
One final note is in order concerning importing data from outside companies. If the outside company also owns Structural Material Manager, they should not be sending you files that need imported. Rather, it is probably best that they supply jobs in Structural Material Manager’s native data format by simply backing them up to a file with the Back up Folder to Archive function. They can then e-mail the backed-up data to you as an e-mail attachment. You, in turn, save the received attachment to a directory of your choosing, and load the jobs with the Restore Folder from Archive function. This technique thus bypasses the need for importing jobs with the External Data Interface. See Sections 13-7 and 13-8 for information on backing up and restoring folders to and from archive files, respectively. Also see Section 13-11: E-Mailing Folders for details on sending backed-up data via e-mail.
Section 18-6: Importing ASCII-Delimited Files into Excel. The information presented in this section is helpful in transferring data to the Excel spreadsheet program which is part of the Microsoft Office suite of applications. There are two main sources of ASCII-delimited data that Structural Material Manager customers routinely import into Excel:
1. Files exported from Structural Material Manager itself as per the directions presented in Section 18-3. In this context, the idea is to export a Structural Material Manager bill of material, Buy List or Master Shipper to Excel for further processing.
2. Files exported from outside applications. Specifically, these applications are usually those that cannot produce EJE and/or KISS files but can save their bills of material to delimited-text files. Examples include SolidWorks, Inventor, Revit and Bluebeam. Here the idea is to use Excel as an intermediary to bridge the gap between the outside application and Structural Material Manager. Re-keying of data is thus eliminated despite not having access to EJE and/or KISS files. Section 18-7 also broaches this subject.
This discussion assumes that you’ll begin with a blank worksheet open in Excel. It is into that blank worksheet that a file previously exported from Structural Material Manager, or perhaps exported from some other application, will now be imported. Of course you can instead open an existing worksheet in Excel, and import the file into it so that the new items will be added to that worksheet. For our purposes in this section, however, let’s assume that the current Excel worksheet is blank.
An important distinction needs noted here. Once the ASCII-delimited file has been exported from Structural Material Manager or another application, you'll import it into Excel rather than open it in Excel. A classic mistake is to go to Excel’s File menu, choose Open, and select the file that was exported. That is incorrect since File | Open is intended for actual spreadsheet data such as contained in .Xls and .Xlsx files. Remember, you are importing ASCII-delimited text that is stored in .Txt, .Csv or other text-file types; you are not opening a spreadsheet file. While it is true that Excel can actually open text files directly, the results will not necessarily be as expected since these problems can occur:
1. Fractions may be misinterpreted as dates.
2. Fields intended to be in separate columns might instead become one big text block.
To properly import the file into Excel and avoid the problems mentioned above, click Excel’s Data menu. Under all modern Excel versions (2007 and newer), the Data menu has an area labeled Get External Data, and it is there that you’ll click From Text. Here is a screen shot showing the Data menu expanded and the From Text button highlighted within the Get External Data area:
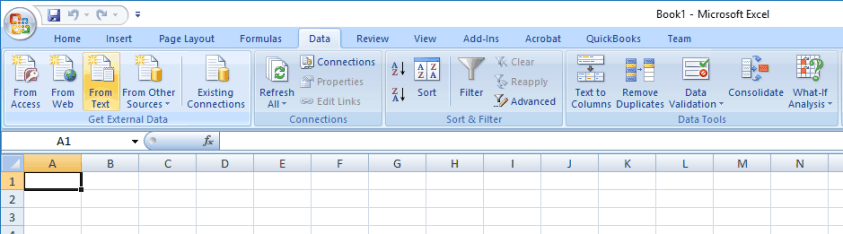 Excel Data Menu Typical of Excel 2007 and Newer
Outdated Excel versions such as Excel 2003 and older have a different menu structure than Excel 2007 and newer releases, and the screen shot shown above does not apply. Under those older Excel versions, your next step after clicking the Data menu is to select Import External Data followed by Import Data.
If Excel pops up a Microsoft Office Security Notice dialog stating that the operation connects to an external data source, simply click Ok. External data is exactly what we want here!
Regardless of your Excel version, you can now select the file to import, and click the Open button. Excel will then begin walking you through the screens of its 3-step Text Import Wizard.
At the first Text Import Wizard screen, Excel lets you specify the data type as Delimited or Fixed Width. Make sure that Excel has selected the radio button corresponding to Delimited. If the Fixed Width radio button is for some reason selected, change to the Delimited option. Click Next when done. The following screen shot shows the dialog:
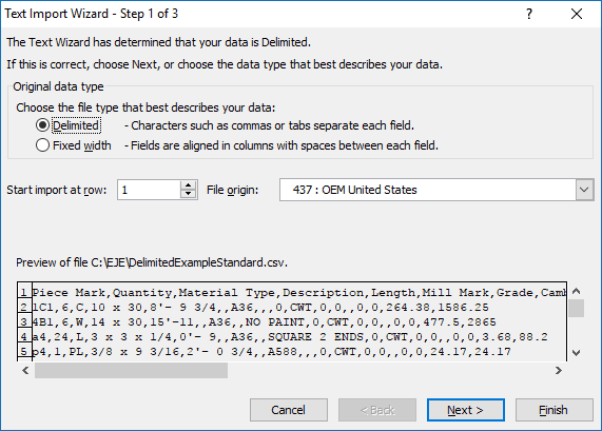 Excel Text Import Wizard’s First Step
The second Text Import Wizard screen is the one at which the delimiter character can be chosen. Excel snoops in on the file contents, and that sneak-peek often lets it automatically determine which delimiter is being used. It is especially good at detecting the tab character as the delimiter, but it won’t always correctly detect comma-delimited data. If the proper delimiter is not automatically selected, simply check the box next to the correct one such as the comma or semicolon. Only if your data uses some delimiter other than a tab, comma, or semicolon will you have to select the delimiter type of "Other" and then actually type that character (such as ~ which is a tilde) in the appropriate box. A sure sign that the delimiter is properly set is that the data preview will show fields (Piece Mark, Quantity, etc.) in separate columns rather than presenting the data as one big text block. After the delimiter is properly set, click Next. This screen shot shows the dialog:
 Excel Text Import Wizard’s Second Step
The third and final Text Import Wizard screen now appears. It is here that it might be tempting to get lazy and quickly click Finish. Instead, what we first need to do is specify the format of any fields that might contain fractions. This needs done on a column-by-column basis. This will avoid fractions being accidentally imported as dates which will now be discussed in detail.
When importing data, Excel assumes a default data type of "General." That type causes Excel to import numeric values as numbers, date values as dates, and all remaining values as text. So far so good; this seems to be exactly what you'd want done. A problem occurs, however, in North America where the Imperial/English measurement system is often used. The issue is that the fraction bar in measurements such as 1/4", 29'-10 3/4, etc. can fool Excel into thinking that the fraction represents a date! To illustrate the problem, consider this tab-delimited data line:
b1 3 BAR 1/4 8 20'- 0 A36
The data line above is intended to represent some Bars. They all have piece mark b1, and there are (3) of them. The Bars are 1/4 inch thick x 8 inches wide x 20 feet long and are made of grade A36 material. The tab character is the delimiter, and that causes what appears here as varying amounts of blank space between fields (tabs are of course invisible). Unfortunately, Excel's default data type of "General" will convert 1/4 to the date 4-Jan rather than accepting it as the intended dimension of 1/4! Converting the column's format to the proper "Text" data type at some later time turns 4-Jan into 42739 rather than 1/4; thus, an after-the-fact adjustment is clearly not the solution. What we need to do is guide Excel's hand during the import rather than trying to correct the situation afterwards.
The Text Import Wizard provides a data preview showing each field. As mentioned, we need to go column by column telling Excel to use a data type of Text rather than General. Do this for any fields that are expected to sometimes contain textual data and/or fractions rather than strictly whole and decimal numbers: Piece Mark, Material Type, Description, etc. are all such examples. In fact, most fields should indeed be Text. There are relatively few fields that contain strictly whole or decimal numeric data without text or fractions; Quantity, Price, Shop Hours, Field Hours, etc. are such columns, and they should be left as the General type.
The first column the Text Import Wizard shows in its preview, assuming that the data is in the proper field order as prescribed in Section 18-3, is the Piece Mark field. Click that column in the data preview in order to select it (even if that column’s contents are completely blank) and then click the Text radio button so that General is no longer selected.
The next field (again assuming the proper field order presented in Section 18-3) is the Quantity. As mentioned, this is one of the few fields that can be left as General since it will only ever contain numbers without fractions.
The next so many fields (Material Type, Description, Length, etc.) can all be expected to contain some non-numeric data and must be changed from General to Text. Repeat this process for all such fields, but leave any further strictly-numeric fields (Price, Shop Hours, Field Hours, etc.) as General.
After all fields have been inspected and either left as General or changed to Text, you can click Finish. Here is a screen shot of the Text Import Wizard at that point:
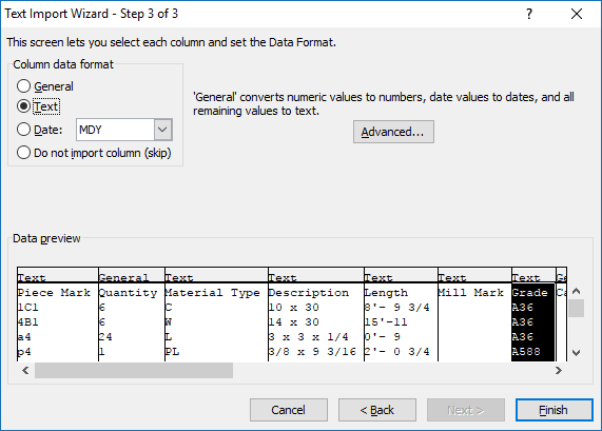 Excel Text Import Wizard’s Third Step
After you click Finish at the third and final Text Import Wizard screen, the Import Data dialog appears. It asks where to put the imported data. We’ll assume that the default of “Existing Worksheet” will be used, and you can simply click Ok at this point to actually begin the import process.
It is very important to note that Structural Material Manager’s calculating power is relinquished once you import a list into another application. For instance, suppose a material list is exported to a file and then read into a spreadsheet such Excel. If you change an item’s length from 5'-0 to 6'-0, or perhaps the quantity from 4 to 9, the weight figures will not automatically increase! If calculations are needed, you will have to add them to your spreadsheet or database program.
We’ve covered a lot of ground in this section! Admittedly, the concepts discussed here can be a bit overwhelming to those unfamiliar with importing data into Excel. If anything remains unclear, please view the video at http://www.ejeindustries.com/video/importintoexcel.html which shows an ASCII-delimited file being imported into Excel.
Section 18-7: Exporting ASCII-Delimited Files from Excel. Excel spreadsheets can be exported to an ASCII-delimited format. However, this is not done via some sort of “Export” function in Excel. Rather, an export to ASCII-delimited is done in Excel by clicking File | Save As and choosing either “Text (Tab delimited) or "CSV (Comma delimited)" as the file type.
As long as the fields of your Excel spreadsheet are formatted according to the specification at http://www.ejeindustries.com/delimitedfieldlayout.html, the delimited file generated by Excel will be able to be successfully imported by Structural Material Manager. That Web-based resource covers the ASCII-delimited format in great detail, and the field order it presents (Piece Mark, Quantity, Material Type, etc.) is the same as that shown in this chapter’s Section 18-3: Exporting Structural Material Manager Material Lists to ASCII-Delimited Files.
As an exercise left to the reader, it is entirely possible to follow this series of steps:
1. Export a bill of material from Structural Material Manager as per Section 18-3.
2. Import the material into Excel as per Section 18-6.
3. Make changes to the list under Excel. Customized sorting or pricing are some possible changes.
4. Export the modified material list from Excel as per this section (18-7).
5. Import the bill of material back into Structural Material Manager as per Section 18-4.
The ability of Excel to easily produce ASCII-delimited files that Structural Material Manager can import can be leveraged to allow nearly any program's bill of material to be sent to Structural Material Manager. For instance, suppose you need to export a bill of material from some application that does not directly offer a function labeled "Export to EJE," "Export to Structural Material Manager," "Export to KISS," etc. Such examples include SolidWorks, Inventor, Revit and Bluebeam. Don't immediately conclude that those applications cannot be interfaced with Structural Material Manager! As long as an "Export to Excel" function is provided, it will be easy to use Excel as an intermediary. Here are the steps:
1. Have the application such as SolidWorks, Inventor, Revit, Bluebeam, etc. send its bill of material to Excel.
2. Verify that the Excel worksheet's columns are in the prescribed order (Piece Mark, Quantity, Material Type, etc.) shown in this chapter’s Section 18-3: Exporting Structural Material Manager Material Lists to ASCII-Delimited Files and are formatted according to the specification at http://www.ejeindustries.com/delimitedfieldlayout.html.
3. In Excel’s File menu, use the Save As option to save the Excel data to a .Txt or .Csv file.
4. Have Structural Material Manager import the .Txt or .Csv file that Excel produced.
Using Excel as an intermediary in the way described above is the next best thing to a having a direct interface and certainly beats manually re-keying items from Solidworks, Inventor, Revit or Bluebeam. Exporting to an ASCII-delimited file and skipping the Excel intermediary is probably possible, but it likely would require some effort to set up the first time. Sending the list first to Excel and then having Excel save it to an ASCII-delimited file (whether .Txt or .Csv) is easy.
Section 18-3 mentions how every Structural Material Manager system comes bundled with sample CSV files. Those files provide examples of how the Material Type and Description fields are separate in the normal layout but can be combined into a single field using an alternate layout. Just as those CSV files reside in the X:\EJE folder where X: represents the letter of the drive on which Structural Material Manager is installed, a couple of Excel spreadsheets, ExcelExampleStandard.Xls and ExcelExampleAlternate.Xls, are also provided there. Please copy these files for your own purposes, and use the copies as templates in your own data-import projects. Whereas the Excel samples list every possible field, you’ll probably be able to identify a certain column that is the rightmost one you’ll ever need, and delete every column after that one.
Section 18-8: Importing CAD Bills of Material As Fixed-Field-Width Files. Most previous sections of this chapter have dealt with importing and exporting ASCII-delimited files. A delimited file is definitely the best way to send material lists to and from Structural Material Manager when dealing with most software packages. An exception to this general rule, however, is when you want Structural Material Manager to import bills of material that originate in CAD systems; a certain type of fixed-field-width file is best for that purpose.
E.J.E. Industries publishes the fixed-field-width format in which Structural Material Manager’s External Data Interface expects a CAD system to send its bills of material. The specification for that format is published at it http://www.ejeindustries.com/fixedfieldwidthformat.html, but - as you’ll soon see - you’ll probably never need to refer to that specification.
Most CAD systems aimed at the steel industry (AutoSD, CadVantage, CDS, DetailCad, SDS/2, Soft Steel, SteelLogic, and Tekla Structures) have built-in support for Structural Material Manager's External Data Interface. They write their bills of material to the fixed-field-width format that E.J.E. Industries publishes, and you as the end-user thus do not have to be familiar with that format. Such detailing packages have functions labeled something to the effect of "Export to Structural Material Manager" or simply "Export to EJE" that exist within the detailing programs themselves. Those functions build the required fixed-field-width format file that can be imported into Structural Material Manager.
Since steel detailing packages are intended strictly for the steel industry, it is natural for such programs to support Structural Material Manager. The users of the steel-detailing programs and the users of Structural Material Manager are very much the same group of companies. The software companies producing such CAD systems have worked closely with E.J.E. Industries to make sure that our systems are compatible.
Here is a list of CAD systems that can export their bills of material to the fixed-field-width file format that Structural Material Manager’s External Data Interface expects:
Advance Steel by Autodesk, 844-262-9170, http://www.autodesk.com/products/advance-steel
AutoSD, 601-679-5800, http://www.autosd.com
CadVantage, 704-344-9644, http://www.steeldetails.com
CDS, 843-552-7055, http://www.asteel.com
Detail, 909-863-9169, http://www.4macrosoft.com
DetailCad, 205-324-5741, http://www.detailcad.com
SDS/2 by Design Data, 1-800-443-0782, http://www.sds2.com
Soft Steel by Soft Steel, Inc., 909-863-9191, http://www.softsteelinc.com/SoftSteel.html
SteelLogic by Computer Detailing Corporation, 215-355-6003, http://www.steellogic.com
Tekla Structures by Tekla, Inc., 770-424-8666, http://www.tekla.com
You’ll have to check with the maker of your particular CAD system to determine the exact wording of the “Export to E.J.E.” or “Export to Structural Material Manager” function within that system. You can also inquire as to the steps are needed to invoke that function (the menu functions and/or buttons to select).
Different CAD systems export to Structural Material Manager using different file extensions. Some produce files with a .Dat extension while others may export files with .Txt, .EJE or other extensions.
The .EJE file extension is mentioned above along with .Dat and .Txt. It is due to an unfortunate coincidence that the makers of some CAD systems - most notably Tekla but perhaps others, too - began using .EJE as a file extension. Please don’t confuse those .EJE files with the .EJE files that Structural Material Manager uses to name its own backup archives (see Chapter13 for information on backing up and restoring the system). The .EJE files exported by CAD systems are fixed-field-width files in the format expected by Structural Material Manager’s External Data Interface, and the .EJE files produced by Structural Material Manager’s own Backup function are compressed archives in a completely different format.
Your steel detailing system might have an “Export to KSS” or “Export to KISS” function. Such a function produces files in the KISS format, and they have an extension of .KSS. Although Structural Material Manager can import such files, keep in mind that most any package that can produce .KSS files can also export to Structural Material Manager’s native .EJE format. There are exceptions such as Advance Steel and CadVantage which can only produce .KSS but not .EJE files, but most systems export to both formats.
If you own the Tekla steel detailing system, or if you do not own it but plan on receiving Tekla data from outside detailers who do own that system, please be sure to visit our Web site and review the http://www.ejeindustries.com/support/teklaexportdirections.html page. It provides general Tekla export directions and also links to a different Web page that describes how you can verify that Tekla is configured to export net cut lengths instead of gross model lengths.
Some detailing systems - most notably Design Data's SDS/2 - can be configured to use identical major marks for the Main Member and the first "real" item below it. That causes a problem for systems such as Structural Material Manager which expect only detail marks to follow a Main Member. Specifically, this is an issue affecting the optional Production-Control Module since that feature relies on major and minor piece marks to determine which items belong to the same fabricated assembly. Chapter 9, the Production-Control chapter, contains Section 8-18: Identical Piece Marks on Main Member Headings and Actual Items which describes how Structural Material Manager detects the identical piece marks during import and converts them to the required format. No intervention is needed on your part; everything is handled automatically as the items are imported. If you currently import from SDS/2 or think that you might do so in the future, please take a moment to read over that section.
Once your CAD system has exported the necessary file, the information in Section 18-4: Importing Files into Structural Material Manager can be used. If that file was produced by an outside company and sent to you as e-mail attachment, please refer to Section 18-5: Importing Files Supplied by Outside Companies.
Best practices for exporting from various CAD systems to Structural Material Manager can be summed up as follows:
• Advance Steel and CadVantage users should always export the bill of material to the KISS format. These systems do not have a specific “Export to Structural Material Manager” option, but that is not a problem since Structural Material Manager supports KISS files.
• Users of AutoSD, CDS, DetailCad, SDS/2 Soft Steel, SteelLogic and Tekla will find options for exporting to Structural Material Manager as well as KISS. One format might prove better than the other for a particular project, but always try exporting to Structural Material Manager first. Only if import results are unsatisfactory you try the KISS file format option.
• SDS/2 users should be aware that modern SDS/2 versions actually have (2) Structural Material Manager export options: the older fixed-field width format or the newer ASCII-delimited format. They are labeled as “Fixed” and “ASCII,” respectively. Although Fixed might be the default, be sure to choose ASCII for best results.
• Those with AutoCAD or SSDCP will need to employ a conversion utility by P2 Programs or Soft Steel, Inc. as discussed in the next section.
Section 18-9: P2 Programs and Soft Steel Conversion Utilities for AutoCAD and SSDCP. All of the CAD systems mentioned in Section 18-8 support Structural Material Manager directly. That is, they can export their bills of material to one of the file formats that Structural Material Manager can import. No conversion utilities or special programming are needed.
There are some other CAD systems commonly used in the steel industry that - while not supporting Structural Material Manager directly - can indeed have their bills of material sent to Structural Material Manager by means of a conversion utility. They are as follows:
AutoCAD (i.e., generalized AutoCAD without any third-party, add-on programs)
SSDCP, 704-370-0840, http://www.ssdcp.com
A Texas-based company named P2 Programs and a California-based firm named Soft Steel, Inc. each carry ready-made utilities that export AutoCAD bills of material to a fixed-field-width file that Structural Material Manager's External Data Interface can import. The result: no programming is required to send AutoCAD material lists to Structural Material Manager despite the fact that AutoCAD lacks intrinsic Structural Material Manager support.
P2 Programs’ and Soft Steel’s AutoCAD interfaces are also the means by which SSDCP, an AutoCAD add-on package, is supported. You may thus export bills of material from SSDCP to Structural Material Manager using either of those conversion utilities.
Call P2 Programs toll-free at 1-800-563-6737 within the U.S. and Canada, or 512-858-2007 elsewhere, if you’d like information on their interface. A Web page describing the AutoCad to EJE Conversion Utility can be found at http://www.p2programs.com/index-1ac2eje.html.
Soft Steel, Inc. can be reached by phone at 909-863-9191. Read about their SoftScan Bill of Material Scanner at http://www.softsteelinc.com/SoftScan.html.
Using utilities by P2 Programs or Soft Steel to convert AutoCAD or SSDCP data to Structural Material Manager’s required format of course introduces an extra step. That step is not required for Advance Steel, AutoSD, CadVantage, CDS, DetailCad, SDS/2, Soft Steel, SteelLogic, and Tekla Structures which all directly support E.J.E. Industries’ External Data Interface standard. Still, the end result is the same: the CAD bill of material is able to be read into Structural Material Manager without re-typing!
Please see Section 18-4: Importing Files into Structural Material Manager for the procedures to follow after the AutoCad to EJE or SoftScan utility has built the file. If the file produced by either utility has been sent from another firm as an e-mail attachment, please refer to Section 18-5: Importing Files Supplied by Outside Companies.
We at E.J.E. Industries are sometimes asked why AutoCAD does not have an export-to-EJE function. Actually, the lack of such a function makes perfect sense when you consider the fact that AutoCAD is not a steel-specific package. As a generalized CAD system intended for any conceivable industry, AutoCAD will probably never add support for any steel-specific data formats such as the one E.J.E. Industries publishes for Structural Material Manager. That is of little consequence, however, as long as you have the AutoCad to EJE or SoftScan utilities to bridge the gap between AutoCAD and Structural Material Manager.
We are also sometimes asked whether the P2 Programs utility can be used to produce Structural Material Manager data from AutoCAD LT - known as AutoCAD “Lite” - rather than the full version of AutoCAD. The AutoCad to EJE conversion program by P2 cannot work with drawings coming from the LT version. However, if the drawings can first be converted to the AutoCAD 2002 version, the P2 Programs utility will indeed be able to work with them. The full versions of newer AutoCAD systems come equipped with a drawings converter utility, so if you have access to a PC that has the full version of AutoCAD, it can be used to convert AutoCAD LT data to the AutoCAD 2002 format.
Suppose a fabrication company needs the AutoCad to EJE or SoftScan utility, but detailing is done through an outside firm rather than in-house. Who should buy the utility? Where no single answer is right for everyone, the following options provide food for thought:
1. Let the detailing company purchase the conversion utility. That firm then uses the utility to process AutoCAD or SSDCP bills of material before sending them to you. This is advantageous in that you receive data that the utility has already prepared for use with Structural Material Manager’s External Data Interface.
2. You purchase the conversion utility for the outside detailing firm so they can use it on your behalf. This has the same advantage as the first option in that the data comes to you already converted.
3. You purchase the conversion utility, and keep it in-house. The detailer supplies CAD drawings as AutoCAD files. You then use the utility to do this conversion, and the file produced by the utility is the one that is read into Structural Material Manager’s External Data Interface. This is not as elegant as the first two options, as you rather than the detailer now must operate the converter.
Section 18-10: Custom Interfaces. Files from other software applications cannot be imported directly into Structural Material Manager. An intermediate file is needed as a bridge between the two systems. The External Data Interface reads that intermediate file and converts it into a Structural Material Manager job.
The intermediate file can be produced by Microsoft Excel, Microsoft Access, and many other generalized programs that can save data in an ASCII-delimited format. Steel-specific programs that can build the required intermediate file (whether as an ASCII-delimited text file, a fixed-field-width text file or a KISS file) are listed in Sections 18-8 and 18-9.
Only if you wish to interface Structural Material Manager to some program that cannot export its bill of material to an ASCII-delimited file, or a steel system other than those mentioned in Sections 18-8 and 18-9, will any custom programming be required.
In the unlikely event that custom programming proves necessary, a computer programmer is required to write a conversion utility in the programming language of his or her choice. The utility builds an ASCII-delimited text file in the format that Structural Material Manager’s External Data Interface is expecting. That format is published at http://www.ejeindustries.com/delimitedfieldlayout.html. Writing the conversion utility is not a difficult task, but it does require an individual with more than "end user" skills. Once the conversion utility has been written, no programming skills are needed on the part of those using the utility; the completed system can be put to daily use by personnel with no technical background.
Chapter 19: Adhesive Item Labels
Section 19-1: Introduction. The following Structural Material Manager printouts can be directed to adhesive labels rather than being printed as reports:
• Sorted List
• Nested List
• Master Shipper
• Shipping Ticket
Structural Material Manager’s labels contain such information as piece mark, length, weight, project name, contract number, etc. The exact information appearing on the label varies depending on which type of label listed above is being printed.
No barcodes or QR codes appear on the labels. That is a feature that E.J.E. Industries likely will incorporate into a future Structural Material Manager upgrade, but currently no such codes are printed.
This chapter covers general issues surrounding label printing: the label construction, required printers and ribbons, etc. rather than presenting the steps needed to print each type of label. For specific information on printing sorted labels, see Chapter 7. Chapter 8 covers labels that are based on Production-Control reports, namely, labels that correspond to Master Shippers and Shipping Tickets. See Chapter 9 for information on nested labels.
Section 19-2: Required Label Printer. An industrial-quality, thermal-transfer label printer using a ribbon is required in order to have Structural Material Manager print labels.
The software has been designed and tested with certain thermal-transfer printers manufactured by Zebra. If you need to purchase a new thermal-transfer printer for Structural Material Manager label printing, the Zebra ZT411 and Zebra ZT421 are specifically recommended. Other Zebra and even models from different manufacturers may also work, but success is guaranteed only with the Zebra ZT411 and ZT421 models.
The Zebra ZT411 can accommodate labels up to 4.09" wide. The ZT421 is a nearly identical but larger, more expensive unit capable of handling labels up to 6.6" wide. Given that a 4" wide x 6" long label size is extremely common in industry and works well with Structural Material Manager, most of our customers will probably opt for the ZT411.
All Zebra thermal printers are capable of direct thermal printing. That is, they can all print without ribbons on direct-thermal media such as is commonly used for package labels that don’t require durability, store receipts not intended to last permanently, etc. However, thermal-transfer printing using ribbons is not automatically available on every Zebra unit. If you purchase one that is equipped only for direct thermal printing , a metal plate inside the unit will cover the area from which the ribbon spools would emanate for units also equipped with thermal-transfer printing. You must order a dual thermal (aka hybrid) model in order for it to have the spools that hold a thermal-transfer ribbon. So, be careful to not accidentally purchase a unit that supports only direct thermal printing.
Thermal-transfer printers are not likely to be found as "in stock" items at your local office supply store or computer equipment dealer, but they are readily available via Internet ordering. If your company lacks in-house I.T. staff but utilizes an outsourced I.T. consultant, E.J.E. Industries suggests that you let them order and install the printer in order to avoid the costly mistake of getting the wrong unit.
Thermal-transfer printers are available with different print qualities with resolution being specified in dots per inch (dpi). For instance, some Zebra models are offered in 203 dpi, 300 dpi and 600 dpi variations with price increasing in direct proportion to resolution. For Structural Material Manager’s purposes, even 203 dpi is more than adequate.
Many customers would like to print labels using inkjet or laser printers such as Structural Material Manager requires for its reports, but 8 ½" x 11" sheet-fed label stock that such units require would be prohibitively expensive if the labels were of industrial quality. The inexpensive sheet-fed labels that are commonly available for inkjet and laser printers are office-grade materials made of paper and cannot be considered a replacement for industrial-grade, synthetic-material labels that the Structural Material Manager software requires.
Sheet-fed media issues aside, the waterproof ink that would be required for inkjet printers is a rare item. Very few original equipment manufacturers (O.E.M.) produce waterproof ink for their printers, and waterproof inks produced by "aftermarket" companies have generally proven to be troublesome at best and damaging to print heads at worst. Even if waterproof ink were able to be successfully used, the inkjet print would likely fade in sunlight.
Laser printers melt very fine toner particles to produce an image. That type of print does not hold up well in the elements; it tends to flake off when exposed to harsh outdoor conditions combining sunlight, moisture and extreme temperatures. Also, the industrial-grade labels for which the Structural Material Manager software is designed have very aggressive type of glue known as “freezer-grade” adhesive that allows them to adhere to cold and/or slightly dirty metal, and the high heat of a laser printer’s fuser section would cause that glue to ooze out from behind the label backings so that the printer’s imaging drum would quickly be ruined.
Section 19-3: Thermal-Transfer Ribbons. The required thermal-transfer ribbons are known as Coated Side Out or Ink Side Out ribbons. They have a 1" core diameter. The ribbons are sold in various lengths, but you should choose the longer lengths such as 984' or 1,476' since they represent a better value than shorter lengths such as 233'.
At least (3) types of thermal-transfer ribbon formulations exist:
1. The lowest-cost thermal-transfer ribbons are strictly wax-based. They produce the least-durable print and are intended for paper labels rather those made from synthetic materials. Such wax ribbons definitely should never be used for printing Structural Material Manager’s labels.
2. Ribbons that use resin-enhanced wax cost a bit more than wax-based ones but provide a more durable printed image. They are compatible with not only paper labels but also synthetic label materials such as polyproplene. Whether you should choose resin-enhanced wax ribbons as a middle-ground solution in terms of cost depends on just how long you need the label’s print to last in the elements and how abrasion-resistant that print must remain.
3. For the ultimate scratch-, scuff- and chemical-resistance, a true resin-based ribbon is required. They work with all common label materials: paper, polypropolene and polyester. The ribbon cost is a bit higher, but such true resin-based ribbons are needed when the printed label must remain readable for extended periods of perhaps a year or more. Our suggestion is to locate true resin-based ribbons at a low enough per-ribbon price (even if you have to buy in full-case quantities to do so) such that you can use them at all times.
Many suppliers of true resin-based, thermal-transfer ribbons can be found online. E.J.E. Industries provides the following recommendations as worth your consideration:
4x6labels.com
Phone: 904-501-7929
Website: www.4x6labels.com
Uline
Phone: 1-800-295-5510
Website: www.uline.com
E.J.E. Industries is not affiliated with the above companies and does not profit in any way from the sale of their ribbons to our Structural Material Manager software customers.
Section 19-4: Label Materials. Adhesive item labels must, of course, be properly constructed in order to withstand the elements and to properly adhere to steel. While E.J.E. Industries does not sell the labels, we are glad to make some general recommendations regarding the materials you should purchase.
The label’s face material must be synthetic. Paper is not suitable because it will deteriorate in the elements, but a synthetic will withstand temperature extremes, moisture and sunlight. Polypropolene and polyester are two synthetic materials that yield an industrial-grade, weather-resistant label face.
The labels must employ an adhesive that is formulated to allow them to stick well to steel. “Freezer-grade” adhesive must be used in order to ensure proper adhesion to steel over a wide range of temperatures; do not substitute less-expensive “refrigerator-grade” adhesive unless you are located in a warm climate and thus do not expect to apply labels at temperatures less than 32 degrees Fahrenheit.
Labels must be at least 4" wide by 6" high. It turns out that 4" x 6" label size happens to be one of the most common in the industry. Larger-width labels will not hurt in any way, and will result in larger, more readable print since Structural Material Manager will automatically scale the font size upward to match the larger label area. Warning: pay attention to your printer’s maximum label width before arbitrarily ordering labels over 4" wide, as many thermal-transfer printers can only handle labels up to around 4" in width while the maximum length specification is much more generous.
Suppose you do choose the 4" x 6" label size which is so prevalent in industry. You can then specify landscape printing at the Printer Setup Dialog so that Structural Material Manager will up-scale the font to match the 6" dimension rather than the 4" one.
Labels are expected to be roll-format media with a 3" core and 8" diameter. The labels must be separated by tear-off perforations.
You will find many sources of labels online, but be careful that the labels actually meet the specifications outlined above. Although E.J.E. Industries does not sell the labels, we do suggest a some suppliers:
Pannier Corporation
Phone: 1-877-726-6437
Website: www.pannier.com
CILS International Ltd.
Phone: 1-877-512-8763
Website: www.cils-international.com/us
E.J.E. Industries has no formal business relationship with the above suppliers and makes no money from the sale of their labels to our customers. We encourage you to contact them directly to make sure the labels you order will meet your expectations.
Section 19-5: Colored Labels or Ribbons. The labels most Structural Material Manager software customers use are simply white. However, some label suppliers may be able to provide thermal-transfer labels in a variety of colors: green, yellow, blue, orange, pink, and perhaps others.
By using a different label color for each job, shop personnel can tell at a glance to which job an item belongs.
Structural Material Manager has a sequencing feature that is used whenever a job is broken into multiple zones or phases. Just as different color labels can be used for each job, some users may also choose to use label colors to differentiate items of different sequences within the same job.
If colored labels cannot be located, keep in mind that changing to a colored ribbon which still printing on white labels achieves a similar effect. Rather than changing the label stock for different jobs or different sequences within a job, you’d instead change the black ribbon to perhaps a red, green or blue one.
Section 19-6: Hanging Labels. Of course labels can attached to items via the labels' adhesive backing. What is not so obvious is that certain types of labels can instead be hung from cable ties.
The ability of a label to be hung from a tie is due to the fact that a pre-drilled hole is provided, and the cable tie is simply passed through the hole. If no labels with pre-drilled holes can be located, using a handheld hole punch can serve as a workaround.
Hanging the label is advantageous when no area of the steel item should be covered during application of coatings. When an adhesive label is used, the area behind it is obviously unpainted if the label is applied before painting and/or priming. Hanging the label from a cable tie rather than applying it directly to the item eliminates this issue.
Of course, a label can only be hung if the steel item to which it is to be attached contains at least one hole to which a cable tie can be attached. Assuming that an item does have at least one hole so that the label can be hung, the backing is left over the label's adhesive since no adhesive is needed. However, if the item has no holes, the backing is removed so that the adhesive label can be applied in the usual manner.
Another benefit of hanging labels during the application of coatings is that the disposable label covers as described in the next section are better able to stay in place. Since the disposable covers deliberately employ a relatively mild adhesive to facilitate later removal, spray gun pressures can sometimes lift the edges of the covers if the underlying adhesive label is attached directly to the metal. If the label is hung from a tie, its disposable cover is much less likely to encounter direct spray pressures.
Wire ties are not recommended since the metal will easily cut the label. Plastic cable ties with locking teeth are suggested instead. E.J.E. Industries does not sell these cable ties since they are commonly available in our customers' local areas.
Section 19-7: Label Covers. If a steel item bearing a label is to receive any sort of coating such as paint and/or primer, the label's printed text will obviously be covered. One method of dealing with this problem is to simply print (2) labels for each item, and apply the second one after the first has been rendered useless by the coating(s). Another solution is to simply cover the original label before any coatings are applied; the cover can later be removed to reveal the printed label beneath.
Ask your label supplier whether they carry disposable covers that are manufactured with a special “light-tack” adhesive that allows them to be easily removed after paint/primer is applied. Due to the mild nature of this adhesive, the underlying label is not harmed by removing the cover as long as it is removed no more than 48 hours after being applied to the label.
Disposable label covers should ideally be clear so the label information beneath can be read until the coatings are actually applied.
Covers should be made from a synthetic material (not paper-based) so they will not absorb any of the coating material. This provides the ultimate in protection for the underlying label since none of the paint or primer can soak through the cover and be transferred to the label.
Rather than purchasing disposable label covers, some customers prefer to cut their own reusable covers from magnetic sheet stock. Such stock – typically vinyl - is used in the sign industry for making magnetic signs, and the resulting covers will of course stick to any steel items.